EasyManua.ls Logo

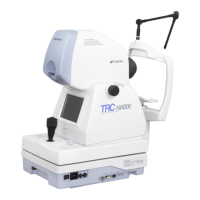
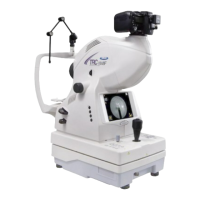
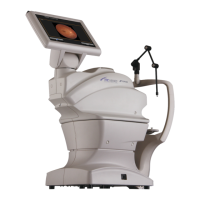
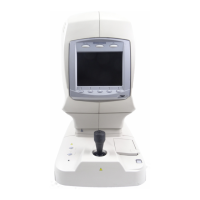
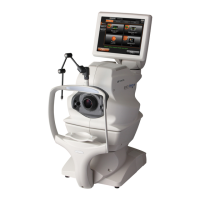
Topcon TRC-NW200 User Manual

Topcon TRC-NW200
103 pages
To Next Page IconTo Next Page
Page #1 background imageLoading...
Page #1 background image
INSTRUCTION MANUAL
NON-MYDRIATIC RETINAL CAMERA
TRC-NW200

Table of Contents

Questions and Answers:

Topcon TRC-NW200 Specifications

General IconGeneral
BrandTopcon
ModelTRC-NW200
CategoryMedical Equipment
LanguageEnglish

Summary

Introduction

Cautions for Use

Basic Caution

General safety note regarding chinrest operation.

Environmental Conditions for Use

Specifies acceptable temperature, humidity, and air pressure for operation.

Storage, Usage Period and Others

Guidelines for storing and handling the instrument safely.

Environmental Conditions for Packaging in Transportation

Defines temperature and humidity limits for transporting the instrument.

Maintenance Checkpoints

Key checks to perform for instrument maintenance and lens care.

Display for Safe Use

Displays

Explanation of warning and caution symbols used in the manual.

Icons

Meaning of graphical symbols indicating prohibitions, actions, or cautions.

Safety Cautions

Warnings

Critical safety instructions to prevent severe injury or death.

Cautions

Important safety instructions to prevent minor injury or damage.

Usage and Maintenance

Usage

Information on the intended use of the retinal camera.

User Maintenance

Tasks that can be performed by the user for instrument upkeep.

Warning Displays and Positions

Components

Component Names

Identifies and labels the various parts of the instrument.

Composition of Parts Which Contact the Human Body

Details the materials used for parts that directly touch the user.

Control Panel Components

Explains the function of each button and switch on the control panel.

Monitor Screen

Monitor Screen Display

Description of the information displayed on the main monitor screen.

Menu Screen Display

Overview of the main menu structure and options.

Standard Accessories

Assembly

Components

List of parts included in the assembly package.

Assembly Procedure

Assembling the Instrument Body

Step-by-step guide for putting together the main instrument unit.

Confirmation After Assembly

Checks to perform after assembly to ensure correct setup.

Preparations

Installing the Instrument

Procedure for safely placing and securing the instrument.

Connecting the Power Cable

Instructions for attaching and plugging in the power supply.

Installation of the CompactFlash Card

Steps for inserting the memory card into the device.

Removal of the CompactFlash Card

Procedure for safely ejecting the memory card.

Connecting the External Device

Guide for connecting computers or other external equipment.

Image Output to External Monitor and Others

How to connect the instrument to external display devices.

Menu Setting

Preparation for Menu Setting

Steps to take before accessing and changing menu settings.

Displaying the Menu Screen

How to navigate to and view the main menu options.

Returning to the Monitor Screen

Procedure for exiting menus and returning to the main display.

Setting the Internal Fixation Target

Switching Internal Fixation Target On/Flicker

How to enable or set the fixation target to flicker.

Switching Internal/External Fixation Target

Procedure to switch between internal and optional external fixation targets.

Internal Fixation Target Pattern

Options for customizing the fixation target display pattern.

Setting the Flash Level

Flash Level Adjustment

Adjusting the standard or zero value of the flash level.

Setting the Built-in CCD Camera

File Compression Ratio

Setting the level of image data compression for storage.

Record Pixels Setting

Configuring the resolution (pixel count) for recorded images.

Gain Adjustment

Adjusting the image luminance (gain) for better visibility.

White Balance Setting

Adjusting color balance for accurate image representation.

Image Emphasis Setting

Modifying image characteristics like sharpness and detail.

Contrast Adjustment

Adjusting the difference between the darkest and lightest areas of the image.

Color Setting

Configuring the color depth and tone of the captured images.

CF Format

Process for formatting the CompactFlash memory card.

PC Mode Operation

Setting the instrument to communicate with a PC.

Image Name Setting

Defining the naming convention for saved image files.

Date and Time Setting

Setting the current date and time for image records.

Date Format Setting

Choosing the display order for year, month, and day.

File Protect Function

Enabling protection to prevent accidental deletion of image files.

Print Settings

Configuring options for DPOF printing of images.

Backup

Setting up automatic data transfer to a PC via USB.

Setting the ID Number

ID Number Configuration

Setting up patient identification numbers and related counters.

Setting of AE

Reset From Power Save State

Procedure to exit the instrument's power saving mode.

Initial Setting

Preparation for Initial Setting

Steps to take before configuring the instrument's initial settings.

Setting the Internal Fixation Target

Configuring the fixation target display and patterns.

Setting the Screen Display

Customizing various display elements on the monitor screen.

System Setting

Configuring system parameters like recording methods.

Setting the Initial State

Adjusting initial states for flash level, sound, and power saving.

Setting the Built-in CCD Camera

Configuring camera settings like compression, pixels, and white balance.

Basic Operations

Preparation for Photography

Steps to take before capturing images with the instrument.

Changing the Mode

Switching the instrument's operational mode, e.g., to photography.

Setting of the Patient

Positioning and preparing the patient for image capture.

Color Photography (Center)

Setting the Picture Position

Adjusting the alignment for capturing central retinal images.

Setting the Picture Angle

Selecting the magnification or zoom level for the image.

Setting the Illumination Level

Adjusting the brightness of the illumination light.

Setting the Flash Level

Configuring the intensity of the photographic flash.

Changing the Diopter Compensation Lens

Adjusting lens power for patient's vision correction.

Alignment and Photography

Detailed steps for aligning the instrument and capturing the image.

Photography of Ear Side/Nose Side

Setting the Picture Position

Adjusting alignment for capturing images of the ear or nose side.

Other Settings

References for additional configuration options related to photography.

Anterior Segment Photography

Setting the Picture Position

Adjusting alignment for anterior segment imaging.

Setting the Illumination Level

Adjusting illumination for anterior segment photography.

Setting the Flash Level

Configuring flash settings for anterior segment imaging.

Changing the Diopter Compensation Lens

Adjusting lens power for anterior segment viewing.

Alignment and Photography

Steps for aligning and capturing anterior segment images.

Playback and Deletion of Recorded Image

Playback

Accessing and viewing previously captured images.

Playback Zoom

Enlarging specific areas of displayed images.

Playback of Multi-display

Viewing multiple images simultaneously on the screen.

PC Mode

Finishing

Steps for properly shutting down and securing the instrument.

Before Requesting Service

Troubleshooting

Guide to diagnosing and resolving common instrument issues.

Specifications and Performance

Specifications

Technical details and performance characteristics of the instrument.

Electromagnetic Compatibility

Information regarding the instrument's compliance with EMC standards.

Electric Rating

Details on power requirements and consumption.

System Classification

Classification of the instrument based on safety and operational standards.

Dimensions and Weight

Physical size and mass of the instrument.

Purpose of Use

Description of the intended application for the device.

Operation Principle

Explanation of how the instrument functions.

Maintenance

Daily Checkups

Routine checks to ensure the instrument is clean and functional.

Ordering Consumables

Information on how to purchase replacement parts and supplies.

Replacing the Illumination Lamp

Procedure for changing the instrument's illumination bulb.

Replacing the Xenon Lamp

Steps for replacing the xenon flash lamp.

Changing the Fuse

Guide for replacing blown fuses in the instrument.

Cleaning

Cleaning Dust Cover, Control Panel, Monitor Screen

Instructions for cleaning external surfaces of the instrument.

Cleaning Parts Contacting Patient

Procedures for cleaning parts that come into contact with the patient.

Cleaning the Objective Lens

Detailed guide for cleaning the critical objective lens.

Disposing the Product

Guidelines for environmentally responsible disposal of the instrument.

Optional Accessories

Automatic Instrument Table AIT-20

Details on an optional accessory for instrument height adjustment.

External Fixation Target EF-2

Information on an optional accessory for patient fixation.

Other Optional Accessories

Listing of other available accessories for the instrument.

Shape of Plug

Information on power plug types used in different countries.

Symbol

Related product manuals