InstallingtheBlades
1.Installtherstbladesothatitishorizontal,alongwith
allmountinghardwareasshowninFigure44.
Note:Tightentheboltwithyourngers.
Important:Positionthecurvedendsoftheblades
topointtowardthemachinehousing.Besureto
nesttheraisedareasoneachbladedriverwiththe
recessesintheheadofitscorrespondingspindle,
andthepinsontheothersideofeachbladedriver
withtheholesinitscorrespondingblade.
2.Steadyeachbladewithaboardandturnthebladebolt
clockwisewithatorquewrenchasshowninFigure45;
torquethebladeboltto82N-m(60ft-lb).
Important:Abolttorquedto82N-m(60ft-lb)is
verytight.Putyourweightbehindthewrenchand
tightentheboltsecurely.Thisboltisverydifcult
toovertighten.
Figure45
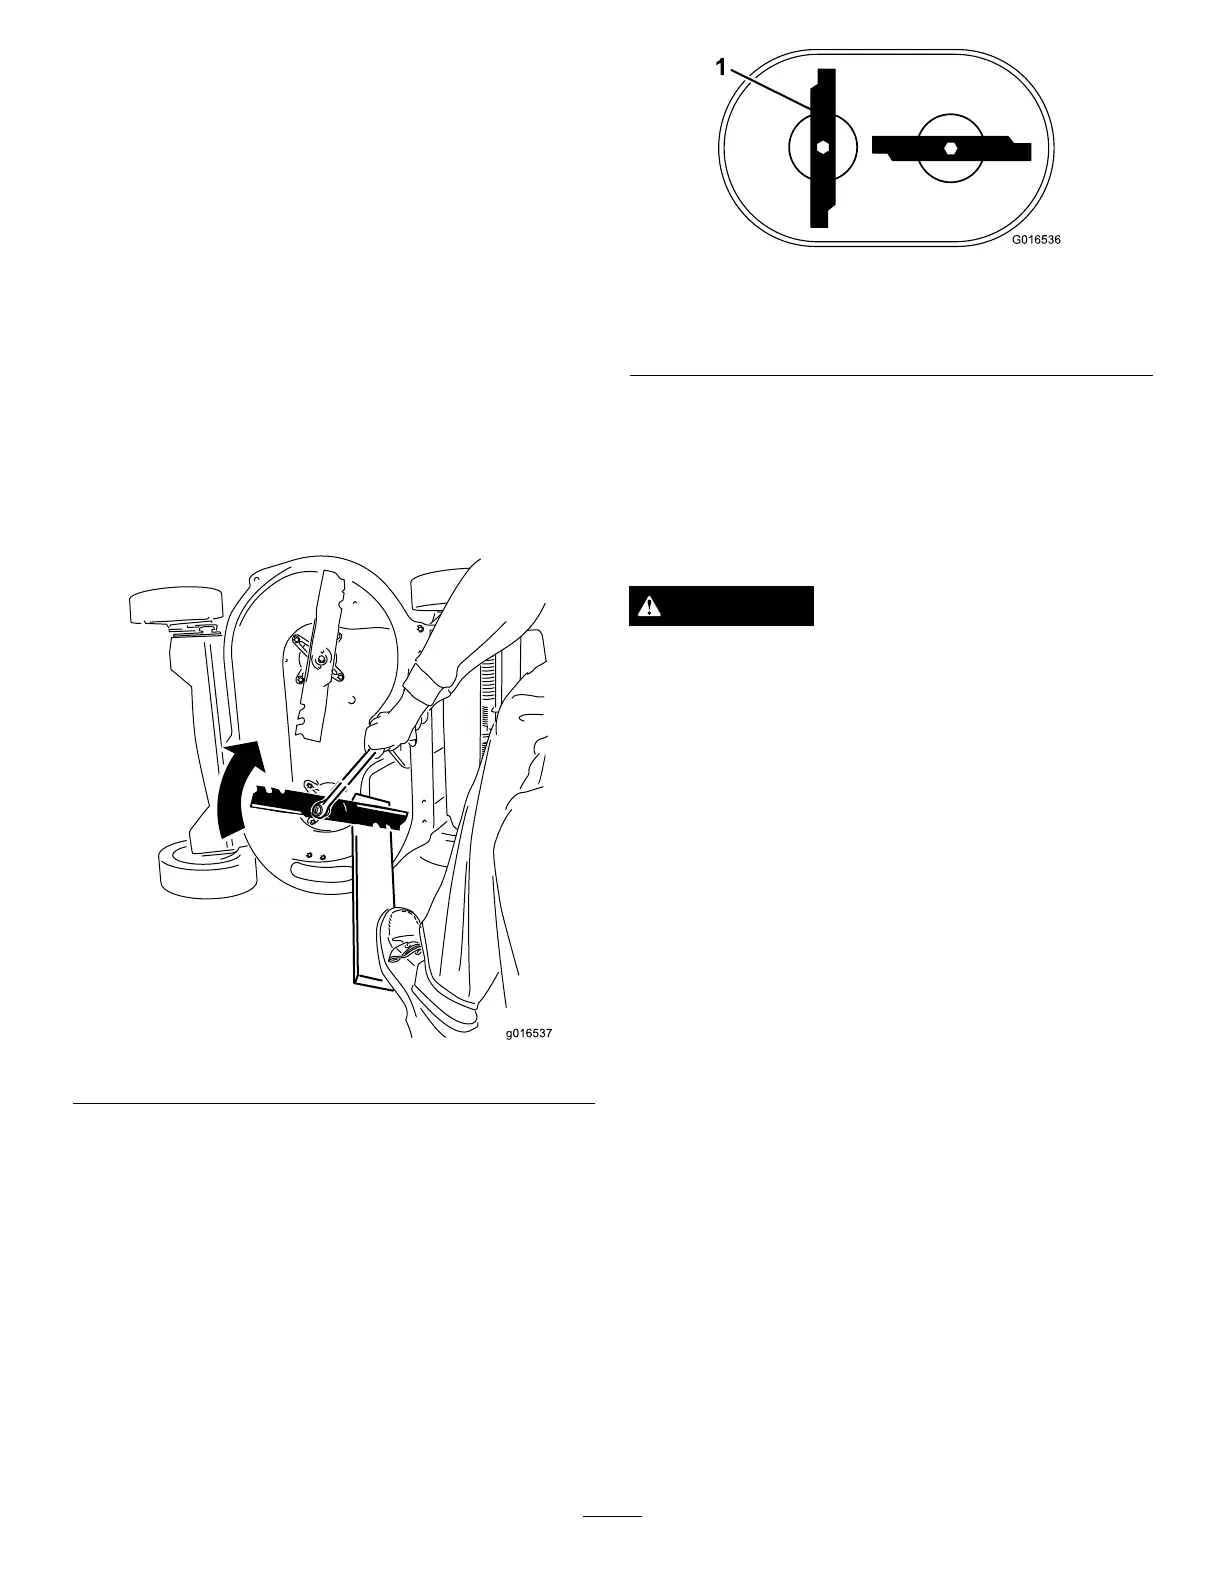
3.Rotatetheinstalledblade1/4turnuntilitisvertical,
andinstalltheotherbladeinthesamemannerasthe
rst(refertostep1).
Note:Thebladesshouldbeperpendicular,forming
aninverted“T”asshowninFigure46.
Figure46
1.Blade(2)
4.Tightenthesecondblade;refertostep2.
5.Rotatethebladesbyhandafull360°turntoensure
thattheydonottouch.
Note:Ifthebladestoucheachother,theyarenot
mountedcorrectly.Repeatsteps1through3,untilthe
bladesnolongertoucheachother.
WARNING
Incorrectlyinstallingthebladescoulddamagethe
machineorcauseaninjurytotheoperatororto
bystanders.
CleaningundertheMachine
Housing
ServiceInterval:Beforeeachuseordaily
1.Movethemachinetoalevelsurface.
2.Stoptheengineandwaitforallmovingpartstostop
beforeleavingtheoperatingposition.
3.Lowerthemachinetoitslowestcuttingheightsetting.
RefertoAdjustingtheCuttingHeight(page9).
4.Attachahosetothewashouttting,andturnthewater
onhigh(Figure47).
Note:Spreadpetroleumjellyonthewashouttting
O-ringtomakethecouplingslideoneasierandprotect
theO-ring.
22