Figure7
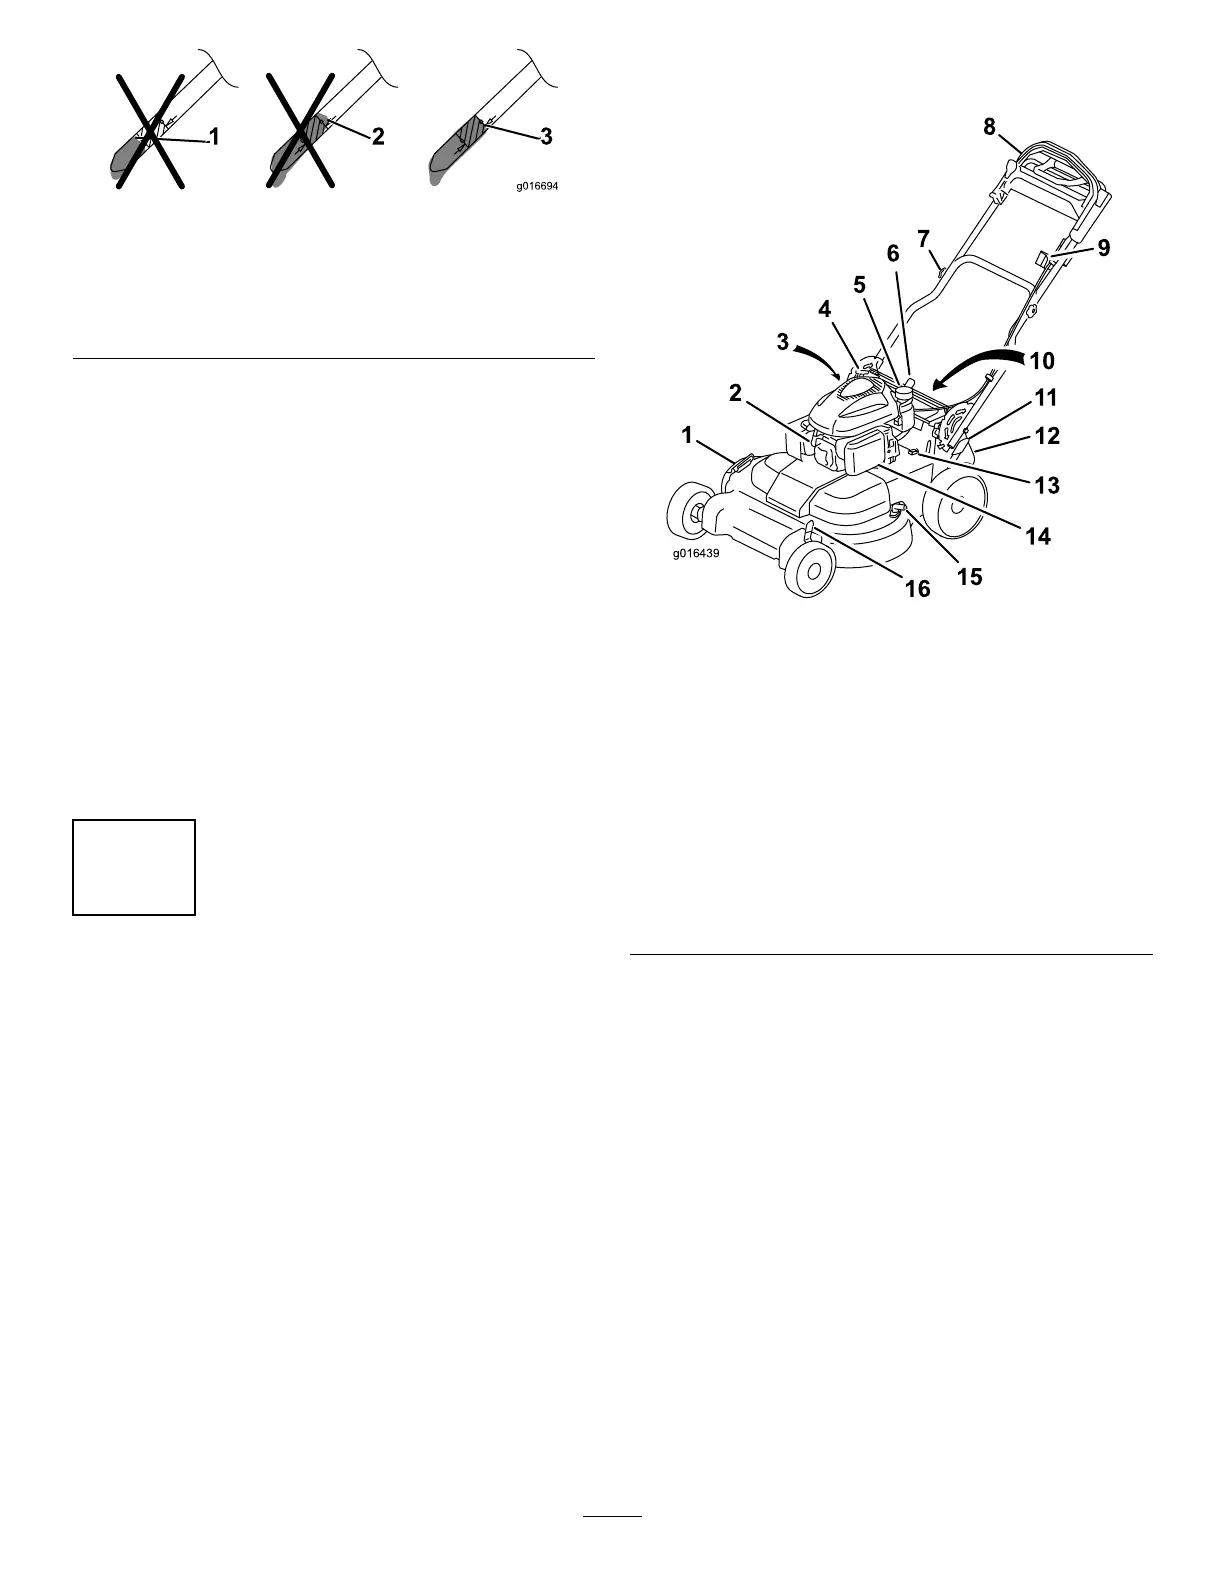
1.Theoillevelistoolow;
addoiltothecrankcase.
3.Theoilleveliscorrect.
2.Theoillevelistoohigh;
removeoilfromthe
crankcase.
•Iftheoillevelistoolow,slowlypourasmall
amountofoilintotheoil-lltube,wait3minutes,
andrepeatsteps3through5untiltheoillevelon
thedipstickiscorrectasshowninFigure7.
•Iftheoillevelistoohigh,draintheexcessoiluntil
youobtainthecorrectoillevelonthedipstick.To
draintheexcessoil,refertoChangingtheEngine
Oil(page16)
.
Important:Iftheoillevelinthecrankcaseistoo
lowortoohighandyouruntheengine,youmay
damagetheengine.
6.Installthedipsticksecurely.
Important:
Change the engine oil after the r st 5
operating hour s
;changeityearlythereafter.Refer
toChangingtheEngineOil(page16).
4
ChargingtheBattery
NoPartsRequired
Procedure
Electric-startmodelonly
RefertoChargingtheBattery(page17).
ProductOverview
2
14
1
13
3
4
5
6
7
8
9
10
11
12
g016439
15
16
Figure8
1.Side-dischargedeector
9.Ignitionswitch
(electric-startmodelonly)
ortoggleswitch(standard
modelonly)
2.Sparkplug10.Battery(electric-start
modelonly;notshown)
3.Oilll/dipstick(notshown)
11.Rearcutting-heightlever
4.Recoil-starthandle
12.Rear-dischargedeector
5.Fuel-tankcap13.Fuse
6.Handle-locklever
14.Airlter
7.Handleknob(2)
15.Washoutport
8.Upperhandle16.Frontcutting-heightlever
7