Important:Ifthe72inchSideDischargeCuttingUnit,
model31336,isbeingmountedtoamodel30307,30308,
30309,30343,30344or30345tractionunitwithaserial
numberpriorto311000301,theCuttingUnitAlignment
Kit,partnumber120–6599mustbeinstalledtothe
cuttingunitpriortobeingmountedtotractionunit.
1
SecuringtheGrassDeector
(Model31336only)
NoPartsRequired
Procedure
WARNING
Anuncovereddischargeopeningcouldallowthe
lawnmowertothrowobjectsintheoperator'sor
bystander'sdirectionandresultinseriousinjury.
Also,contactwiththebladecouldoccur.
•Neveroperatethelawnmowerunlessyouinstall
acoverplate,amulchplate,oragrasschuteand
catcher.
•Makesurethegrassdeectorisinthedown
position.
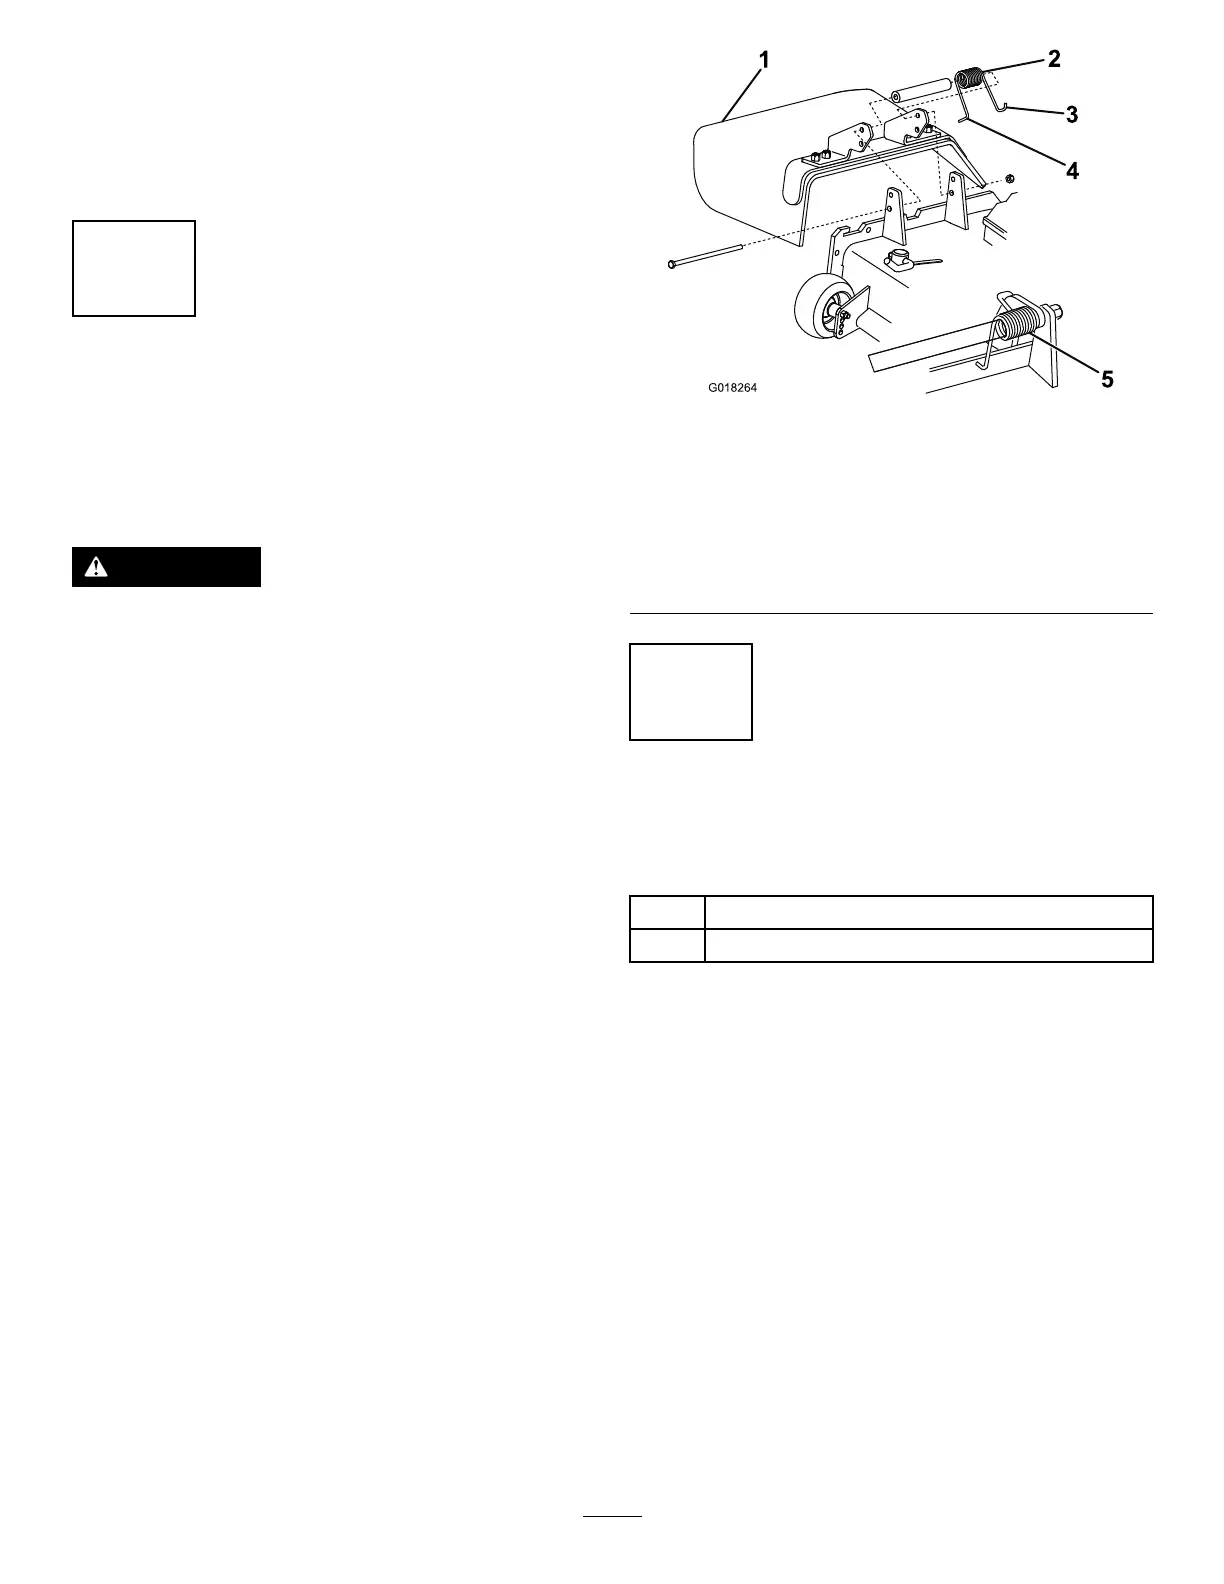
1.Removethecabletiesecuringthegrassdeectortothe
topofthedeckandlowerthedeector.
2.PlacethelefthandJhookendofthespringaround
thedeckedge
3.PlacetherighthandJhookendofthespringaround
thegrassdeector(Figure2).
Important:Thegrassdeectormustbeableto
lowerdownintoposition.Liftthedeectorupto
testthatitlowersintothefulldownposition.
Figure2
1.GrassDeector4.Lefthandhookendof
spring,placebehinddeck
edge
2.Spring5.Springinstalled
3.Righthandhookend
ofspring,placearound
deector
2
InstallingtheLiftArmstothe
TractionUnit
Partsneededforthisprocedure:
1
Liftarm,right
1
Liftarm,left
Procedure
1.Ononesideofthetractionunit,loosen(donot
remove)thewheelnutssecuringthewheelandtire
assemblytothefrontwheelstuds.
2.Jackupthemachineuntilthefrontwheelisoffofthe
oor.Usejackstandsorblockthemachinetoprevent
itfromaccidentallyfalling.
3.Removethewheelnutsandslidethewheelandtire
assemblyoffofthestuds.
4.Removetheliftarmsfromthepallet.
5.Removethepivotpinandcotterpinfromeachliftarm.
6.Mountaliftarmtothepivotbracketwithapivotpin
andacotterpin(Figure3).Mounttheliftarmwiththe
bendpositionedoutward.
7.Hookthebrakereturnspringtothetabonthelift
arm(Figure3).
9