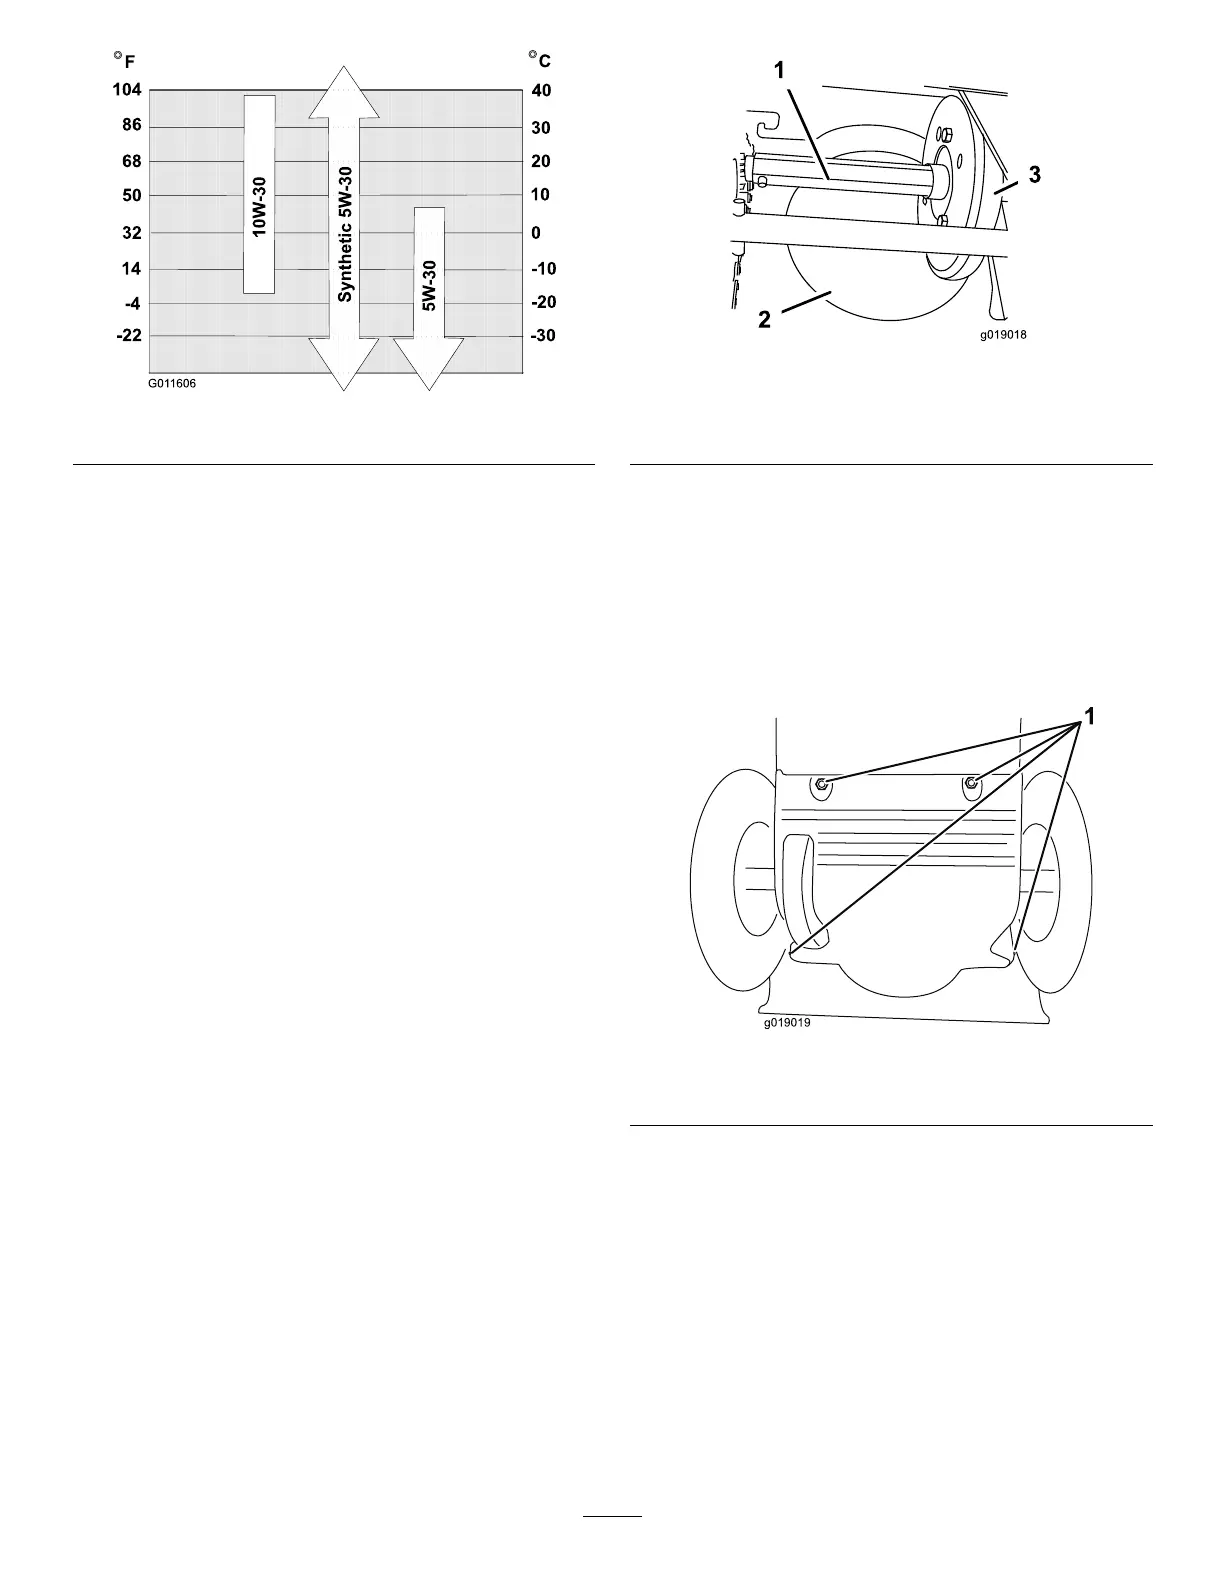
g01 1606
Figure 32
9. W ait 3 minutes for the oil to settle in the engine.
10. Wipe the dipstick clean with a clean cloth.
1 1. Insert the dipstick into the oil-ll tube, but do not
screw it in , then remove the dipstick.
12. Read the oil level on the dipstick.
• If the oil level on the dipstick is too low ,
carefully pour a small amount of oil into
the oil-ll tube, wait 3 minutes, and repeat
steps 10 through 12 until the oil level on the
dipstick is correct.
• If the oil level on the dipstick is too high,
drain the excess oil until the oil level on the
dipstick is correct.
Important: If the oil level in the engine is too
low or too high and you run the engine, you
may damage the engine.
13. Install the dipstick into the oil-ll tube securely .
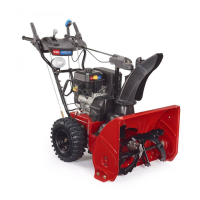
Lubricating the Hex Shaft
Service Interval : Y early —Lubricate the hex shaft.
Lightly lubricate the hex shaft yearly with automotive
engine oil ( Figure 33 ).
g019018
Figure 33
1. Hex shaft
3. Rubber wheel
2. Steel friction pulley
Important: Do not get oil on the rubber wheel or
the steel friction pulley because the traction drive
will slip ( Figure 33 ).
1. Drain the fuel from the fuel tank.
2. T ip the machine forward onto its auger housing
and block it so that it cannot fall.
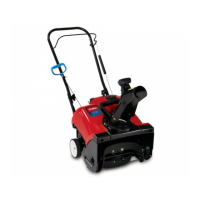
3. Remove the back cover ( Figure 34 ).
g019019
Figure 34
1. Screws
4. Move the speed-selector lever to Position R2.
5. Dip your nger in automotive engine oil and
lightly lubricate the hex shaft.
6. Move the speed-selector lever to Position 6.
7. Lubricate the other end of the hex shaft.
8. Move the speed-selector lever forward and
rearward a few times.
9. Install the back cover and return the machine to
the operating position.
23