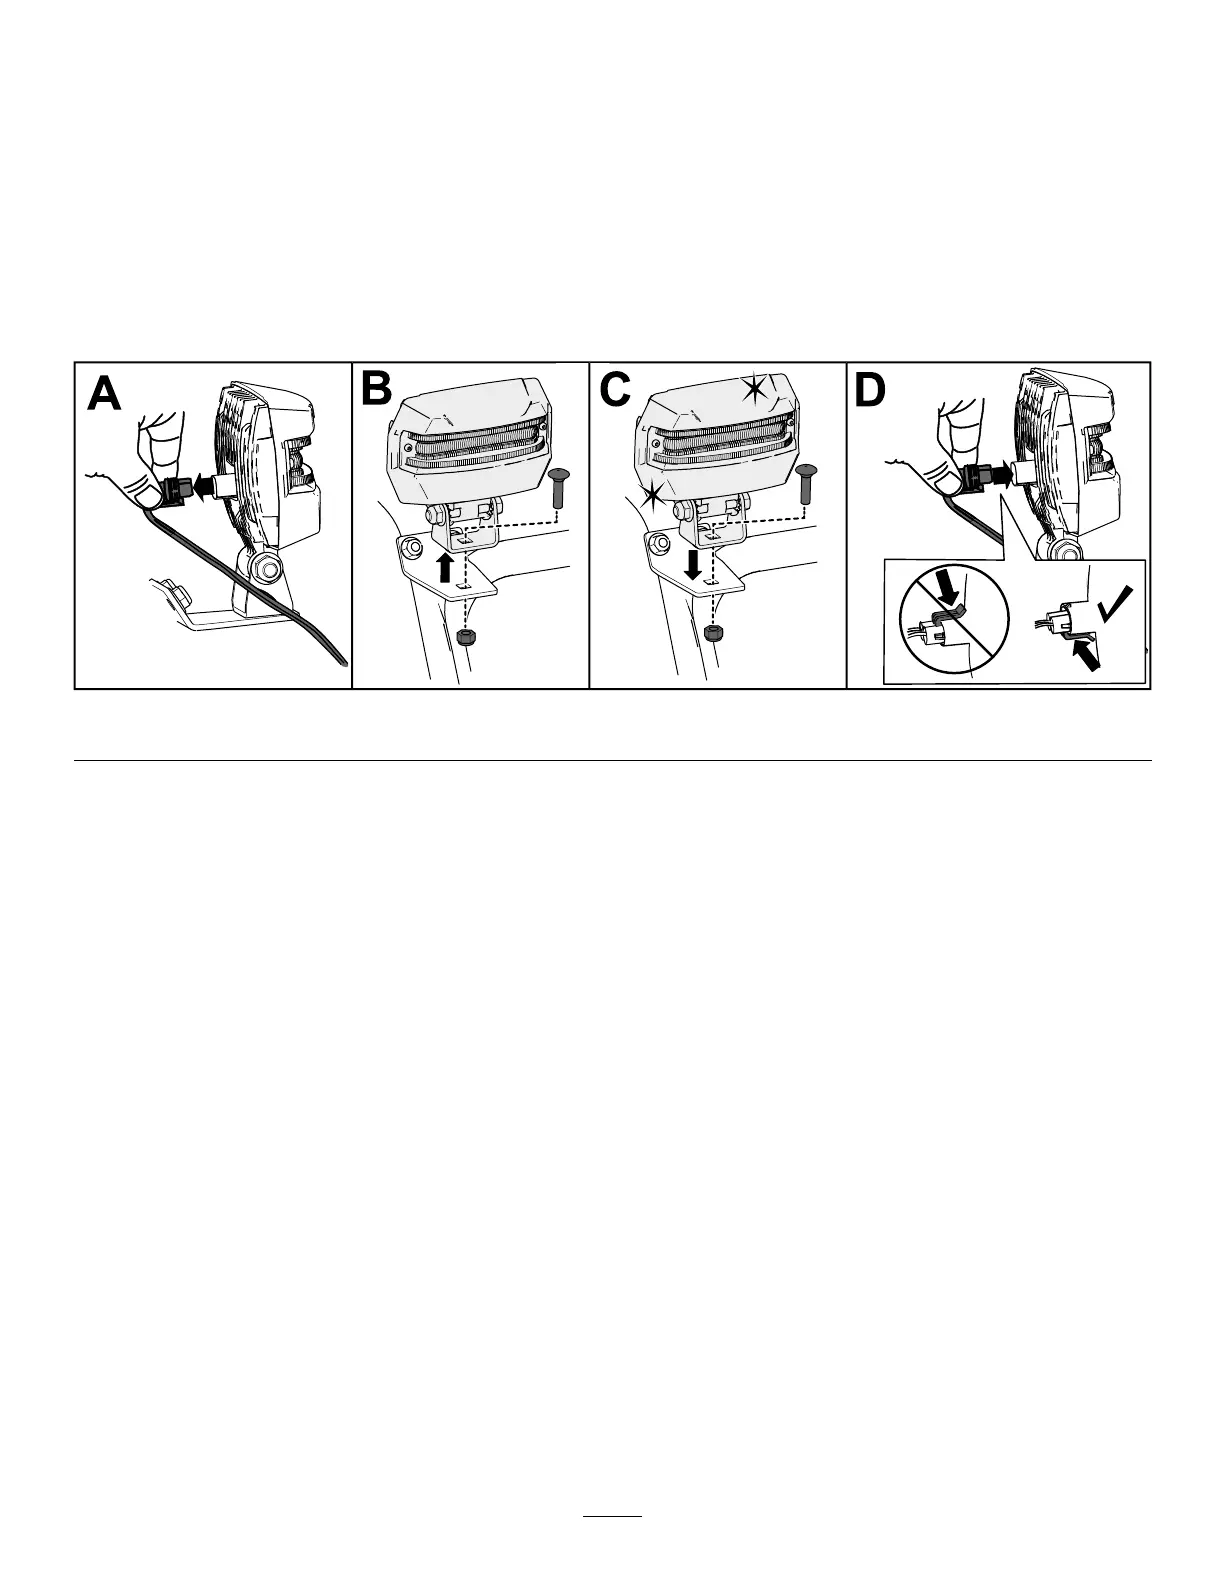
Replacing the Headlight
Model 37799 only
Replace the headlight assembly (T oro part number 138-0670) when needed.
1. Remove the headlight wire from the back of the headlight (A of Figure 38 ).
2. Remove the bolt and nut holding the headlight assembly onto the headlight bracket and then remove the
old headlight assembly (B of Figure 38 ).
3. Secure the new headlight assembly onto the headlight bracket with the previously removed nut and
bolt (C of Figure 38 ).
4. Insert the headlight wire straight into the back of the headlight until it is securely in place (D of Figure 38 ).
g256137
Figure 38
Storage
Storage Safety
• Shut of f the engine, remove the key , and wait
for all movement to stop before you leave the
operator ’ s position. Allow the machine to cool
before adjusting, servicing, cleaning, or storing it.
• Fuel fumes are highly ammable, explosive, and
dangerous if inhaled. If you store the product in an
area with an open ame, the fuel fumes may ignite
and cause an explosion.
• Do not store the machine in a house (living
area), basement, or any other area where ignition
sources may be present, such as hot water and
space heaters, clothes dryers, furnaces, and other
appliances.
• Do not tip the machine either forward or backward
with fuel in the fuel tank; otherwise, fuel may leak
out of the machine.
• Do not store the machine with its handle tipped
down onto the ground; otherwise, oil may leak into
the engine cylinder and onto the ground, and the
engine may not start.
Storing the Machine
1. On the last refueling of the year , add fuel
stabilizer to fresh fuel as directed by the fuel
stabilizer manufacturer .
Important: Do not store fuel longer
than that suggested by the fuel stabilizer
manufacturer .
2. Run the engine for 10 minutes to distribute the
conditioned fuel through the fuel system.
3. Run the machine until the engine runs out of fuel.
4. Prime the engine and start it again.
5. Allow the engine to run until it shuts of f.
When you can no longer start the engine, it is
suf ciently dry .
6. Allow the engine to cool.
7. Remove the key .
8. Clean the machine thoroughly .
9. T ouch up chipped surfaces with paint available
from an Authorized Service Dealer . Sand
af fected areas before painting, and use a rust
preventative to prevent the metal parts from
rusting.
25