RemovingtheBlades
Thebladesmustbereplacedifasolidobjectishit,if
thebladeisoutofbalance,orifthebladeisbent.For
bestperformanceandcontinuedsafetyconformance
ofthemachine,usegenuineT ororeplacementblades.
Replacementbladesmadebyothermanufacturers
mayresultinnon-conformancewithsafetystandards.
1.Holdthebladeendusingaragorthickly-padded
glove.
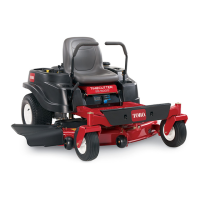
2.Removethebladebolt,curvedwasher,and
bladefromthespindleshaft(Figure56).
g027833
Figure56
1.Sailareaoftheblade3.Curvedwasher
2.Blade4.Bladebolt
SharpeningtheBlades
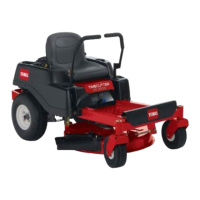
1.Usealetosharpenthecuttingedgeatboth
endsoftheblade(Figure57).
Note:Maintaintheoriginalangle.
Note:Thebladeretainsitsbalanceifthesame
amountofmaterialisremovedfrombothcutting
edges.
g000552
Figure57
1.Sharpenatoriginalangle.
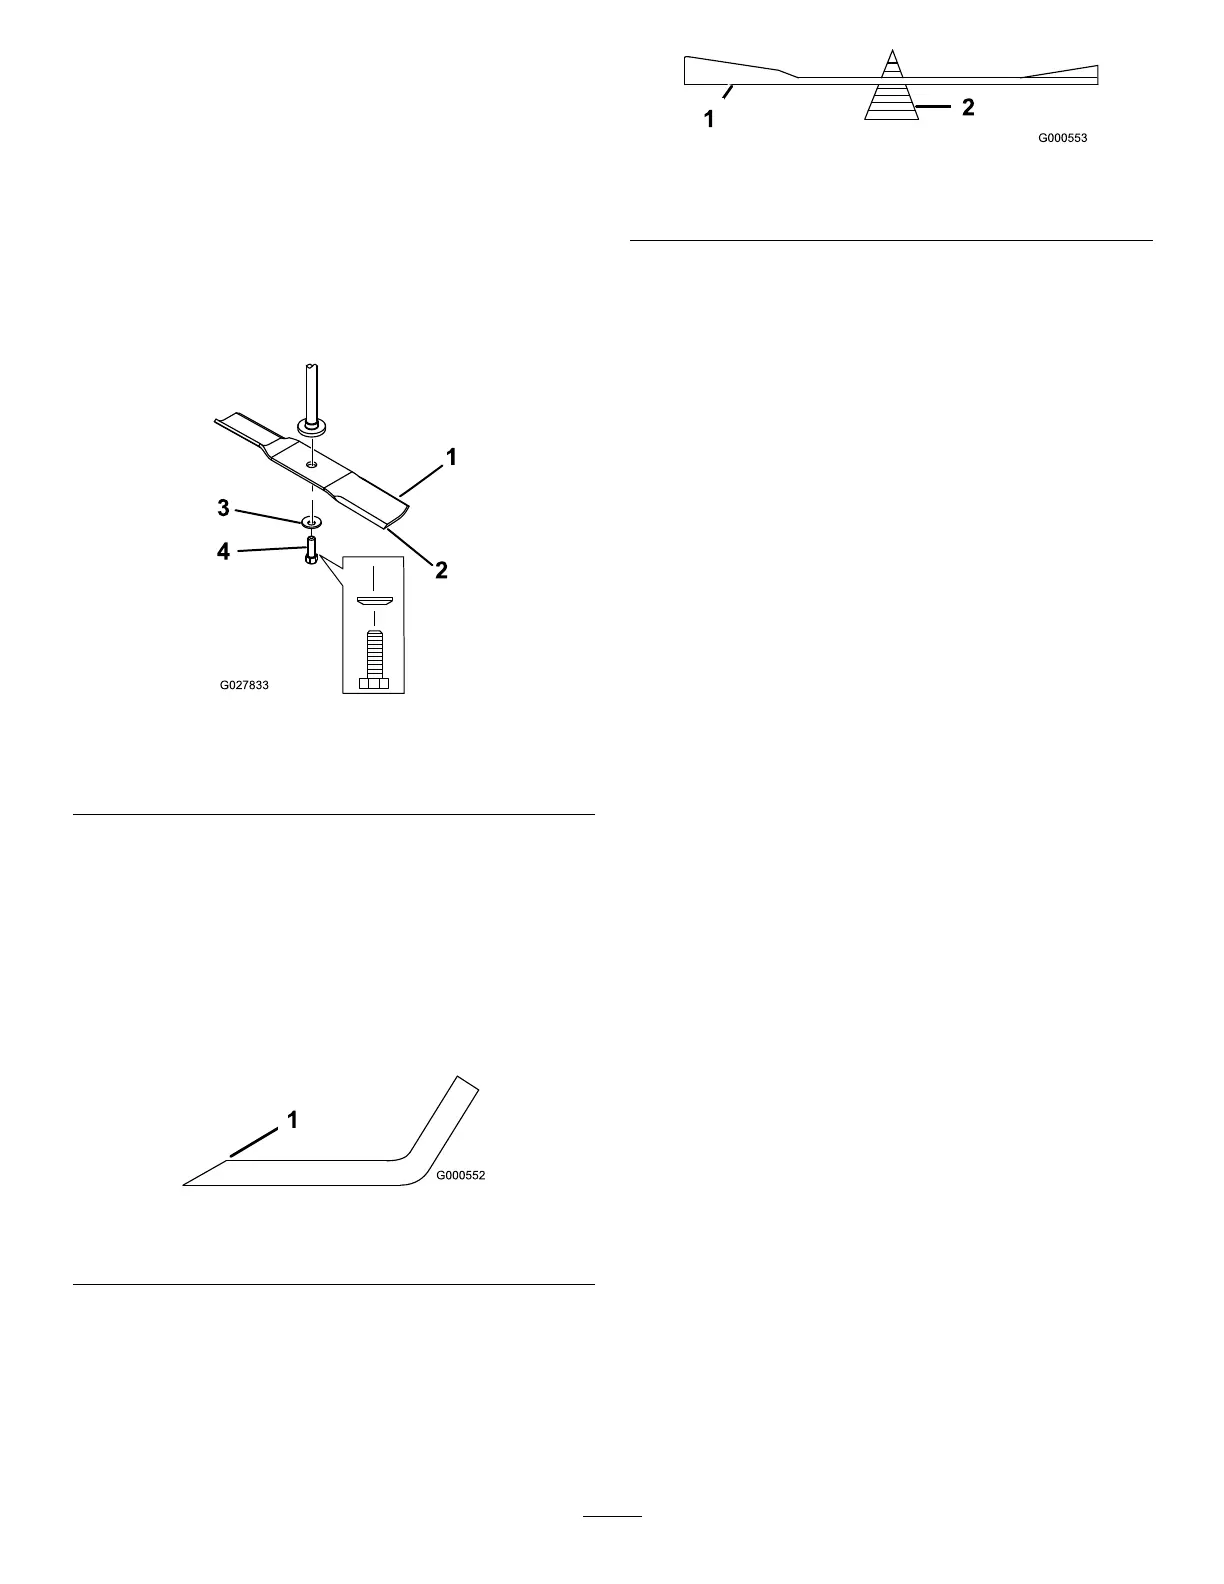
2.Checkthebalanceofthebladebyputtingitona
bladebalancer(Figure58).
Note:Ifthebladestaysinahorizontalposition,
thebladeisbalanced,andcanbeused.
Note:Ifthebladeisnotbalanced,lesome
metalofftheendofthesailareaonly(Figure57).
g000553
Figure58
1.Blade2.Balancer
3.Repeatthisprocedureuntilthebladeis
balanced.
InstallingtheBlades
1.Installthebladeontothespindleshaft(Figure
56).
Important:Thecurvedpartoftheblade
mustbepointingupwardtowardtheinside
ofthemowertoensurepropercutting.
2.Installthecurvedwasher(cuppedsidetoward
theblade)andthebladebolt(Figure56).
3.T orquethebladeboltto47to88N∙m(35to65
ft-lb).
47