Installation
7
Installing
the Mower
1. Park the machine on a level surface, disengage
the power take off (PTO), set the parking brake,
and turn the ignition key to “OFF” to stop the
engine. Remove the key.
2. Turn the front wheels straight ahead and raise
attachment lift lever all the way to the latched
position; refer to tractor Operator’
s Manual.
3. Slide the mower under tractor from right side,
turning front wheels as necessary. Align rear
mounting bushings with ends of lift arms.
4. Turn Dial-a-Height knob counterclockwise, all
the way, and lower attachment lift lever to the
mounting position; refer to Operation page 15.
5. Place rear guide bushings, first left side then
right, onto lift arms then slide deck left into
position (Fig. 8).
6. Secure deck to rear lift arms with 3/4” washers
and large hairpin cotters (Fig. 8).
7. Install front adjustable links to front lift arms
with 1/2” washer and small hairpin cotter
(Fig. 8).
8. Attach rear link to attachment lift with link pin,
1/2” washer and small hairpin cotter (Fig. 8).
1
7
2
3
4
m–2373
5
6
6
5
Figure 8
1. Lift
arm
2. W
asher 3/4”
3.
Hair pin cotter–large
4.
Attachment lift
5. W
asher 1/2”
6.
Hair pin cotter–small
7.
Link pin
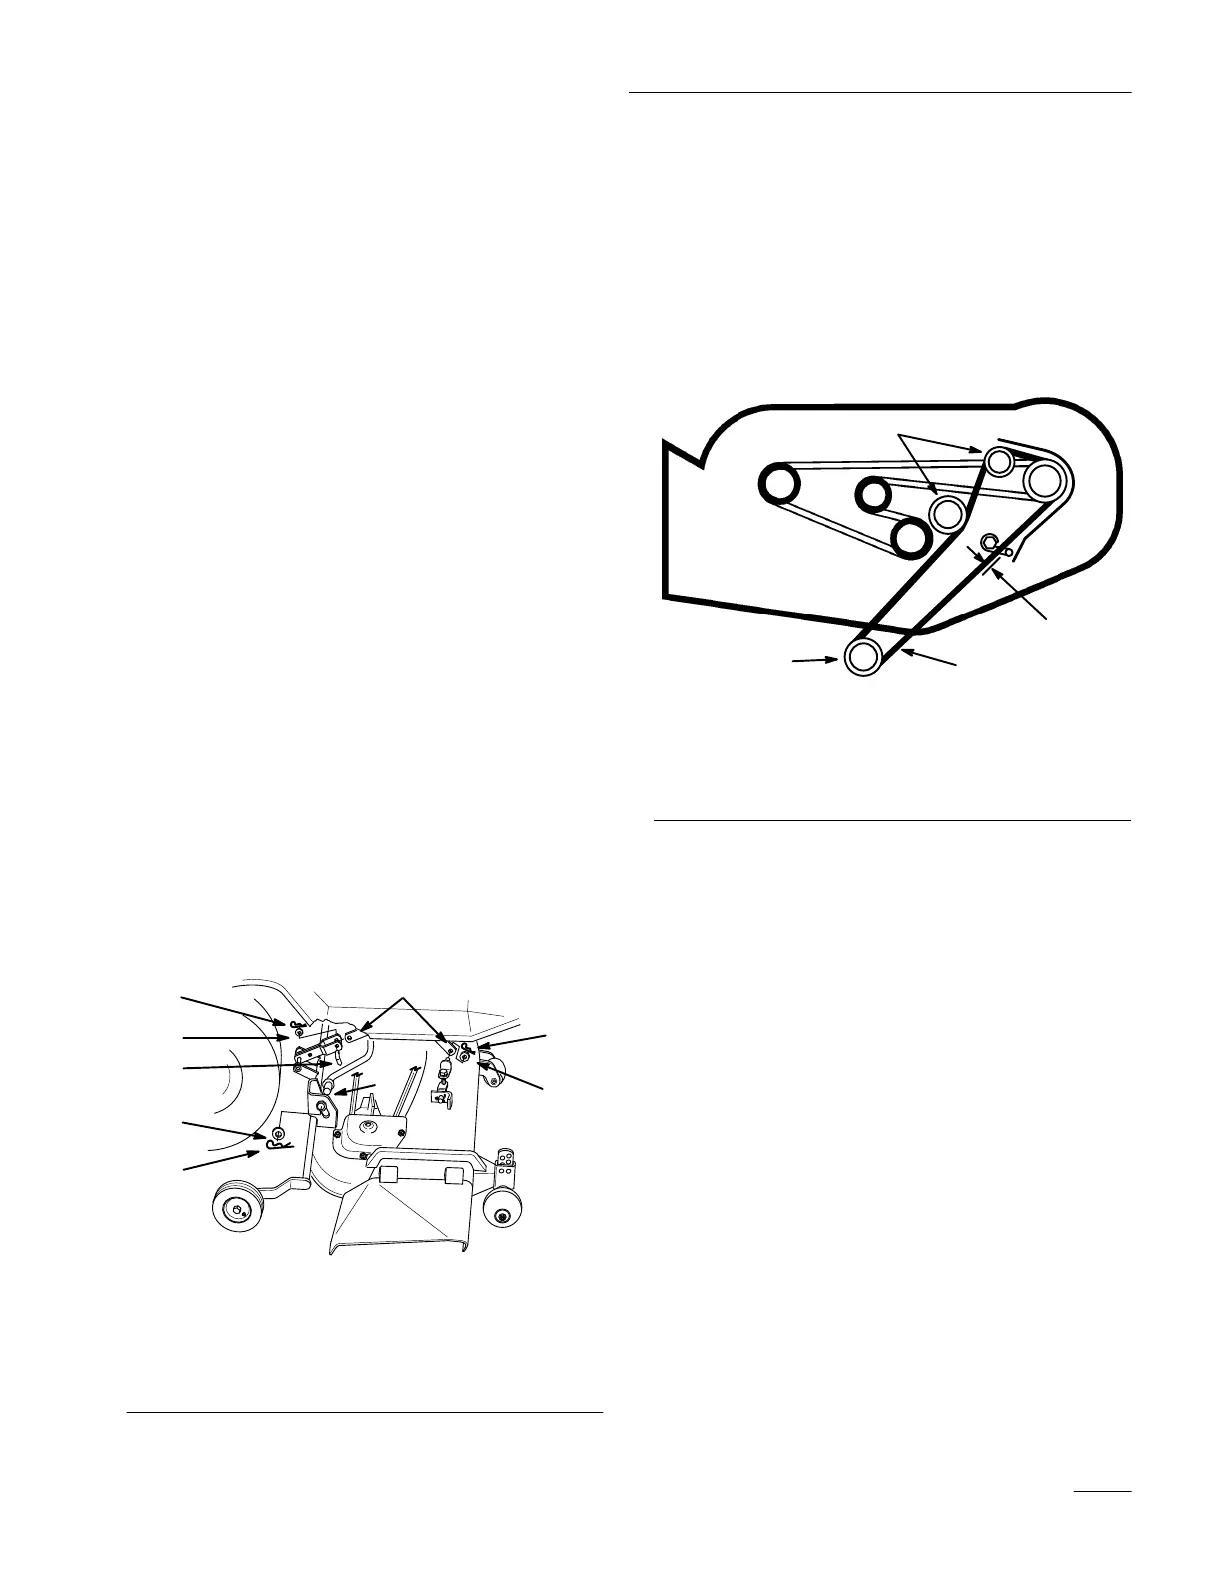
9. Pull on drive belt and rotate onto engine pulley
to install (Fig. 9).
Note: Make sure belt is properly located in
engine and deck pulleys and around
idler pulley.
10. Adjust belt guide so distance between belt and
guide is 1/8” (4 mm) (Fig. 9).
3
2
2418
1
4
Figure 9
T
op V
iew
1. Idler
pulley
2.
Drive belt
3.
Engine pulley
4.
1/8” (4 mm)
11. Check mower level; refer to Side-to-Side Mower
Leveling page 9, and Front-to-Rear Blade
Leveling page 10.
12. Raise attachment lift lever all the way to the
latched position and adjust mower transport
height adjustment; refer to page 8.