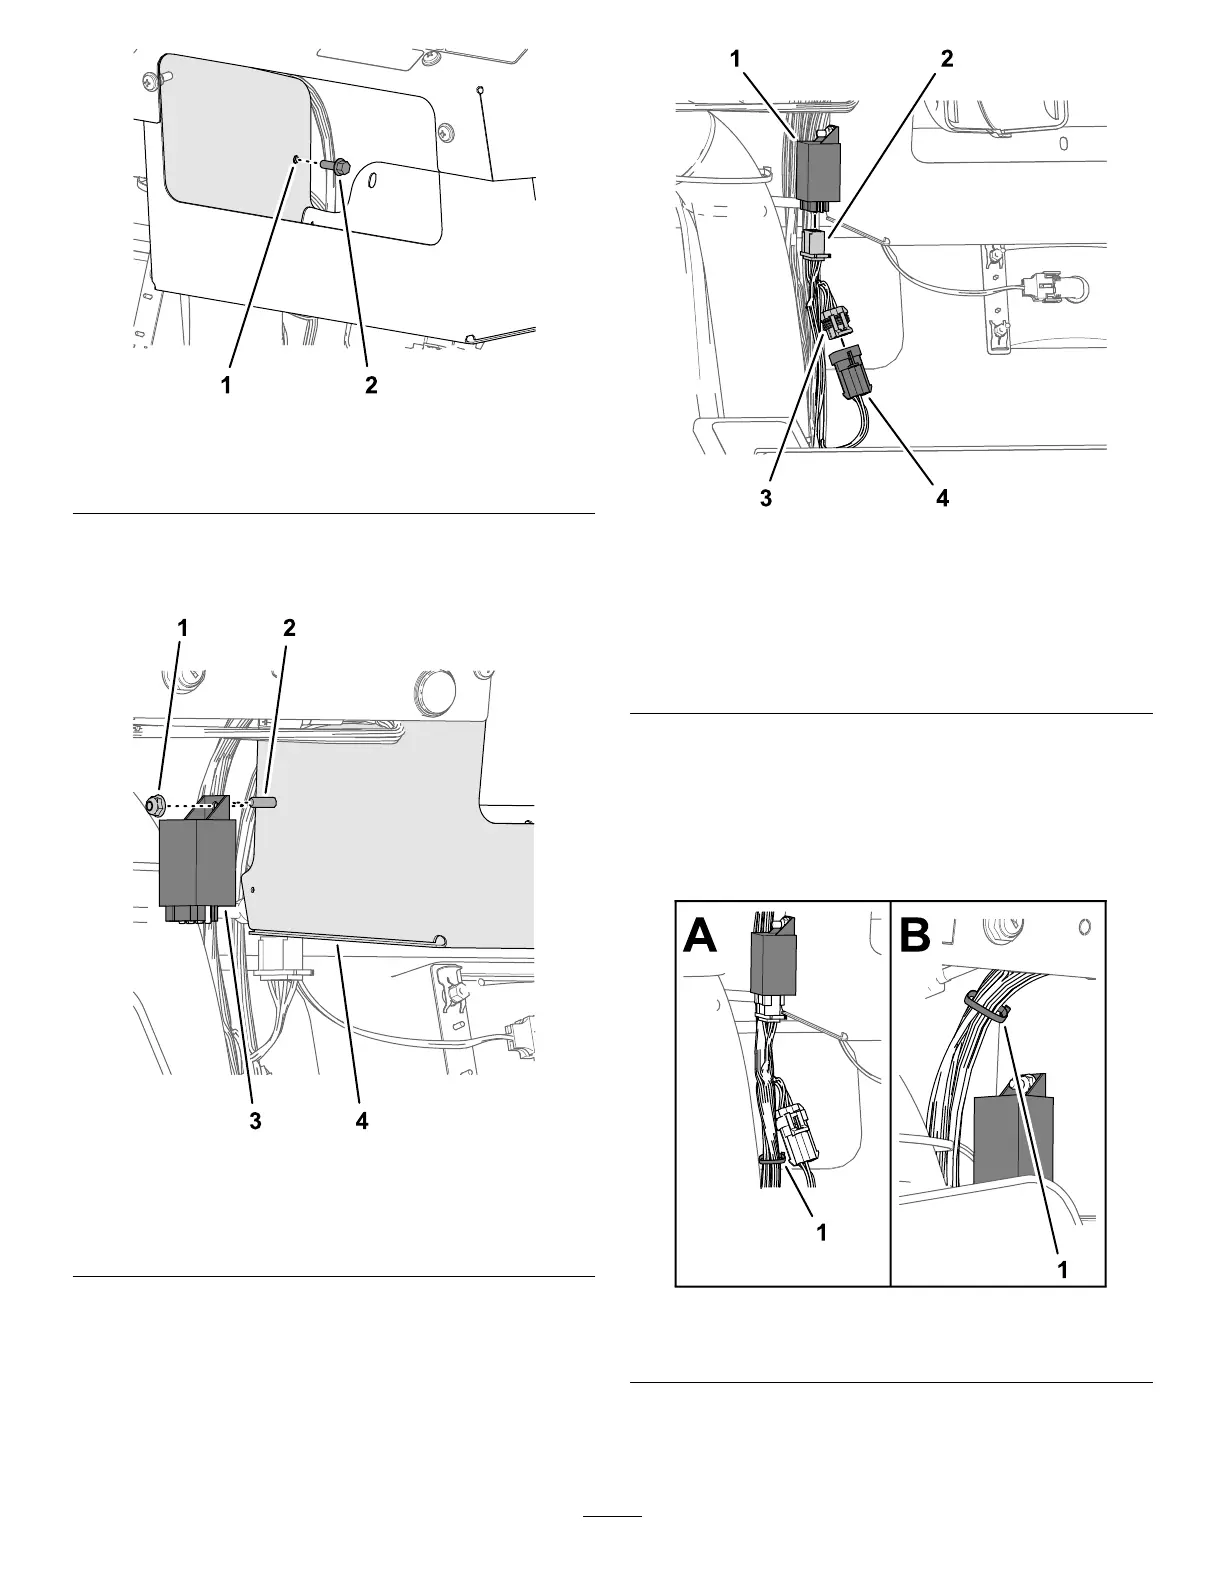
g208200
Figure20
1.Hole—inboardwall
(storagecompartment)
2.Flange-headbolt(1/4x
3/4inch)
4.AssembletheCEashermoduletothe
ange-headboltwithaangelocknut(1/4inch),
andtightenbyhand(Figure21).
g208199
Figure21
1.Flangelocknut(1/4inch)3.Flashermodule(CE)
2.Flange-headbolt(1/4x
3/4inch)
4.Storagecompartment
5.Plugthe6-socketconnectorofthekitwire
harnessintotheCEashermodule(Figure22).
g208201
Figure22
1.Flashermodule(CE)3.6-pinconnector—front
wireharnessofthe
machine(lightkitinterface)
2.6-socketconnector—kit
wireharness(CEasher
module)
4.6-pinconnector—kit
wireharness(TOMAIN
HARNESS)
6.Plugthe6-pinconnectorofthemachinewire
harnessintothe6-pinconnectorofthekitwire
harnesslabeledTOMAINHARNESS(Figure22).
7.Securethe108cm(42-1/2inches)branchofthe
kitwireharnesstothefrontwireharnessofthe
machinewith2cabletiesasshowninFigure23.
g208204
Figure23
1.Cabletie
10

 Loading...