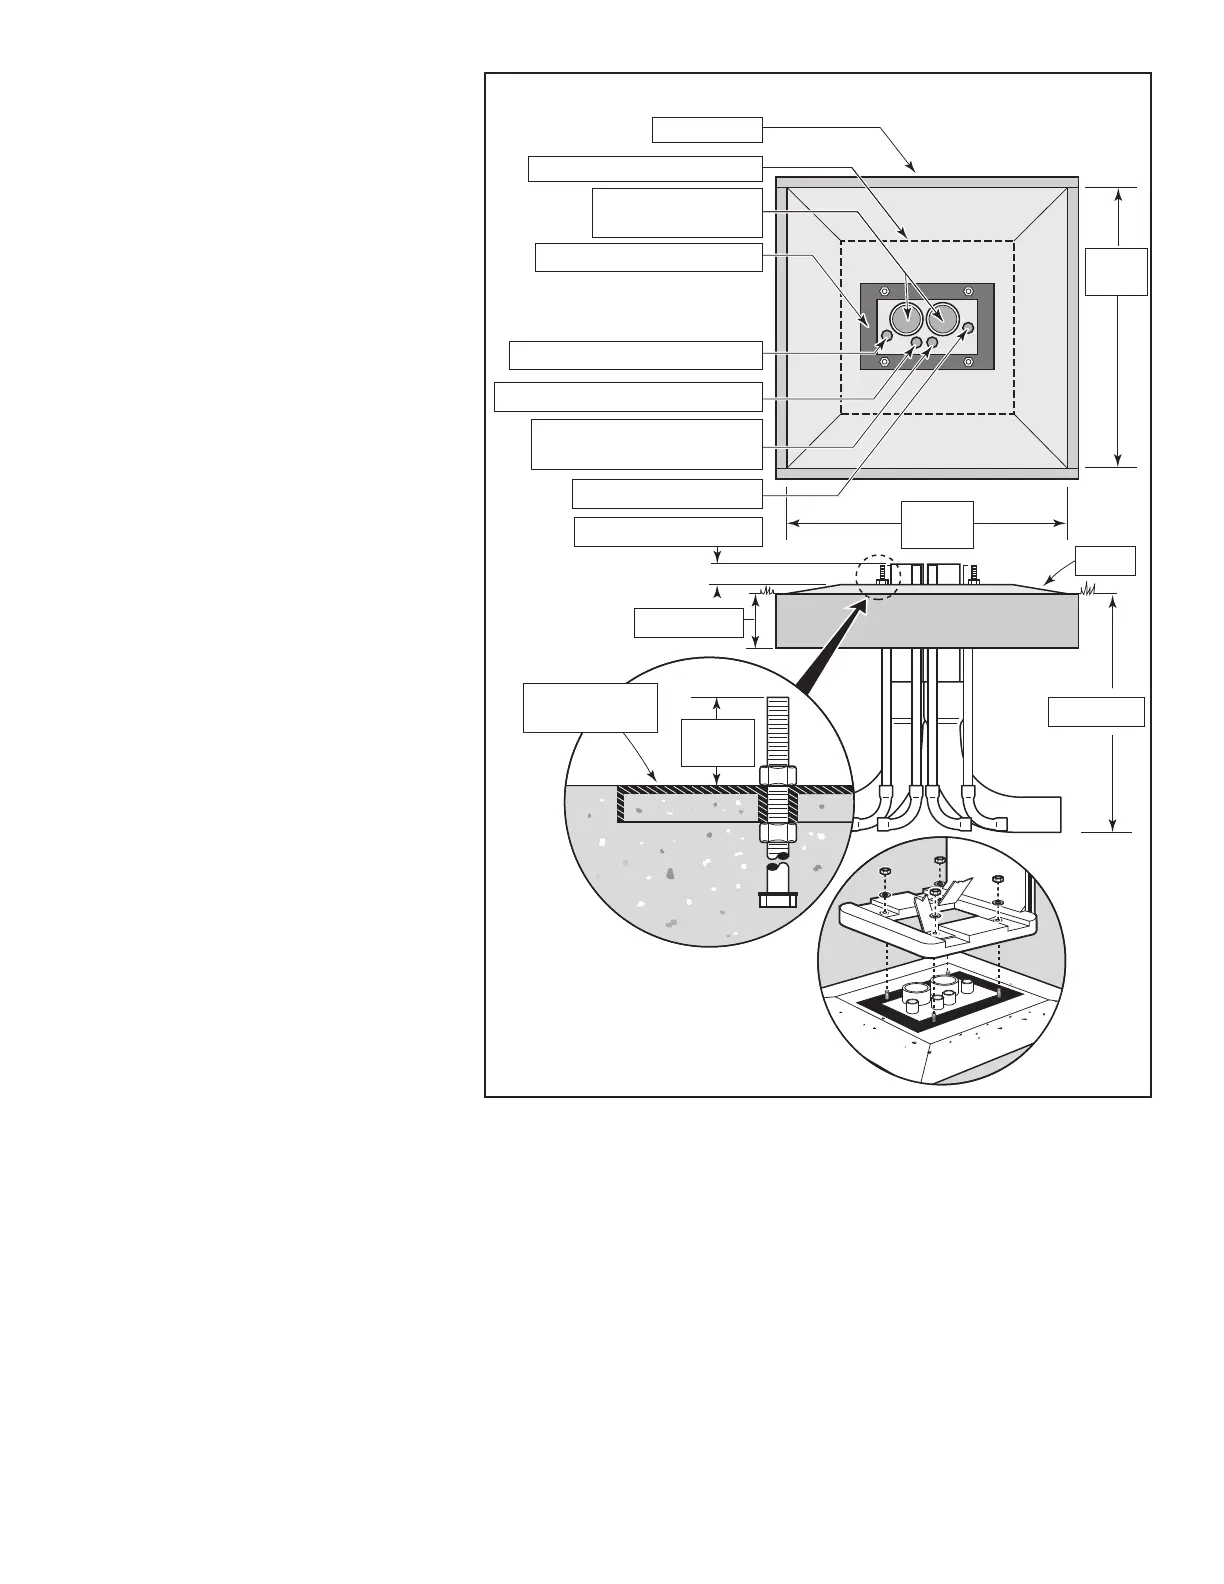
Foundation Construction
1. Prepare a hole for the foundation and wiring
conduit using the minimum recommended
dimensions shown in Figure 3.
*Note: Refer to local electrical codes for
required depth of buried wiring .
2. Trench to the foundation site as required for
each wiring run.
3. Position straight and sweep elbow conduit
sections in foundation hole as shown. Tape
the conduit ends to seal out dirt. Backfill
soil to form a 6” (15.2cm) foundation depth.
Conduit should not extend more than
2” above the finished top surface of the
foundation.
4. Prepare the sides of the foundation hole
with wood forms.
5. Prepare the mounting bolt positioner with
the 5/16 x 4-1/2” bolts and nuts (provided)
as shown in Figure 3. The threads should
extend 2” (51mm) from the top surface of
the bolt positioner.
6. Pour concrete into the formed foundation
hole. Press the mounting bolt positioner into
the concrete until it is flush and level with
the foundation surface and aligned with the
conduit.
7. Finish the concrete with a level flat area for
the pedestal base (13” x 13” [33cm x 33cm]
for the metal cabinet or 16” x 16” [41cm x
41cm] for the plastic cabinet). To prevent
pooling at the base of the pedestal, add
a slight taper away from the cabinet base
contact area. Allow concrete to sufficiently
harden before continuing.
8. Remove the hex nuts from the mounting
studs. Carefully position the controller onto
the studs. Install a flat washer and a hex nut
on each stud and tighten securely.
Wood Form
Figure 3
3” (76mm) – Field
(32 Stations Each)
Mounting Bolt Positioner
3/4” (19mm) – Earth Ground
3/4” (19mm) – Communication
FRONT
(Conduit Recommendations)
30”
(76cm)
Plastic Cabinet Base Area
(Optional) 3/4” (19mm)
Antenna/Telephone Cable
3/4” (19mm) – Power
2” (51mm) Maximum
30”
(76cm)
Taper
See *Note
2”
(51mm)
6” (15.2cm)
Mounting Bolt
Positioner