6.Supporttheweightofmowerdeckbyplacingwood
blocksundertheedgesofthedeck.
Note:Avoidplacingthesupportsunderany
anti-scalprollersifpresentonthedeck.
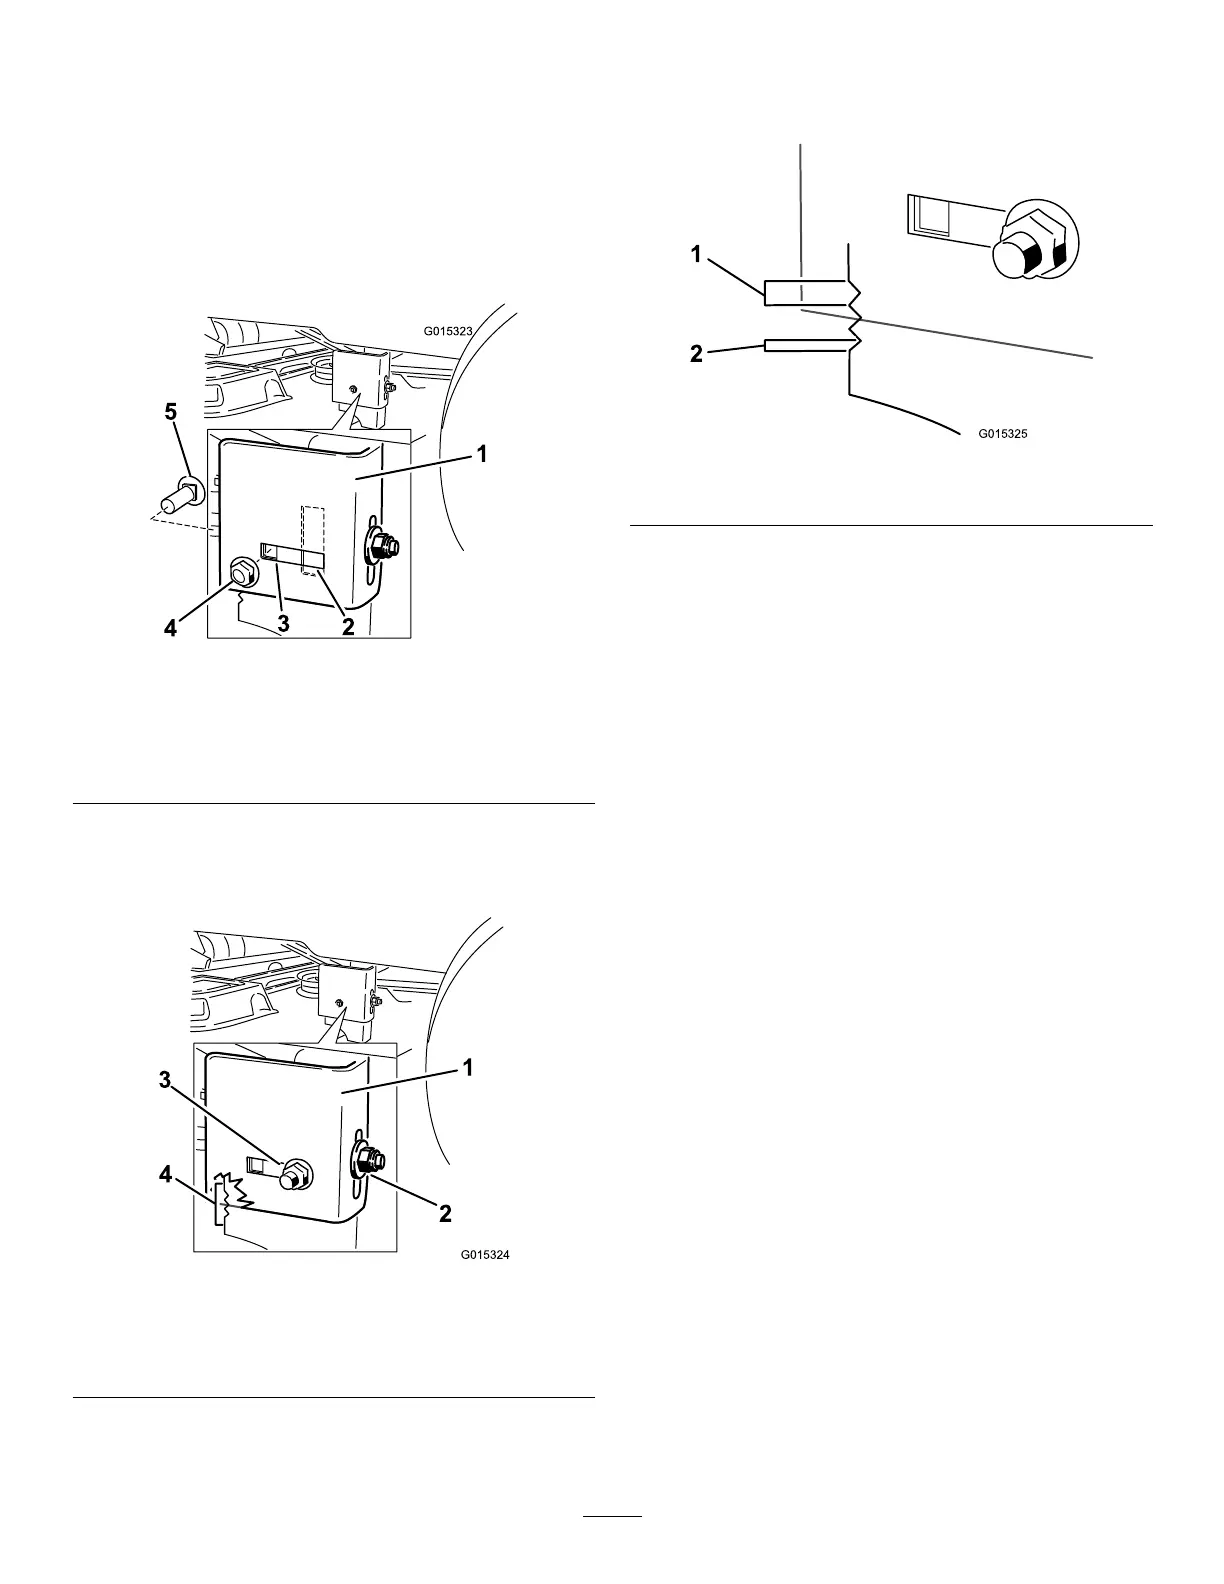
7.Movetotheleftsideofthemachine.Removethe
sidecarriageboltandlockingnutfromthexed
positionandinstallitintotherear,slottedposition
(
Figure49).Leavethelocknutslightlyloose.
Figure49
1.Hangerbracket
4.Sidelockingnut.
2.Slottedadjustment
position
5.Sidecarriagebolt
3.Fixedposition
8.Loosentherearlockingnutonthehangerbracket
justenoughtoallowthehangertobeadjusted
(
Figure49).
Figure50
1.Hangerbracket
3.Sidelockingnut,slotted
position.
2.Rearlockingnut4.Adjustmentnotches
9.Usethenotchesontheweldedbrackettomeasure
theamountofadjustment.Eachnotchsurfaceis
equivalentto0.25inch,whileasinglesideis0.125
inch(
Figure51).Adjusttheheightofthemower
decktothedesiredheight.
Figure51
1.0.25inch2.0.125inch
10.Stopthedeckattheadjustedpositionandtightenthe
rearlockingnutonthehangerbrackettoholdthe
newposition(
Figure50).Tightenthesidelocking
nutonthehangerbracket.
11.Continuelevelingthedeckbycheckingthe
front-to-rearbladeslope;refertoAdjustingthe
Front-to-RearBladeSlope.
AdjustingtheFront-to-RearBlade
Slope
Checkthefront-to-rearbladelevelanytimeyouinstall
themower.Ifthefrontofthemowerismorethan
5/16inch(7.9mm)lowerthantherearofthemower,
adjustthebladelevelusingthefollowinginstructions:
1.Parkthemachineonalevelsurfaceanddisengage
thebladecontrolswitch.
2.Movethemotioncontrolleversoutwardtothe
parkposition,stoptheengine,removethekey,and
waitforallmovingpartstostopbeforeleavingthe
operatingposition.
3.Settheheight-of-cutlevertomiddleposition.
Note:Checkandadjusttheside-to-sideblade
levelifyouhavenotcheckedthesetting;referto
Side-to-SideLeveling.
4.Carefullyrotatethebladessotheyarefacingfront
torear(
Figure52).
36
 Loading...