Toturn,releasepressureonthemotioncontrollever
towardthedirectionyouwanttoturn(Figure13).
Thefartheryoumovethemotioncontrolleversin
eitherdirection,thefasterthemachinewillmovein
thatdirection.
Tostop,pullthemotioncontrolleverstoneutral.
Backward
1.Movetheleverstothecenter,unlockedposition.
2.Togobackward,slowlypullthemotioncontrol
leversrearward(Figure13).
Togostraight,applyequalpressuretobothmotion
controllevers(Figure13).
Toturn,releasethepressureonthemotion
controllevertowardthedirectionyouwanttoturn
(Figure13).
Tostop,pushthemotioncontrolleverstoneutral.
StoppingtheMachine
Tostopthemachine,movethemotioncontrolleversto
neutralandoutwardtotheparkposition,disengagethe
bladecontrolswitch,ensurethethrottleisinthefast
position,andturntheignitionkeytooff.Rememberto
removethekeyfromtheignitionswitch.
Childrenorbystandersmaybeinjuredifthey
moveorattempttooperatethemowerwhileit
isunattended.
Alwaysremovetheignitionkeyandmovethe
motioncontrolleversoutwardtothepark
positionwhenleavingthemachineunattended,
evenifjustforafewminutes.
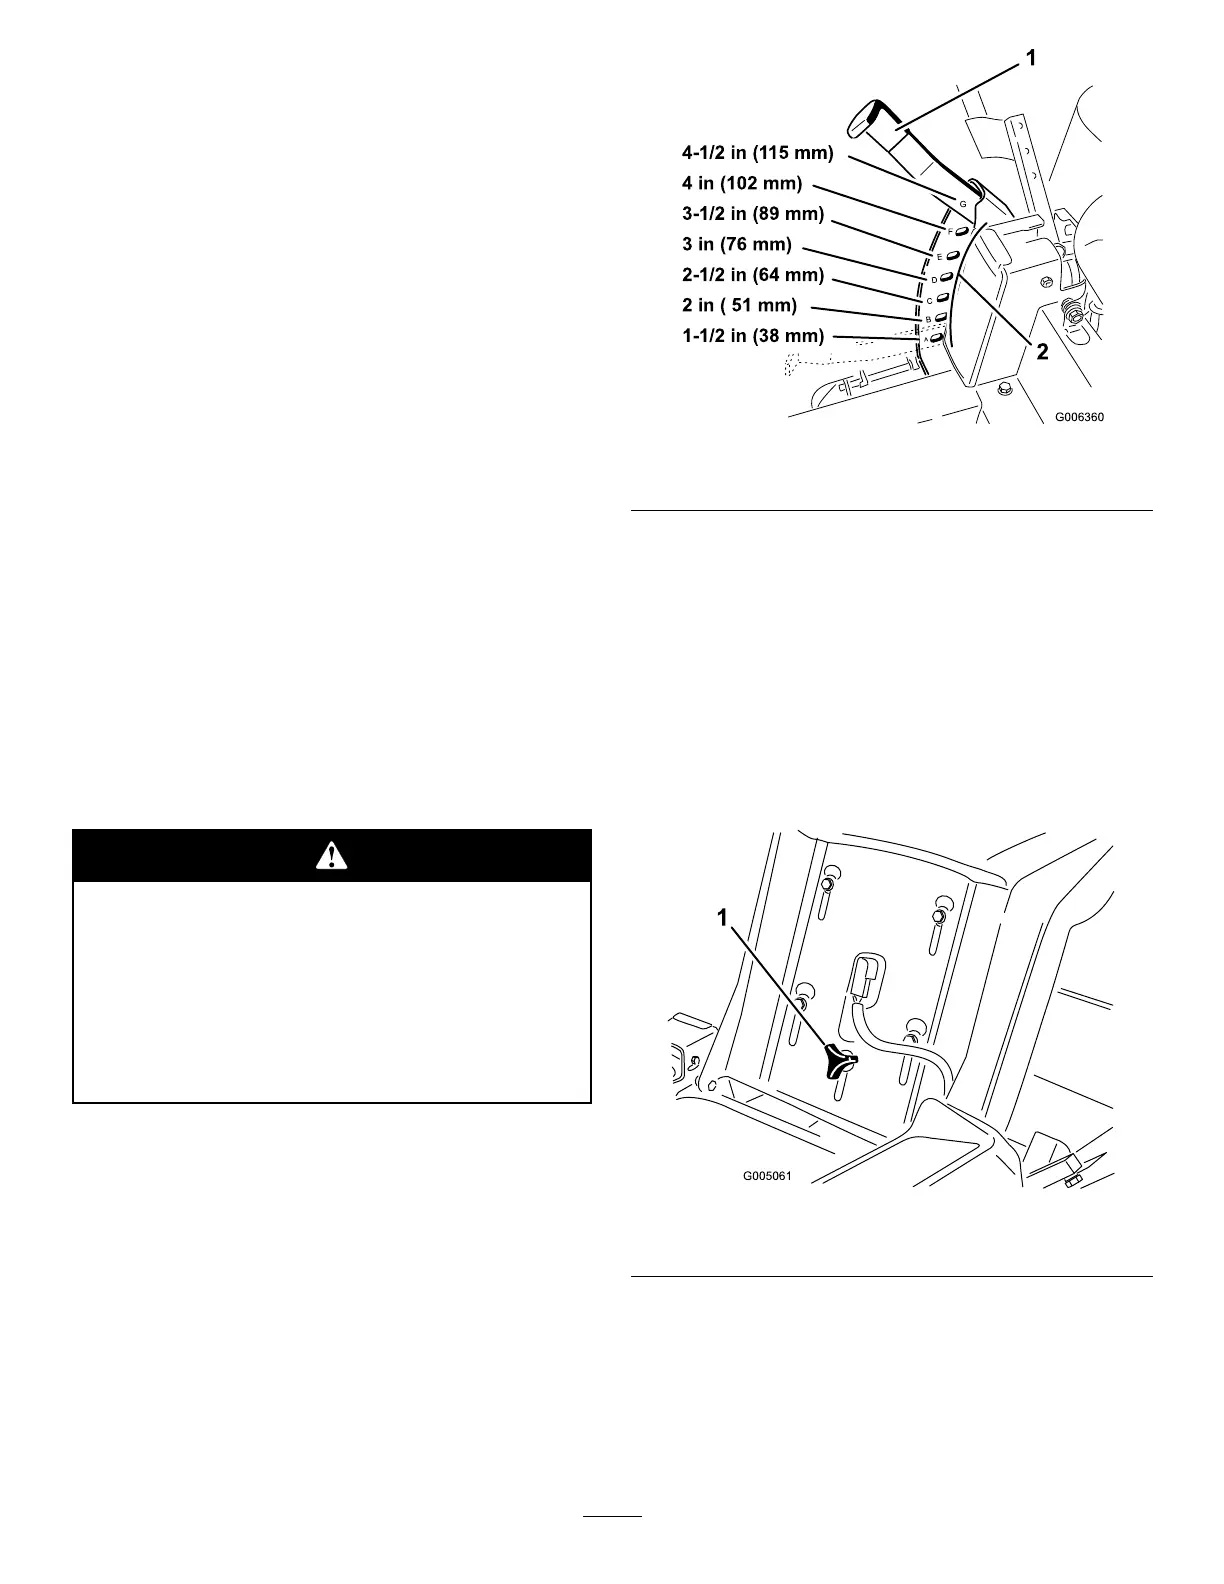
AdjustingtheHeightofCut
1.Raisetheheight-of-cutlevertothetransport
position,cuttingheightpositionG(alsothe
4-1/2inch[115mm])(Figure14).
4-1/2in(1 15mm)
4in.(102mm)
3-1/2in(89mm)
3in(76mm)
2-1/2in(64mm)
2in(51mm)
1-1/2in(38mm)
4-1/2in(1 15mm)
4in(102mm)
3-1/2in(89mm)
3in(76mm)
2-1/2in(64mm)
2in(51mm)
1-1/2in(38mm)
G006360
G
1
2
F
E
D
C
B
A
Figure14
1.Height-of-cutlever2.Height-of-cutpositions
2.Toadjusttheheightofcut,pullinwardandupon
theleverandmoveittothedesiredposition.
PositioningtheSeat
Theseatcanmoveforwardandbackward.Positionthe
seatwhereyouhavethebestcontrolofthemachine
andaremostcomfortable.
1.Raisetheseatandloosentheadjustmentknobjust
enoughthatseatcanmove(Figure15).
Figure15
1.Adjustmentknob
2.Movetheseattothedesiredpositionandtighten
theknob.
17

 Loading...


