Withoutthegrassdeector,dischargecover,
orcompletegrasscatcherassemblymounted
inplace,youandothersareexposedtoblade
contactandthrowndebris.Contactwith
rotatingmowerblade(s)andthrowndebriswill
causeinjuryordeath.
•Neverremovethegrassdeectorfrom
themowerbecausethegrassdeector
routesmaterialdowntowardtheturf.Ifthe
grassdeectoriseverdamaged,replaceit
immediately.
•Neverputyourhandsorfeetunderthe
mower.
•Nevertrytocleardischargeareaormower
bladesunlessyoumovethebladecontrol
switchtoOffandrotatetheignitionkeyto
Off.Alsoremovethekeyandpullthewire
offthesparkplug(s).
RemovingandInstallingthe
DischargeCover
Themowerdeckandmowerbladesshippedwith
thismachineweredesignedforoptimummulching
performance.Sidedischargeperformancecanbe
improvedbyreplacingthemulchingbladeswith
standardcuttingblades,Torokitnumber:79221.
Tomaintainoptimummulchingperformance,install
themulchingbladesthatareshippedwiththisunit
wheneverchangingbacktomulchingoperation.
RemovingtheDischargeCoverfor
SideDischarge
Note:Ifthebaggerattachmentisaddedthemachine,
standardbladesmustbeinstalledforproperbagging
function.Seeabovefortheproperpartnumber.
1.Parkthemachineonalevelsurfaceanddisengage
thebladecontrolswitch.
2.Movethemotioncontrolleversoutwardtopark
position,stoptheengine,removethekey,andwait
forallmovingpartstostopbeforeleavingthe
operatingposition.
3.Removetherightmowerblade.RefertotheMower
Maintenance,page31section.
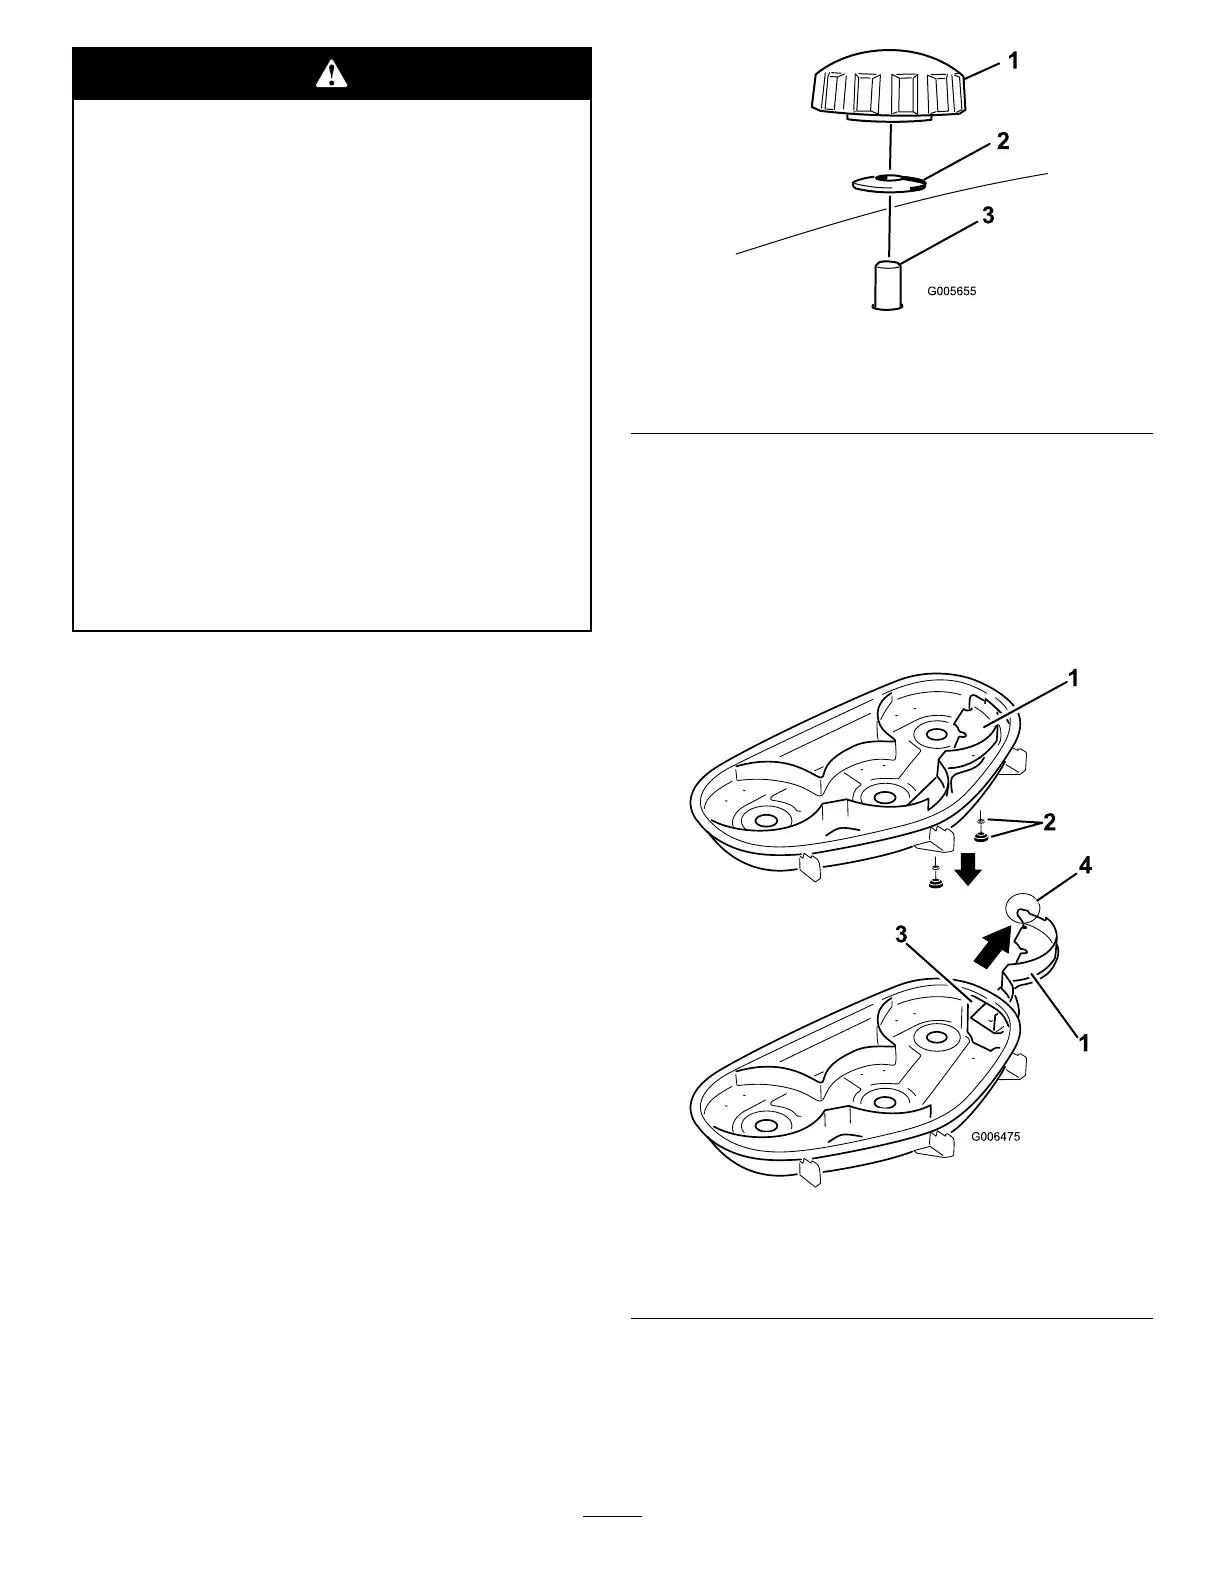
4.Removethe2knobsandcurvedwashersthatsecure
therightbafetothemowerasshowninFigure18.
Figure18
1.Knob
3.Bafestudcomingthrough
themower
2.Curvedwasher
5.Removetherightbafeandlowerthegrass
deectoroverthedischargeopeningasshownin
Figure19andFigure18.
Important:Ensurethemowerhasahinged
grassdeectorthatdispersesclippingstothe
sideanddowntowardtheturf,whileinside
dischargemode.
Figure19
1.Rightbafe
3.Dischargeopening
2.Curvedwasherandknob4.Tab(mustremainoutside
ofthemower)
6.Installthefastenersintotheholesinthetopofthe
mowertopreventyingdebris.
19

 Loading...


