Replacing the Carbon Canister
Note: Replace the carbon canister if it is damaged,
plugged, or if the machine is run without a
carbon-canister lter .
Note: Replace the carbon-canister lter when
replacing the carbon canister .
Disconnecting the Controls at the Seat Base
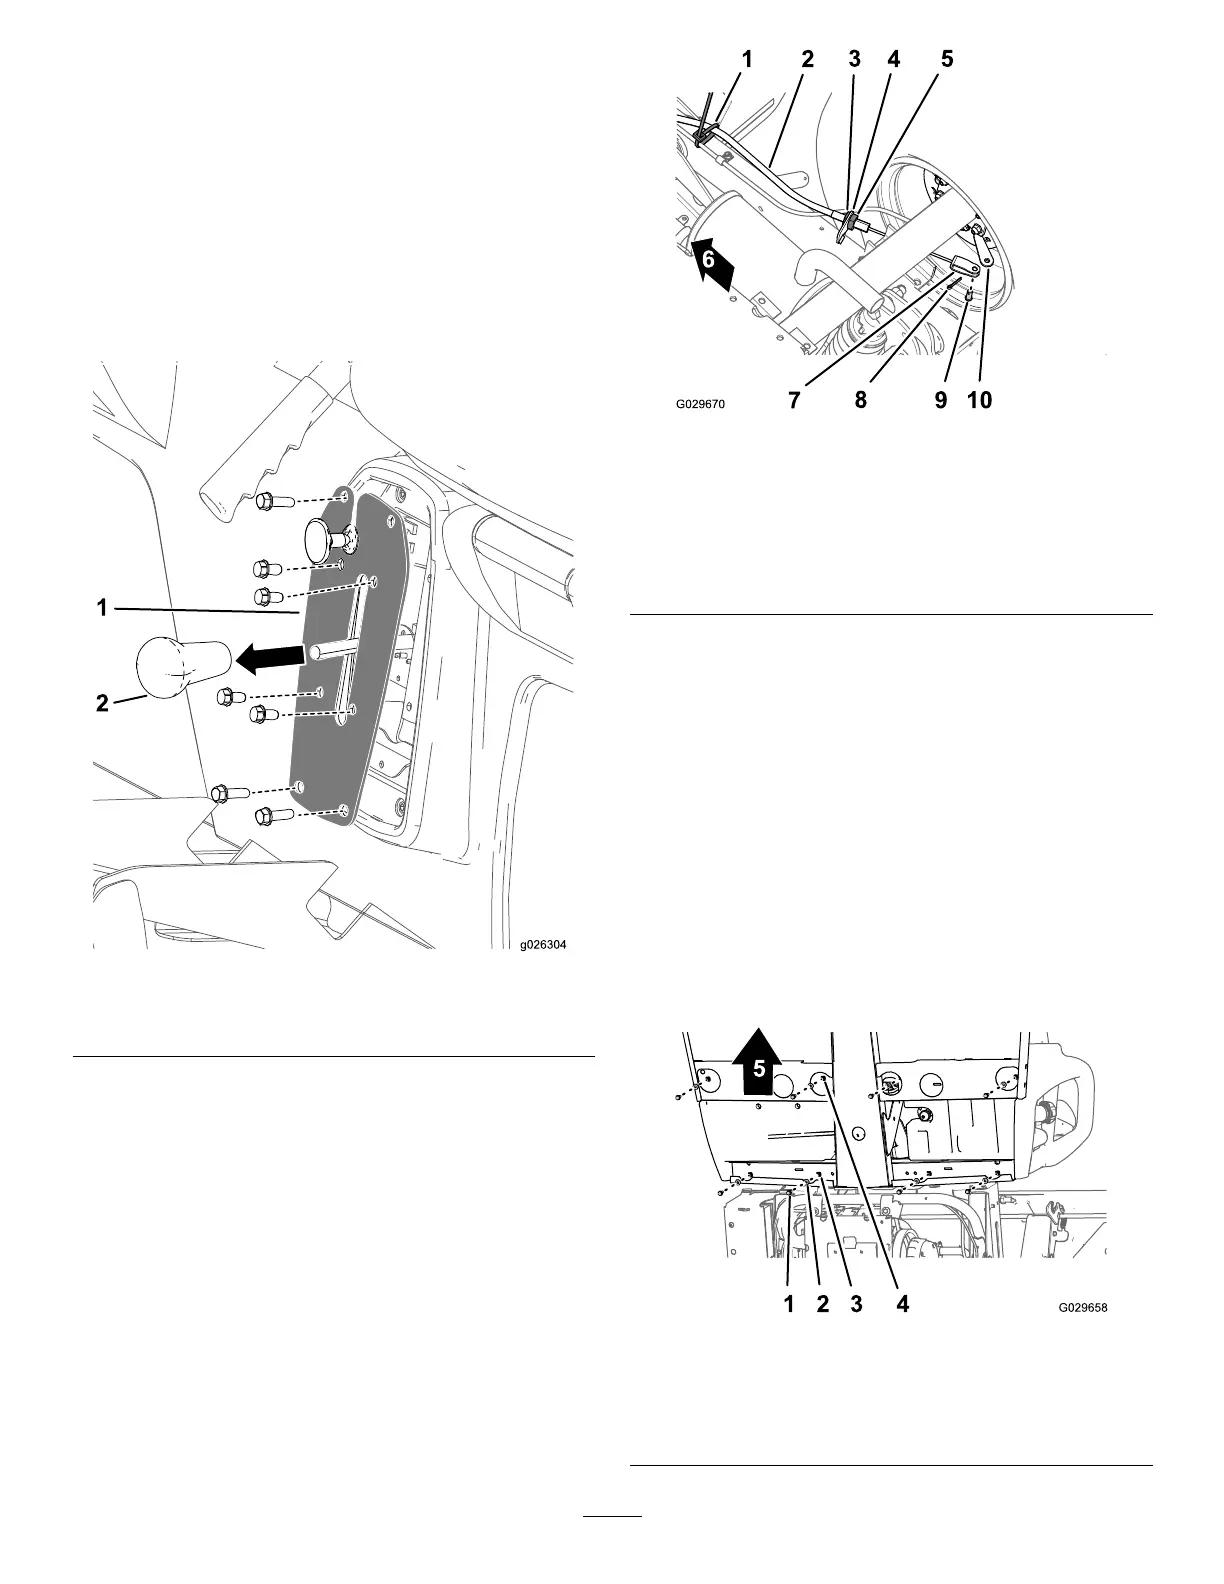
1. Remove the knob from the gear-shift lever
( Figure 39 ).
g026304
Figure 39
1. Shifter plate 2. Gear-shift-lever knob
2. Remove the 4 bolts that secure the shifter plate
to the shifter bracket ( Figure 39 ).
3. Remove the 4 bolts that secure the shifter plate
to the seat base and remove the shifter plate
( Figure 39 ).
Disconnecting the Parking-Brake Cable
1. At the bottom of the machine, remove the cable
tie that secures the parking-brake cable to the
service brake line ( Figure 40 ).
2. Mark a rotation stripe on the forward jam nut for
the parking-brake cable ( Figure 40 ).
Note: Ensure that the forward-jam nut does
not rotate.
g029670
Figure 40
1. Cable tie 6. Front of the machine
2. Parking-brake cable
7. Clevis
3. Forward-jam nut
8. Cotter pin
4. Brake-cable bracket
9. Clevis pin
5. Rear-jam nut 10. Brake-actuating lever
3. Loosen the rear-jam nut and remove the cable
from the brake-cable bracket ( Figure 40 ).
4. Remove the cotter pin and the clevis pin that
secure the clevis for the parking-brake cable to
the brake-actuating lever and separate the cable
from the lever ( Figure 40 ).
5. Repeat steps 1 through 4 to the parking-brake
cable at the other side of the machine.
Removing the Seats and Seat Bases
1. At the bottom of the machine, remove the 8
ange-head bolts and 8 washers that secure the
seat base to the oor plate and rear-cab channel
( Figure 41 ).
g029658
Figure 41
1. Flange-head bolt
4. Hole (oor plate)
2. W asher
5. Front of the machine
3. Hole (rear-cab channel)
39