142
4.SETTING ITEMS (ADMIN)
3.SETTING NETWORK FUNCTIONS (Cont.)
4
3
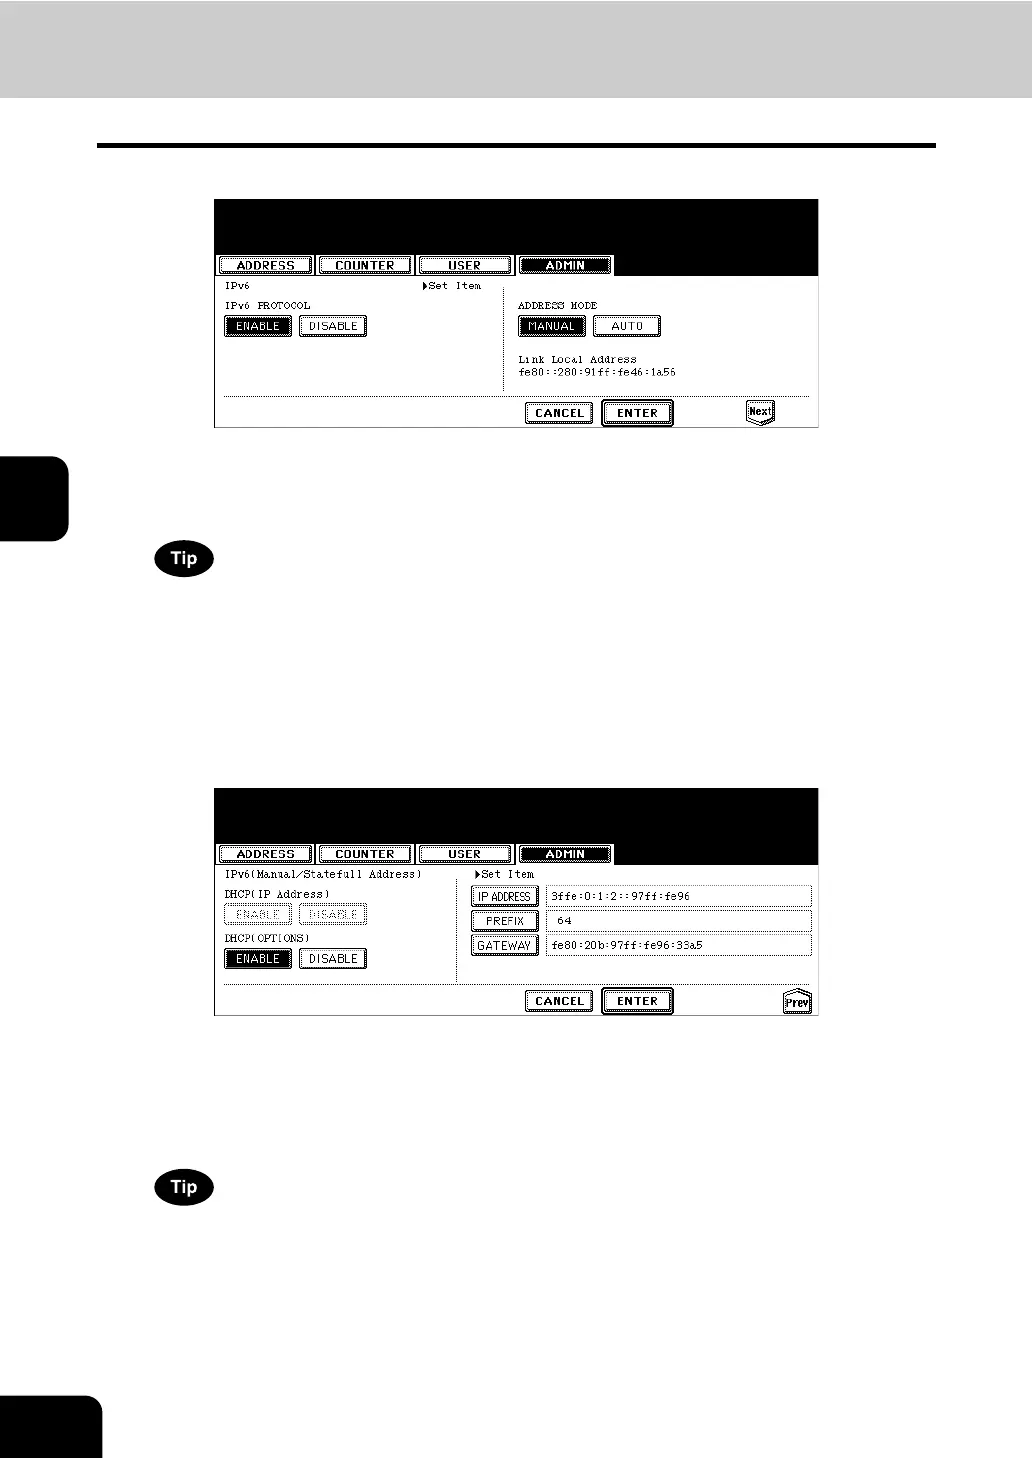
Specify the following items as required.
• IPv6 PROTOCOL—Press the [ENABLE] button to enable the IPv6 protocol, or [DISABLE] button to disable
the IPV6 protocol.
• ADDRESS MODE—Select the IPv6 address mode option.
• Link Local Address—The unique address used for the IPv6 is displayed.
Link Local Address cannot be connected to another routed IPv6 network.
4
Press the [Next] button.
• IPv6 (Manual/Statefull Address) screen is displayed.
• When selecting “MANUAL” mode in step 3, proceed to step 5.
• When selecting “AUTO” mode in step 3, proceed to step 7.
5
Specify the following items as required.
• DHCP (OPTIONS)—Select whether or not the optional information (IPv6 address for the DNS server, etc.)
except the IPv6 address for this equipment, which is issued from the DHCPv6 server is used on this equip-
ment. Press the [ENABLE] button to use the information, or [DISABLE] button to not use it.
• [IP ADDRESS]—Assign the IPv6 address for this equipment.
• [PREFIX]—Assign the prefix for the IPv6 address.
• [GATEWAY]—Assign the default gateway.
In “MANUAL” mode, you cannot select “DHCP (IP Address)” option.
6
Press the [ENTER] button.
• Returns you to the NETWORK menu.
• Proceed to step 12.

 Loading...


