172
4.SETTING ITEMS (ADMIN)
5.SETTING FAX FUNCTIONS (Cont.)
4
3
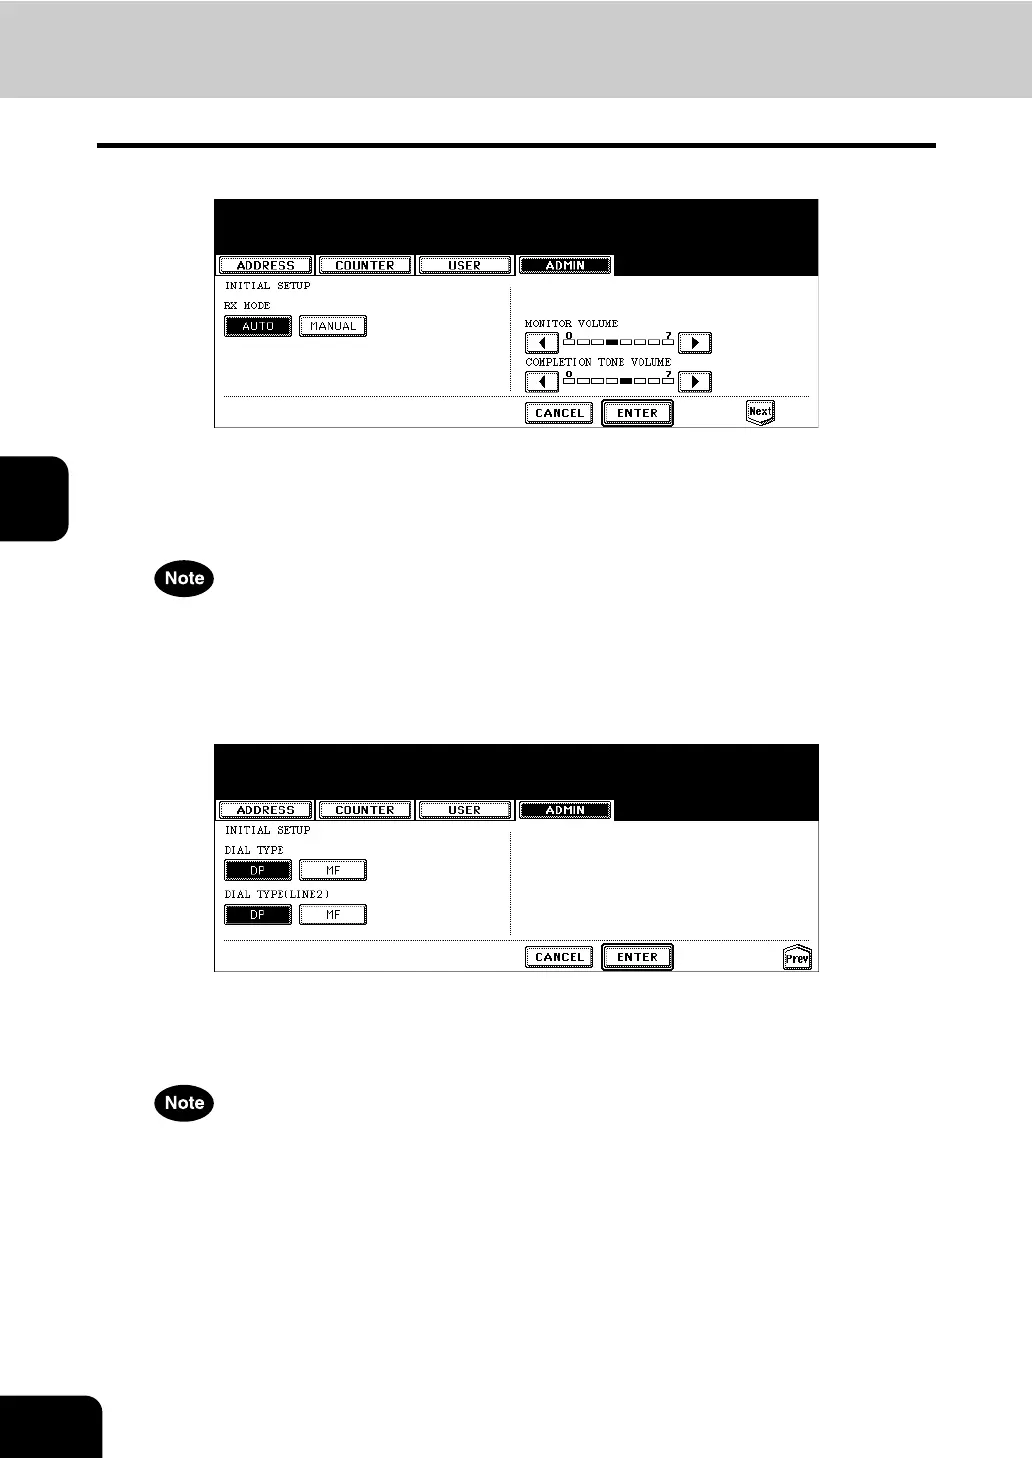
Specify following items as required.
• RX MODE — Press the [AUTO] button to receive faxes automatically, or [MANUAL] button to receive faxes
manually. When you select the manual mode, you can receive the faxes by pressing the [START] button when
it rings.
• MONITOR VOLUME — Press the arrow buttons to change the monitor volume.
• COMPLETION TONE VOLUME — Press the arrow buttons to change the complete volume.
When the User Management Setting is enabled, only the [AUTO] button can be selected for the RX MODE
option.
4
Press the [Next] button to display the next screen.
5
Specify following items as required.
• DIAL TYPE — Press the [MF] button to select the Multi-frequency mode, or [DP] button to select the Dial Pulse
mode for the line 1.
• DIAL TYPE (LINE2) — Press the [MF] button to select the Multi-frequency mode, or [DP] button to select the
Dial Pulse mode for the line 2. This is available only when the optional 2nd line board is installed.
The “DIAL TYPE” and “DIAL TYPE (LINE2)” is not available for the European version.
6
Press the [ENTER] button.
• Returns you to the FAX menu.

 Loading...


