22
1.MANAGING ADDRESS BOOK (ADDRESS MENU)
2.MANAGING GROUPS (Cont.)
1
5
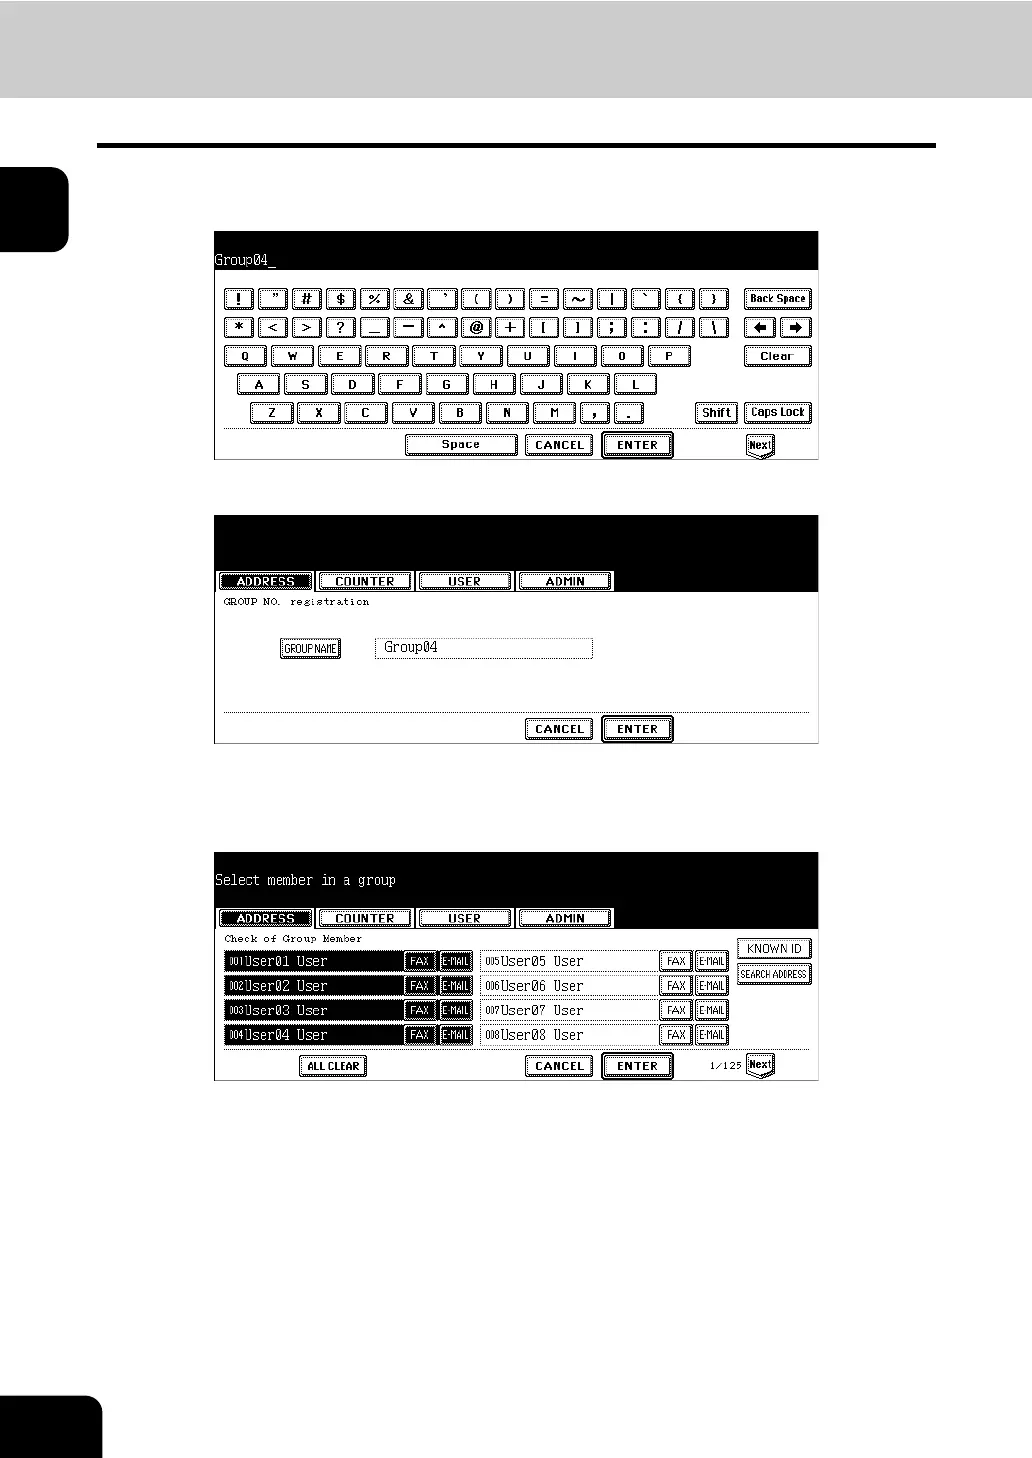
Enter the group name using the keyboard and digital keys, and press
the [ENTER] button.
6
Press the [ENTER] button.
• The CHECK OF GROUP MEMBER screen is displayed.
7
Select the contacts that you want to add to the group, and then press
the [ENTER] button.
• To add or remove the contacts by selecting each contacts manually, see “Adding or Removing Contacts”.
P. 2 6
• To add the contacts by searching them with the ID number, see “Adding Contacts by Searching with ID Num-
ber”. P. 2 7
• To add the contacts by searching them with search string, see “Adding Contacts by Searching with Search
String”. P.28

 Loading...


