11-3. Work procedure after Repair
When vacuuming in the repaired outdoor unit, follow the procedure described below.
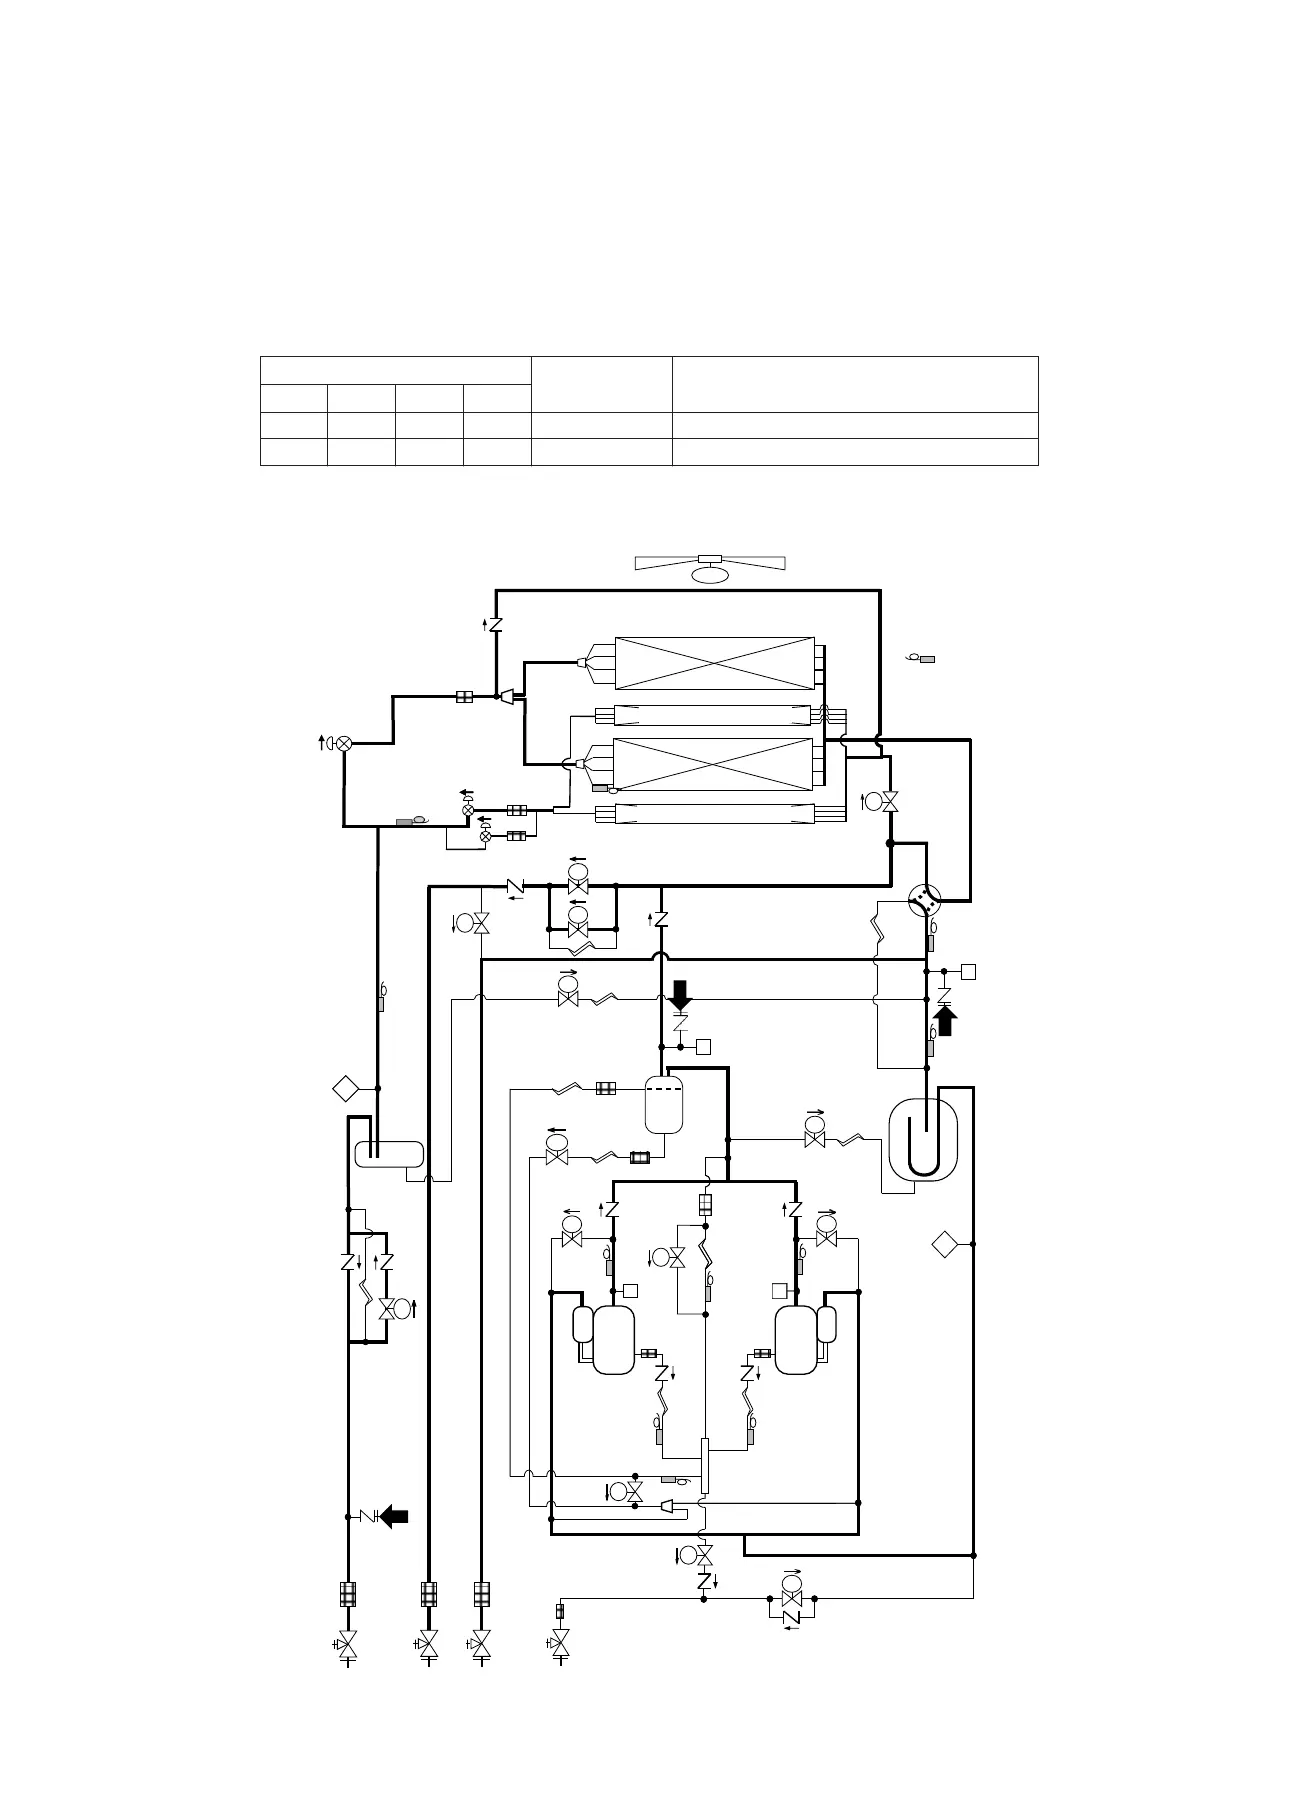
<Work procedure>
(1) Fully open PMV1 and PMV4 in accordance with the table below.
Note: PMV full-opening operation via short-circuiting of the CN30 pins is automatically undone after 2 minutes,
causing the valves to fully close. To maintain fully open state, turn off the power switch of the outdoor unit
within 2 minutes of the short-circuiting of the CN30 pins.
(2) Be sure to perform vacuuming in from the three check joints shown in the diagram below (liquid pipe, discharge
pipe and suction pipe).
SW12
CN30 PMV operation
Bit 1Bit 2Bit 3Bit 4
OFF OFF OFF OFF Short-circuit
PMV1 fully open for 2 minutes.
OFF ON OFF OFF Short-circuit PMV4 fully opens for 2 minutes.
− 228 −
SV
SV
FM
Propeller
Fan
(Right side)
Main heat exchanger
Fusible plug
FPFP
Liquid tank
(SV14)
Check joint
(Liquid)
PMV4
SV
SV15
(TO)
(TE2)
(TE1)
(TL1)
SV
SV
(SV6)
Check joint
(high pressue)
High pressue sensor
4-way
Valve
(TS1)
(TS2)
Check joint
(low pressue)
Low pressue sensor
Accumlator
SV
SV
Oil separator
Centrifugal
type
(SV3D)
(SV2)
(SV41)
SV
(SV42)
(SV3C)
(TD1)
(TD2)
(TK4)
High
pressure
SW
High
pressure
SW
Comp 1
(INV)
Comp 2
(INV)
(TK1)
(TK2)
(SV3A)
(SV3E)
(TK5)
Oil
header
B.P.
(SV3B)
00
Sub-heat exchanger (Right side)
(SV5(SV5))
(SV11)
(Left side)
Main heat exchanger
SV
GEARED PMV1
GEARED PMV3
SV
SV
SV
SV
SV
Fusible plug
FP
Sub-heat exchanger (Left side)

 Loading...