9.BUSHING
1 Detachment
1) Perform work of procedure 1. of 1 Detachment . (Electric parts cover)
2) Remove Bushing from Electrical box.
2 Attachment
1) Attach Bushing to Electrical parts box.
2) Attach the Electric parts cover. (Refer to 1. of 2 Attachment)
10.BODY-SERVE
Before the work, be sure to recover the refrigerant of outdoor unit into cylinders or
another unit connected to the same system.
(Refer to the chapter on "refrigerant recovery methods to be used during compressor replacement")
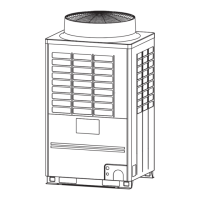
1 Detachment
1) Remove connecting pipes from FS unit.
2) Remove FS unit from 3 hanging-bolts.
3) Perform work of procedure 6. of 1 Detachment . (Coil of 2way-valve(SVS,SVSS,SVDD,SVD))
4) Perform work of procedure 7. -1 (Coil-PMV) and 8. -1 (TCS-Sensor).
5) Remove screws of Electrical parts box. (φ4 x 0.3" (8mm), 4 pcs)
6) Remove screws of 3 Hanging brackets.(φ4 x 0.3" (8mm), 2 pcs)
2 Attachment
1) Attach 3 hangers.(φ4 x 0.3" (8mm), 2 pcs)
2) Attach Electrical parts box. (φ4 x 0.3" (8mm), 4 pcs)
3) Perform work of procedure 7. -2 (Coil-PMV) and 8. -2 (TCS-Sensor).
4) Attach heat-insulation packed in Body-service kit to the PMV pipe.
5) Perform work of procedure 6. of 2 Attachment . (Coil of 2way-valve(SVS,SVSS,SVDD,SVD))
6) Hang FS unit by fixing 3 hanging brackets with washers.
7) Connect and braze the connecting pipe.
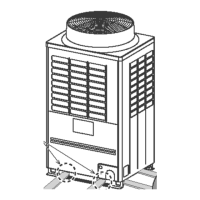
Push Bushing to set its groove to steel sheet certainly.
Heat-insulation is attached to cover the PMV pipe.
Put washers at up and down of hanging bracket.
Check that 4 sides are horizontal with a level gauge. (Horizontal degree: Within 0.2" (5mm))
− 272 −

 Loading...