7
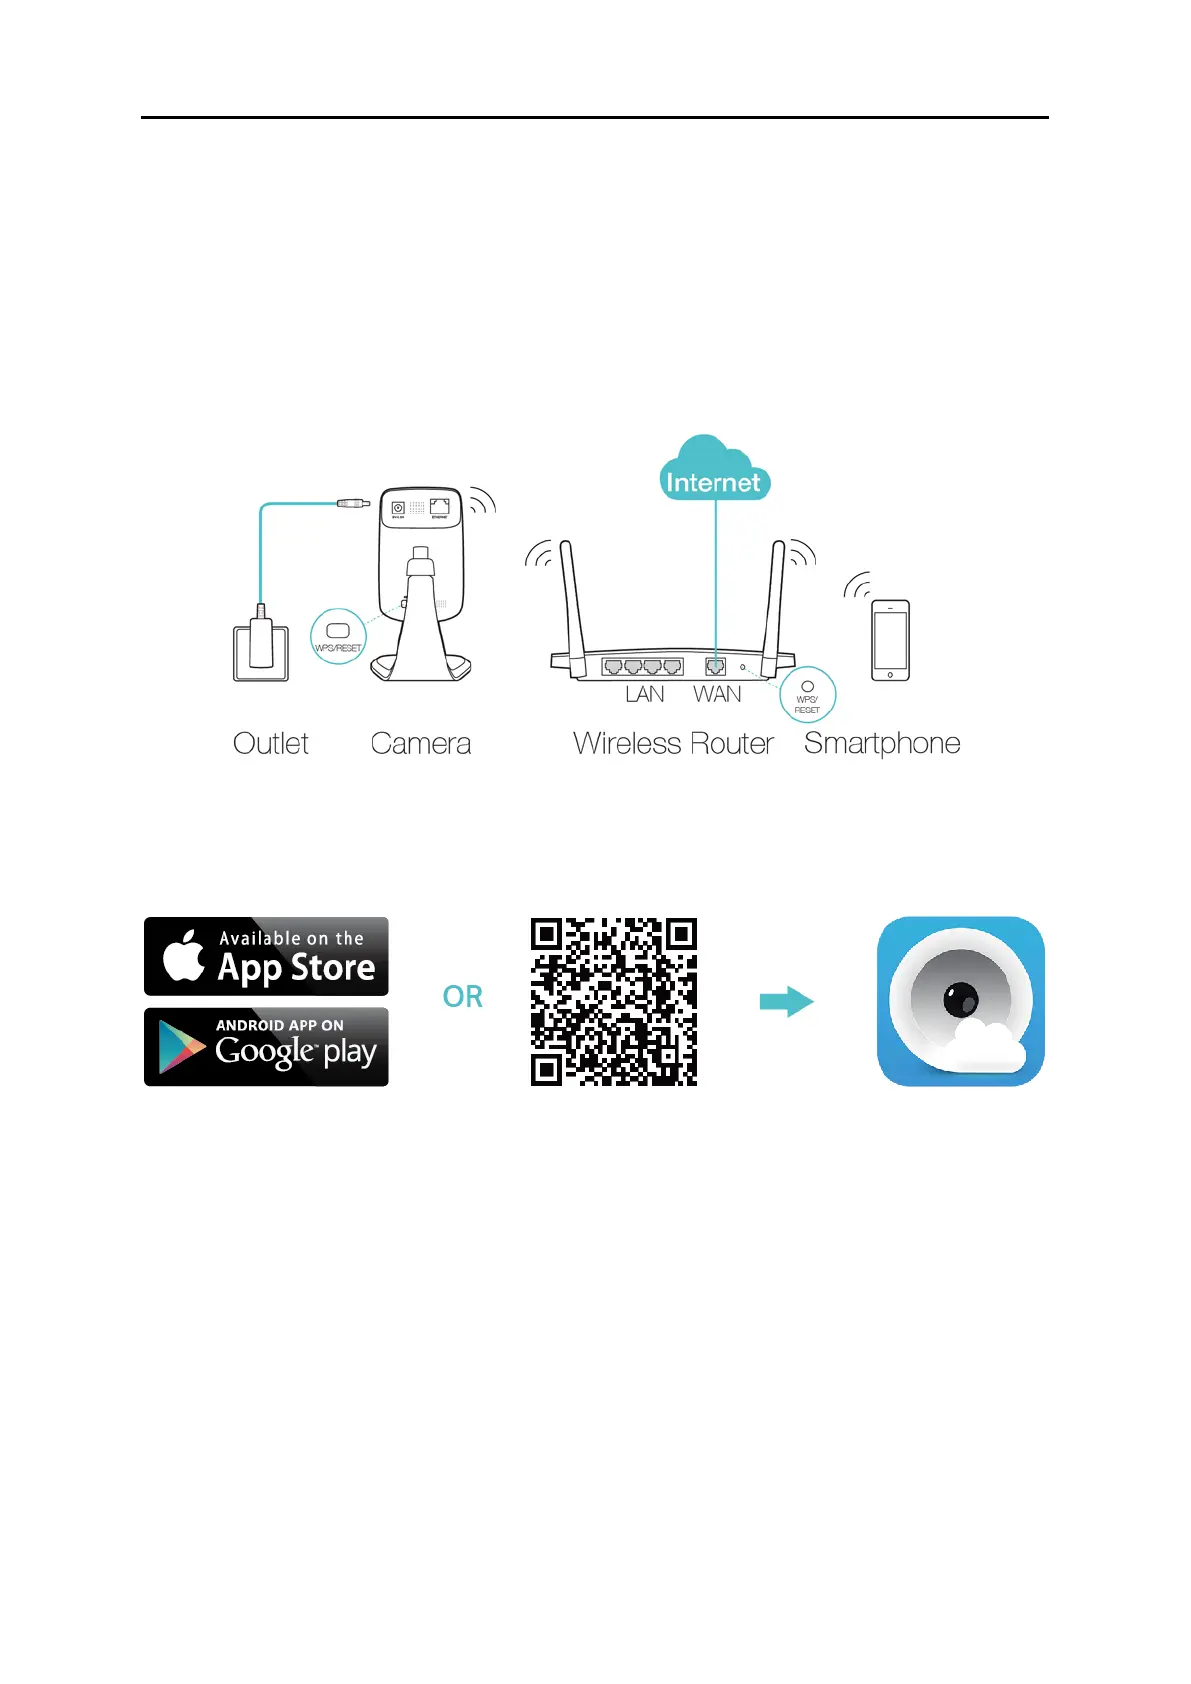
Via WPS/QSS button
If your wireless router supports WPS, you can connect the camera to your Wi-Fi
network using WPS. Press the WPS or QSS button on your router. Within 2 minutes,
press the WPS/RESET button on the back of the camera for about 2 seconds, then the
LED above this button will start flashing quickly. When this LED becomes solid on, the
WPS is successful and the camera is connected to the router wirelessly.
Step 2. Download and install the tpCamera app.
You can download the free tpCamera app from the App Store or Google play. You can also
scan the QR code below to download the tpCamera app.
Step 3. Add the camera to your TP-Link ID.
Launch the tpCamera app, log in with your TP-Link ID or create one if you do not have a TP-Link
ID. Then follow the app instructions to add your new camera to your TP-Link ID.
When you reach the My Cam screen, you have successfully added your camera and can start
to use your camera.
Note:
You can enable Email and App notification in the app, which will inform you immediately of any
detected movement or sound by sending the snapshots. The time interval between each Email
notification alert is 10 minutes while the time interval for App notification is 3 minutes.