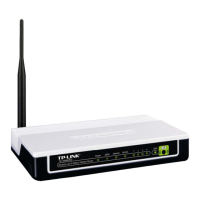
TD-W8950ND 150Mbps Wireless N ADSL2+ Modem Router User Guide
Appendix B: Configuring the PC
For Windows 8
Move your mouse to the lower right corner and you will see Search
icon in the
Popups. Go to
‘
>Apps’. Type ‘Control Panel’ in the search box and press Enter, then you will go to Control
Panel. Click ‘View network status and tasks > Change adapter settings’. Right-click ‘Ethernet’,
select ‘Properties’ and then double-click ‘Internet Protocol Version 4 (TCP/IPv4)’. Select
‘Obtain an IP address automatically’, choose ‘Obtain DNS server address automatically’ and
then click ‘OK’.
For Windows 7/Vista
Go to ‘Start > Settings > Control Panel’. Click ‘View network status and tasks > View status >
Properties’ and double-click ‘Internet Protocol Version 4 (TCP/IPv4)’. Select ‘Obtain an IP
address automatically’, choose ‘Obtain DNS server address automatically’ and then click
‘OK’.
For Windows XP/2000
Go to ‘Start > Control Panel’. Click ‘Network and Internet Connections > Network
Connections’. Right-click ‘Local Area Connection’, select ‘Properties’ and then double-click
‘Internet Protocol (TCP/IP)’. Select ‘Obtain an IP address automatically’, choose ‘Obtain DNS
server address automatically’ and then click ‘OK’.
For Mac OS
Click the icon
at the right top of your desktop. Then click ‘Open Network Preferences…’.
Choose ‘AirPort’ and click ‘Advanced…’. Choose ’TCP/IP’. Set the ‘Configure IPv4’ as ‘Using
DHCP’ and then click ‘OK’.
94

 Loading...