,167$//$7,21
&RS\ULJKW7UDFH(QJLQHHULQJ&R,QF 7HOHSKRQH 3DUW1XPEHU
WK
6WUHHW1( )D[ 2FWREHU
$UOLQJWRQ:$86$ ZZZWUDFHHQJLQHHULQJFRP 3DJH
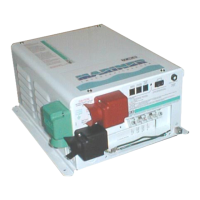
Mechanical Lugs:
Aluminum mechanical lugs are available from electrical hardware suppliers and
do not require crimping. Suggested sources and part numbers are:
Part # Description
ILSCO
TA-2/0 2/0 Lug
TA-250 (preferred) 250 MCM Lug
Thomas &Betts
62205 2/0 Lug
62212 250 MCM Lug
Panduit
LAMA2/0-14 2/0 Lug
LAMA250-56. 250 MCM Lug
DC Negative Ground Cable Connection
The Trace Mariner inverter/chargers have a third battery terminal labeled “DC Ground Bus” (the
green terminal on the left side of the unit). The purpose of this third terminal is to route all DC load
current into and out of the battery bank through the internal shunt of the inverter. The internal shunt
is connected between the inverter's black battery negative terminal and the green DC Ground Bus
terminal of the inverter.
Because all DC loads in a vessel are generally connected to a common DC negative bus and not
directly to the battery negative (in a negative ground system), all DC current in the system will at
some point pass through the bus and then into the battery bank. If the inverter is in this loop, the net
current flow is easily monitored. Thus, the RC7 remote control’s battery fuel gauge feature is
possible. You may connect the system without going through the inverter's DC Ground Bus terminal,
but the RC7’s fuel gauge feature will not work properly.
Installation Procedure
Determine the correct size battery cable to use for your installation (see
Table 2, DC Cable Sizing in
Free Air
on Page 19). Connect a cable from the battery positive terminal to the battery positive (red)
terminal on the inverter. Install an over-current device (fuse or circuit breaker) within 72-inches of the
battery in this cable (within 7-inches is preferable). Connect a cable from the negative battery
terminal to the negative (black) terminal on the inverter. If these cables penetrate a bulkhead, seal
the opening through which the cables pass with a grommet or other device to prevent chafing and
leakage of fluids or vapors.
Observe Battery Polarity! Place the battery cable ring terminals over the stud and directly against
the inverter’s battery terminals. A 'snap' caused by arching may occur-this is normal. Red is positive
(+), Black is negative (-) Use a 1/2-inch wrench or socket to tighten the 5/16 SAE nut to 10-15
foot/pounds. Do not place anything between the flat part of the inverter terminal and the battery
cable ring terminal or overheating may occur. Do not apply any type of anti-oxidant paste to
terminals until after the battery cable wiring is tightened to 10–15 foot-pounds!