17
MOD207
Move the shift lever all the way back. The letter L should
illuminate on the LCD gauge.
MOD208
If either park or low range cannot be reached, the shift
cable must be adjusted.
ADJUSTING SHIFT CABLE
1. Secure the vehicle on a support stand to elevate the
wheels; then place the transmission in neutral; then
rotate the rear wheels by hand at least two revolu-
tions.
2. Tilt the cargo box up; then remove the passenger-
side rear inner fender. With the gear selector in neu-
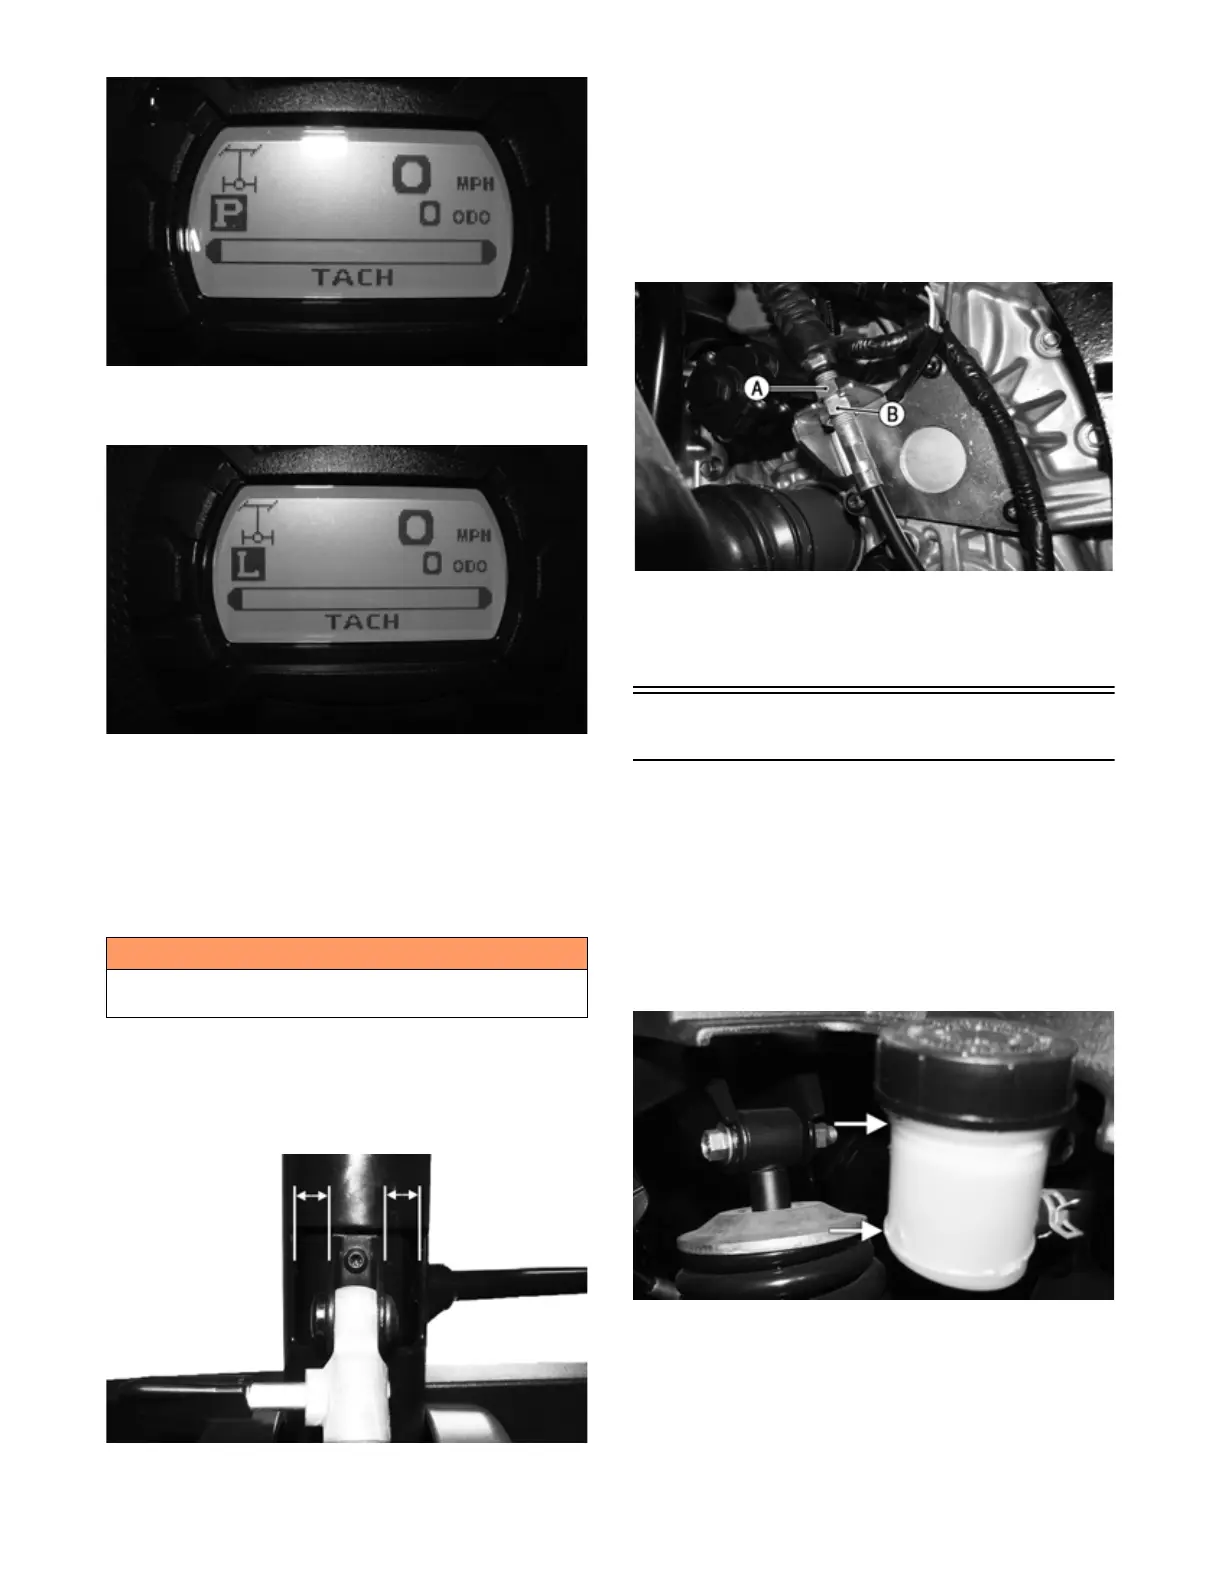
tral, measure the distance on each side of the upper
tilt steering wheel adjuster bracket and the shifter
housing.
MOD520
NOTE: If the distance on each side of the upper tilt
steering wheel adjuster bracket and the shifter hous-
ing is the same and the vehicle does not properly
engage Park or Low, shift cable replacement may be
required.
3. Loosen nuts (A) and (B) and adjust the cable housing
until the measurements on each side of the upper tilt
steering wheel adjuster bracket are the same.
MOD297
4. Tighten the nuts (A) and (B) to 20 ft-lb (27.2 N-m).
5. Check each gear shift position for proper gear selection
and make sure the proper icon illuminates on the LCD.
Hydraulic Brake System
NOTE: This ROV/UTV is equipped with hydraulic
brakes at all four wheels.
CHECKING/BLEEDING
The hydraulic brake system has been filled and bled at
the factory.
1. With the master cylinder in a level position, check
the fluid level in the reservoir. If the level in the res-
ervoir is not above the MIN, add DOT 4 brake fluid.
MOD163
2. Depress the brake pedal several times to check for a
firm brake. If the brake is not firm, the system must
be bled. To bleed the brake system, use the following
procedure:
A. Remove the cover and fill the reservoir with
DOT 4 brake fluid; then install and secure the
cover.
! WARNING
Make sure the vehicle is solidly supported on the sup-
port stand to avoid injury.