27
4. Install the wheels and using a crisscross pattern,
tighten the wheel nuts in 20 ft-lb (27.2 N-m) incre-
ments to a final torque of 100 ft-lb (136 N-m); then
lower the vehicle and remove the suitable lift and
stands.
REMOVING OUTER TIE RODS
NOTE: Removal of the rack and pinion is not
required to replace outer tie rods.
1. Using a suitable lift and stands lift the vehicle until
the front wheels are off the ground; then remove the
front wheels.
2. Remove the cotter pins (A) and castle nuts (B) secur-
ing the tie rod ends to the knuckles; then remove the
outer tie rod ends from the knuckles.
MOD315
MOD316
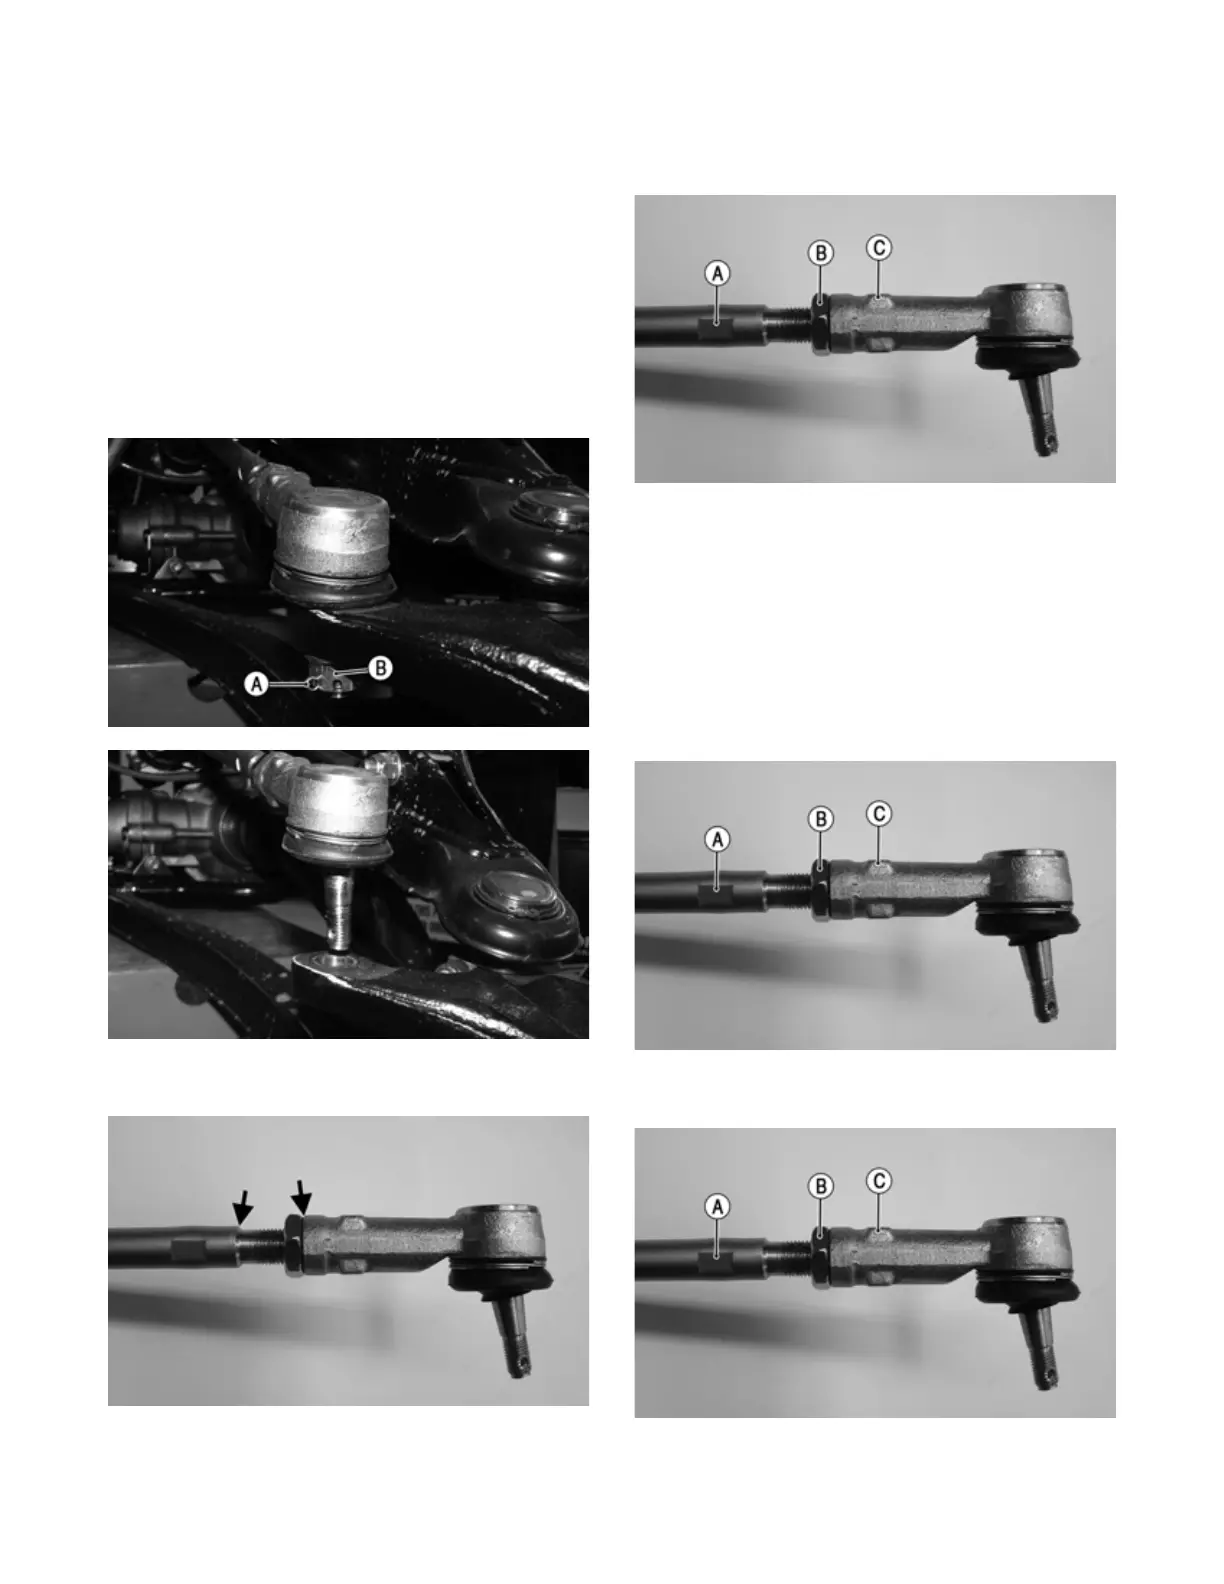
3. Measure the distance between shoulder of the tie rod
shaft and the tie rod.
MOD323
4. Using a wrench, loosen the lock nut (B) while hold-
ing the tie rod at the location indicated (C); then
remove the tie rod with a wrench at the location indi-
cated (C) while holding the tie rod shaft at the loca-
tion indicated (A).
MOD323A
NOTE: Tie rods come as a complete assembly. No
further disassembly is required.
INSTALLING OUTER TIE RODS
NOTE: If a new rack and pinion boot is to be
installed. Install prior to putting on the outer tie rods.
1. Install the outer tie rod with a wrench at the location
indicated (C) while holding the tie rod shaft at loca-
tion indicated (A) until obtaining the measurement
previously recorded when removing the outer tie rod.
MOD323A
2. Hold the outer tie rod with a wrench at the location
indicated (C) and tighten the lock nut (B).
MOD323A