12 RF-SVN006C-EN
Connecting and Configuring the BCI2-C with Tracer TU
Software
This section describes how to connect to the Tracer TU
software and configure the BCI2-C controller. Before
beginning, if the TU service tool is not installed, refer to the
Tracer TU Service Tool Getting Started Guide (TTU-SVN02).
This document will provide information about features,
capabilities, and requirements of TU.
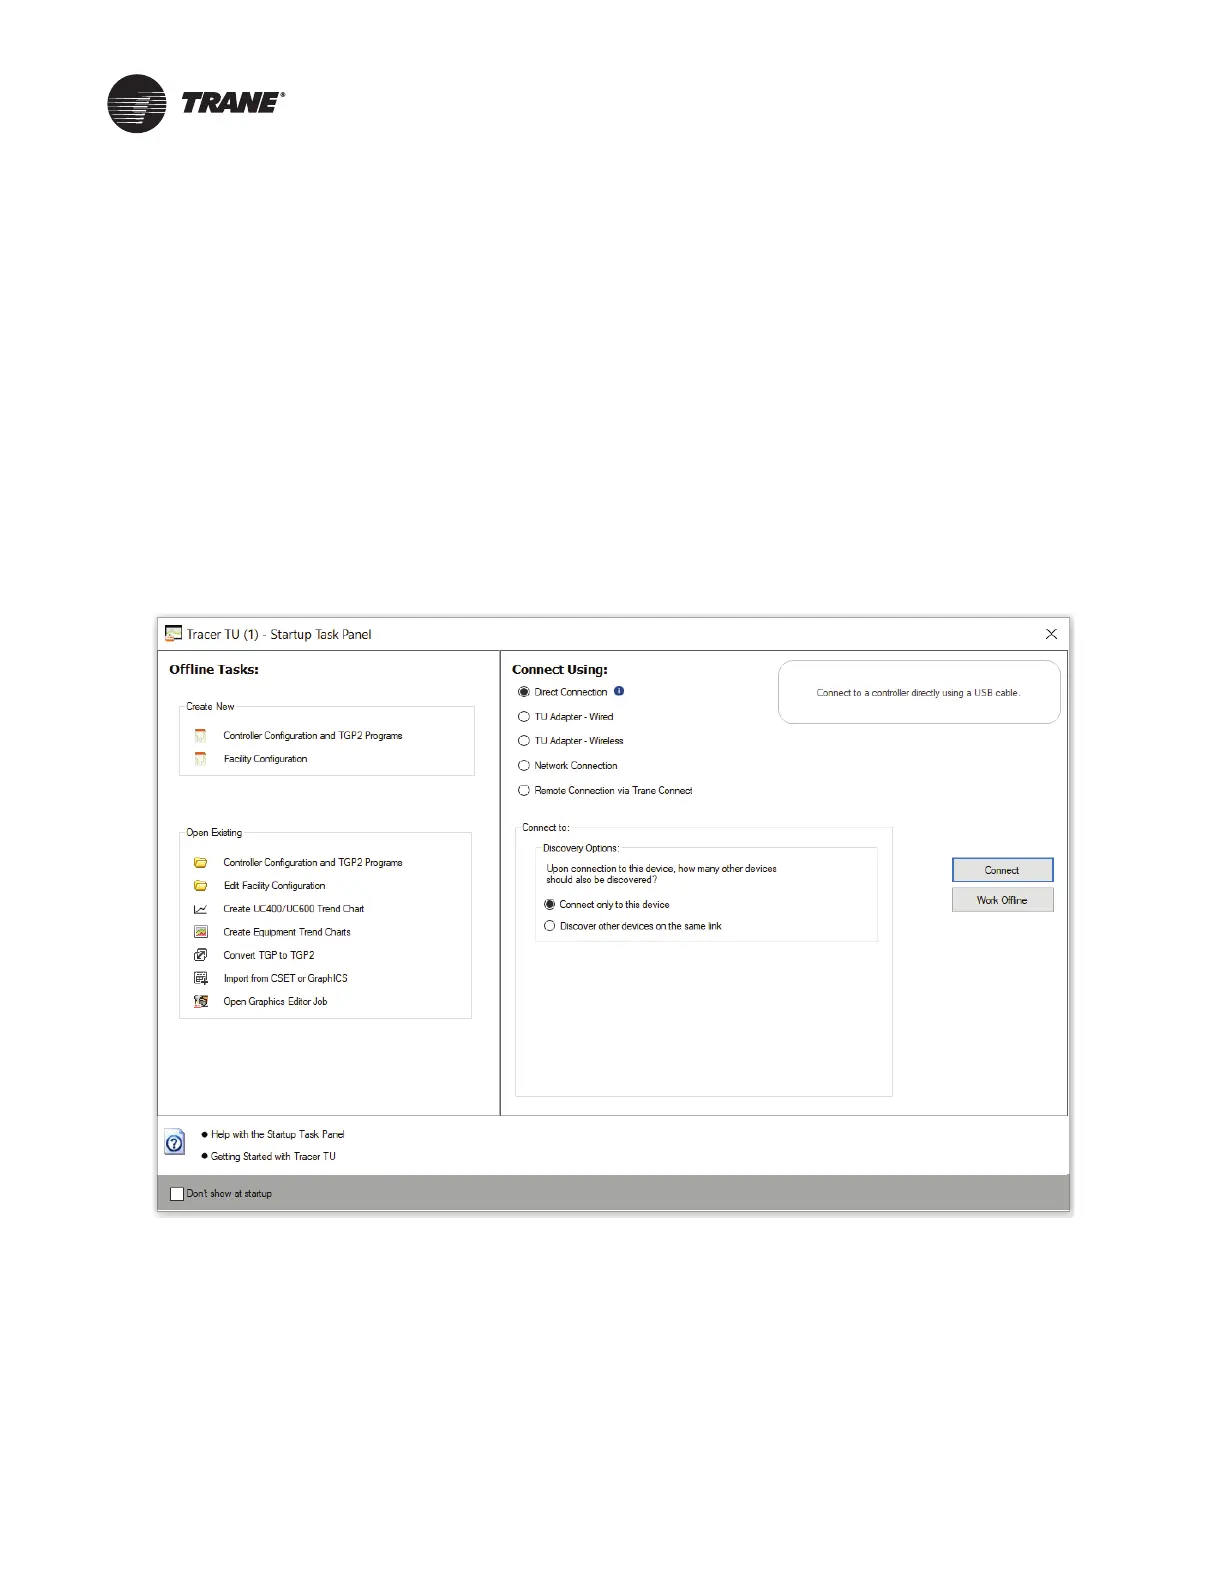
Connecting to Tracer TU
To connect to Tracer TU:
1. Connect the USB cable directly from the laptop to the
BCI2-C controller or to a panel USB port connected to the
controller.
Important: If using a PC with multiple USB ports, it is
conceivable to connect using the same
process outlined below for the same piece of
equipment. This is normal operation. Observe
existing USB standards for cable length. (For
more information go to informational Websites,
such as http://www.USB.org.)
2. Click either the Tracer TU desktop icon or the Tracer TU
program item in the Tracer TU group on the Start menu.
The Tracer TU splash screen appears briefly followed by
the Startup Task Panel.
3. Select the Direct Connection (Via USB cable) radio button
if it is not already selected.
4. Click the Connect button and the Unit Summary page
displays after successful connection.
Figure 8. Startup task panel