16
BAS-SVX076C-EN
Navigating Screens and Setting Parameters
These instructions assume the meter is set to factory defaults. If it has been previously
configured, all optional values should be checked.
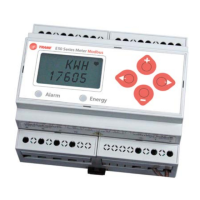
Buttons
(Up)
Select
(Right)
Next
(Down)
Select
(Left)
Back
+
–
1. To Navigate to the Setup Screens:
a. Press the + or – button repeatedly until SSEETTUUPP screen displays.
b. Press –>. to advance to the PPAASSWWDD screen.
c. Press –>. through the digits. Press + or – buttons to select the password (the default is
0000000000). Exit the screen to the right.
d. Press –> to advance to the first setup screen (SS BBAACC).
e. Press + or – to select the desired parameter screen to set. After setting parameters, press
+ or – to select the next setup screen or <- to exit and return to SSEETTUUPP.
2. To Enter BACnet Communication Parameters:
a. Press + or – repeatedly until the SETUP screen displays.. . Press -> to accept the value and
advance to the BAUD screen. Press + or – to select the baud rate (default is 19200). Press
-> to advance to the PAR screen. Press + or – to select the parity (default is NONE). Press
-> to return to the S COM screen.
b. Press -> to advance to the S COM (Set Communications) setup screen.
c. Press -> to advance to the MAC screen and through the address digits. Press + or – to
select the BACnet MAC address (default is 000011).
d. Press -> to accept the value and advance to the KBAUD scrfeen. Press + or – to select the
baud rate (default is 7766..88 kk).
e. Press -> to advance to the ID1 screen and through the upper four digits of the Device
Instance. Press + or – to select the ID digits. The setup screen splits the Device ID into two
parts— the most significant four digits (ID1) and the least significant three digits (ID2). The
E50HxA supports BACnet Device ID values from 1 to 4,193,999. Units are shipped with a
factory default setting that is pseudo-randomly generated in the range from 1,000,000 to
3,097,151.
f. Press -> to accept the value and advance to the ID2 screen and through the lower three
digits of the Device Instance. Press + or – to select the ID digits.
g. Press -> to accept the value and to return to the S BAC screen.
3. To Enter the CT Output Voltage and Input Current Ranges:
a. Press –> to advance to the CCTT SSZZ screen and through the digits. Press + or – buttons to
select the CT size in amps (default is 110000).
b. Press –> to return to the SS CCTT screen.
4. To Enter the Service Type to Monitor:
a. Press –> to advance to the SS SSYYSS (Set System) screen.
b. Press –> to advance to the SSYYSSTTMM screen. Press + or – buttons to select the configuration
(default is 33LLNN--11NN).
c. Press –> to return to the SS SSYYSS screen.