TK 55676-19-IM-EN
35
Alternative Location – Centered Under Bunk
IImmppoorrttaanntt:: See “Evaporator Installation Standards” in Section 5 of the Thermo King TriPac Installation Standards
Guide (TK 56498). THESE STANDARDS MUST BE FOLLOWED!
A template is supplied to represent the amount of area needed to accommodate the evaporator. It also provides
locations for the two 7/8” drain holes and the 3” access hole.
IIMMPPOORRTTAANNTT AACCCCEESSSS HHOOLLEE IINNFFOORRMMAATTIIOONN::
• The location of the 3” access hole will be determined by your particular sleeper construction, including OEM
internal floor supports, electrical wiring, etc. It should be located directly behind the evaporator’s A/C fittings to
allow the refrigerant hoses with 90 degree fittings to be attached and routed down through the floor easily.
• Floors made from fiberglass covered wood construction require the edges of the 3” access hole be completely
sealed with fiberglass and epoxy resin.
• Before drilling any holes, check for interference with internal wires, supports or interior panels. Avoid drilling into
the truck’s support members.
Special Tools Required
Drill Motor
1/4” Drill Bit
7/8” Step Reamer
3” dia. Hole Saw
Reciprocating Saw
Caulk Gun and RTV Silicone Sealant
Sealing Putty (203-391)
Fiberglass Cloth and Resin Kit (if required)
1. Position the template flush with the bulkhead, mark the location of the 7/8” evaporator drain holes and the 3” access
hole. Remove the template.
a. Drill 1/4” pilot hole for the drain holes followed by a 7/8” step reamer.
b. Drill 3” access hole.
2. Cut and install a piece of split loom (or similar) around the inside edge of the 3” access hole to provide protection
for the hoses and wiring.
3. Reposition the evaporator mounting brackets attached to the sides of the evaporator.
4. Install the evaporator to the floor with TEK screws.
5. Mark a location for a return air opening (minimum opening size 14'' x 7'') and cut the opening. Install a return air
grille (installer supplied).
6. From underneath the sleeper:
a. Attach the two water valves (kazoos) onto the evaporator drain tubes and secure with supplied hose clamps
b. Seal around the drain tube access holes with sealing putty or silicone sealant.
c. Apply silicone sealant around the four evaporator mounting screws.
d. Seal any unused holes, cracks, or visible air gaps that might be found.
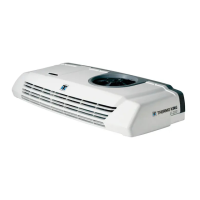
AA//CC EEvvaappoorraattoorr IInnssttaallllaattiioonn