18 PART-SVN121A-EN
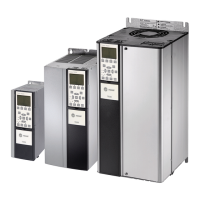
Installation of TR200 VFD and Components
• If there is a risk of arc or flash, technicians MUST put on all necessary Personal Protective
Equipment (PPE) in accordance with NFPA70E for arc/flash protection PRIOR to servicing the
unit.
Failure to follow recommendations could result in death or serious injury.Introduction
3. To modify parameters:
a. Press Main Menu button (press [Back] button if the main menu does not display)
b. Use the [▲] and [▼] buttons to find the parameter menu group (first part of parameter
number)
c. Press [OK]
d. Use the [▲] and [▼] buttons to select the correct parameter sub-group (first digit of second
part of parameter number)
e. Press [OK]
f. Use the [▲] and [▼] buttons to select the specific parameter
g. Press [OK]
h. To move to a different digit within a parameter setting, use the [..] buttons (Highlighted area
indicates digit selected for change)
i. Use the [▲] and [▼] buttons to adjust the digit
j. Press [Cancel] button to disregard change, or press [OK] to accept change and enter the new
setting
4. Repeat step (3) for each menu selection setting in Tabl e 4, p . 17.
5. To reset all programming parameters back to the factory defaults:
a. Go to parameter 14-22 Operation Mode
b. Press [OK]
c. Select "Initialization?h
d. Press [OK]
e. Cut off the mains supply and wait until the display turns off.
f. Reconnect the mains supply - the frequency converter is now reset.
g. Ensure parameter 14-22 Operation Mode has reverted back to "Normal Operation".
Note: Item 5 resets the drive to the default factory settings. The program parameters listed in
Tabl e 4, p . 1 7 will need to be verified or changed as described in Item 3 and 4.
Note: Some of the parameters listed in the Table are motor specific. Due to various motors and
efficiencies available, use only the values stamped on the specific motor nameplate. Do not
use the Unit nameplate values.
Note: A backup copy of the current setup may be saved to the LCP before changing parameters
or resetting the drive. See LCP Copy in the VFD Operating Instructions for details.
6. Follow the startup procedures for supply fan in the "Variable Air Volume System" section or the
"Exhaust Airflow Measurement" startup procedures for the exhaust fan.
7. After verifying that the VFD(s) are operating properly, press the STOP key at the Human
Interface Module to stop the unit operation.
8. Follow the applicable steps in the "Final Unit Checkout" section in the unit Installation,
Operation, Maintenance Manual (IOM) to return the unit to its normal operating mode.
Note: If a problem with a VFD occurs, ensure that the programmed parameters listed for supply
and exhaust VFD Ta b l e 4 , p. 17 have been set before replacing the drive.
 Loading...