Installation (for qualified installers only) 15
© Travis Industries 4090812 100-01232_001
Vent Restrictor
WARNING: Restrictor adjustment should only be done by a qualified installer.
Only those installations determined to be over-drafting require this adjustment. The best indication of
over-drafting is a hyper-active flame pattern (flames that move too quickly). If the air shutter is
constricted, the flames become short and yellow, yet still very active. Over-drafting may affect the pilot,
but this is not the best way to determine over-drafting. Over-drafting is most likely in tall venting
configurations (especially if using an “Exhaust Only Re-Line”). Do not over-restrict the vent (this leads to
ghosting or lifting flames - reduce restrictor setting).
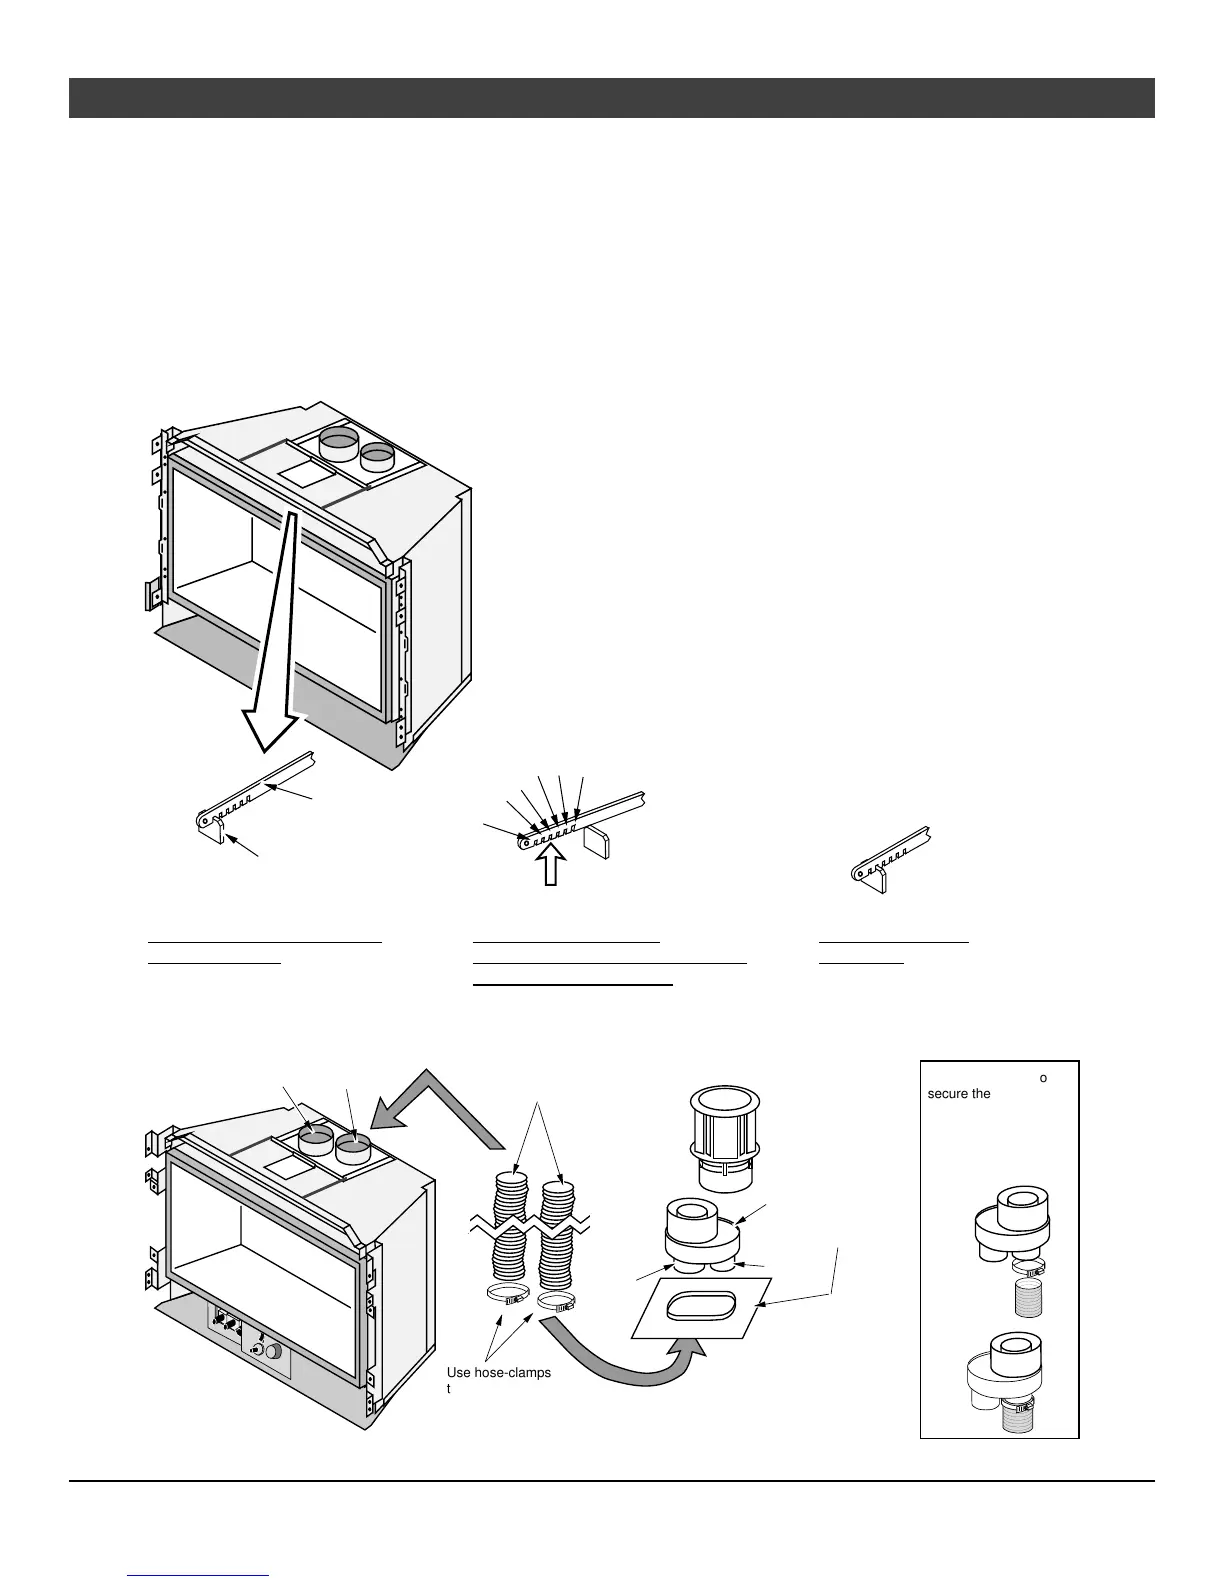
Remove the face.
To Adjust the Restrictor:
To Access the Restrictor:
This restrictor is in position 1
(factory setting).
This restrictor is in
position 2.
Adjustment
Bracket
To adjust, lift up on the
adjustment plate and push it back
(use pliers if necessary).
WARNING: Use a glove to protect
your hand from burns.
Adjustment
Plate
#2
#3
1
2
Determine a restrictor position. Start low (move
the restrictor a maximum two positions at a time)
and thoroughly test the heater before adjusting further.
Lift up the adjustment plate and move it so the correct notch falls
into the slot on the adjustment bracket.
#4
#5
#6
#1
Vent Installation
Inlet (3")
Exhaust (3")
Inlet
Exhaust
High Wind
Termination Cap
Simpson Duravent
6-5/8" to 3" & 3"
Co-Linear Adapter
3" dia. Gas Liner
Use hose-clamps
to secure the vent.
Alternative Method: use high-temperature
silicone and secure with screws.
Use hose-clamps to
secure the vent.
Alternative Method: use
high-temperature
silicone and secure with
screws.