© Copyright 2011 TRENDnet. All Rights Reserved.
4
TRENDnet User’s Guide
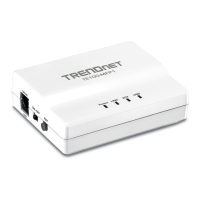
TE100-MFP1
Network Installation
• Verify that any software that is required to operate your printer or multi-function
printer is installed before installing the TE100-MFP1.
• By default the TE100-MFP1 is set to DHCP, it will automatically obtain an IP address
from your network.
Hardware Installation
1. Plug the TE100-MFP1 to one of the LAN ports of your router
2. Plug in the power adapter and connect the print server. Move the power switch to
the “On” position.
3. Verify the status LED indicators on the front of the printer server are fully functional
(Power is solid green and LAN port is solid green).
4. Install TRENDnet USB Control Center utility to configure the print server.
Utility Installation
TRENDnet USB Control Center utility is required to be installed on each computer that
requires access to the print server or to the devices connected to it. Please refer to the
Technical Specification section for a list of supported operating systems.
Windows Installation
1. Insert the Utility CD-ROM into your computer's CD-ROM Drive.
2. Click Install Utility
3. Follow the InstallShield Wizard instructions. Then click Finish.