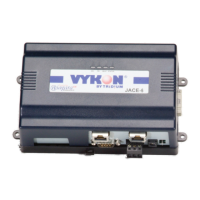
JACE-6 Mounting and Wiring Instructions
Published: April 19, 2007 Part Number 10821
About Expansion Options
About Accessory Modules
8
Procedure 2 Mounting option cards on a JACE-6.
Step 1
Remove power from the JACE-6—see the previous Warning.
Step 2
Remove the cover. See “Removing and Replacing the Cover,” page 6.
Step 3
Remove the battery and bracket assembly by taking out the four screws holding it in place, setting the
screws aside for later. Unplug the battery from the connector on the JACE-6.
Step 4
Remove the blanking end plate for the slot you are installing the option card into.
(Retain the blanking plate in case the option card must be removed at a later date.)
Step 5
Carefully insert the pins of the option card into the socket of the appropriate option card slot.
The mounting holes on the option board should line up with the standoffs on the base board. If they
do not, the connector is not properly aligned. Press until the option card is completely seated.
Step 6
Place the custom end plate that came with the option card over the connector(s) of the option card.
Step 7
Plug the battery connector plug into the battery connector on the JACE-6.
Step 8
Set the battery and bracket assembly back over the option card slots, with the mounting holes aligned
with the standoffs.
Step 9
Place the four screws through the battery bracket, end plates, and into the standoffs on the JACE-6
base board. Hand tighten these screws.
Step 10
Replace the cover.
About Accessory Modules
The JACE-6 has a 20-pin, right-angle, Euro-DIN connector that accepts custom-built accessory modules. The
connector provides power and signal lines to any connected modules, and is located on the end of the JACE-6
opposite to the option cards.
Warning • Power to the JACE-6 must be OFF when inserting or unplugging accessory modules.
Wait for all LED activity to stop (all LEDs to be off).
• Also, do not connect live voltages to the inputs or outputs of an I/O module (IO-16 or IO-34)
while it is in an “un-powered state” before plugging the module into a JACE-6.
Otherwise, damage to the I/O module and/or the JACE-6 controller may result!
Each accessory module has a DIN-mount base, and typically provides two (2) 20-pin connectors that allow you
to “chain” multiple accessories (see Procedure 1 on page 4). Table 2 lists the currently available modules.
Table 2 JACE-6 accessory modules.
Model Description Notes
NPB-PWR DIN-mountable, 24V isolated power
module, used to power JACE-6 from a
dedicated, external, Class-2, 24Vac
transformer or a 24Vdc power supply.
• Only one NPB-PWR per JACE-6.
• Do not install if using WPM-XXX or NPB-PWR-UN.Wiring is covered
in this document, see “NPB-PWR,” page 10.
• Wiring is covered in this document, see “NPB-PWR,” page 10.
NPB-PWR-UN DIN-mountable, Universal 90–263 Vac
input, 15Vdc output, 30W power supply
to power JACE-6.
• Only one NPB-PWR-UN per JACE-6.
• Do not install if using WPM-XXX or NPB-PWR.
• Wiring is covered in this document, see “NPB-PWR-UN,” page 11.
 Loading...