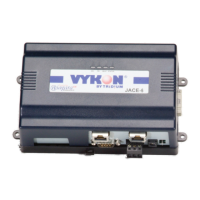
JACE-6 Mounting and Wiring Instructions
Published: April 19, 2007 Part Number 10821
Replacing the JACE-6 base assembly
New Replacement Units
20
New Replacement Units
To replace a faulty unit, order and install a new JACE-6—please note that JACE-6 series products do not have
special “field replacement units,” or FRUs, with separate part numbers.
If the faulty JACE-6 is still in warranty, you can receive credit by returning it to Tridium. Be sure to contact
Tridium for a return authorization (RA) number before shipping an item for return credit. See “Returning a
Defective Unit,” page 21, for more details.
Note Before ordering a new JACE-6, it is strongly recommended that you contact your normal technical
support resource to eliminate the possibility of a software issue or mis-configuration problem.
Replacing the JACE-6 base assembly
Caution Before handling circuit boards, discharge any accumulated static by touching the metal surface of
the JACE-6. For details, see the “Static Discharge Precautions” section on page 3.
To replace the JACE-6 base assembly in the field, proceed as follows:
Procedure 6 Replacing a JACE-6 base assembly.
Step 1
Using the appropriate NiagaraAX software tool, back up the JACE-6’s configuration to your PC.
Step 2
Remove power to the JACE-6. The unit should power down automatically.
Note If IO accessory modules are installed, and any I/O points have voltage, turn the devices off or
disconnect power to them.
Step 3
Note positions of all communications and other wiring cables going to the JACE-6, as well as all
installed accessory modules (if they must be removed). If necessary, label connectors and accessory
modules to avoid mis-connection later, after JACE-6 is replaced.
Step 4
Unplug all Ethernet, serial, LON, modem, and I/O connectors from the JACE-6, and unplug its earth
ground wire.
Step 5
If IO accessory modules are installed:
–
If DIN rail mounting with DIN end-clips was used, you may be able to remove the DIN rail end clip
that secures the JACE-6 end of the assembly, and then slide the JACE-6 away from the rest of the
assembly. Then you can remove the JACE-6 from the DIN rail (see Figure 1 on page 5), leaving the
mounting and wiring of IO modules untouched.
In this case, after removing the JACE-6 from the DIN rail, skip ahead to Step 6.
–
If tab (screw) mounting was used instead of DIN rail mounting, or if a combination of DIN rail
mounting and tab screws (into the JACE-6’s “accessory side” tab holes, see last page
), you will need
to remove the accessory modules first, before removing the JACE-6.
In this case:
a. Making a careful note or all wiring terminations, unplug the I/O connector plugs and earth ground
wires from the installed IO modules.
 Loading...