2 Using the R1 GNSSreceiver
Parts of the receiver
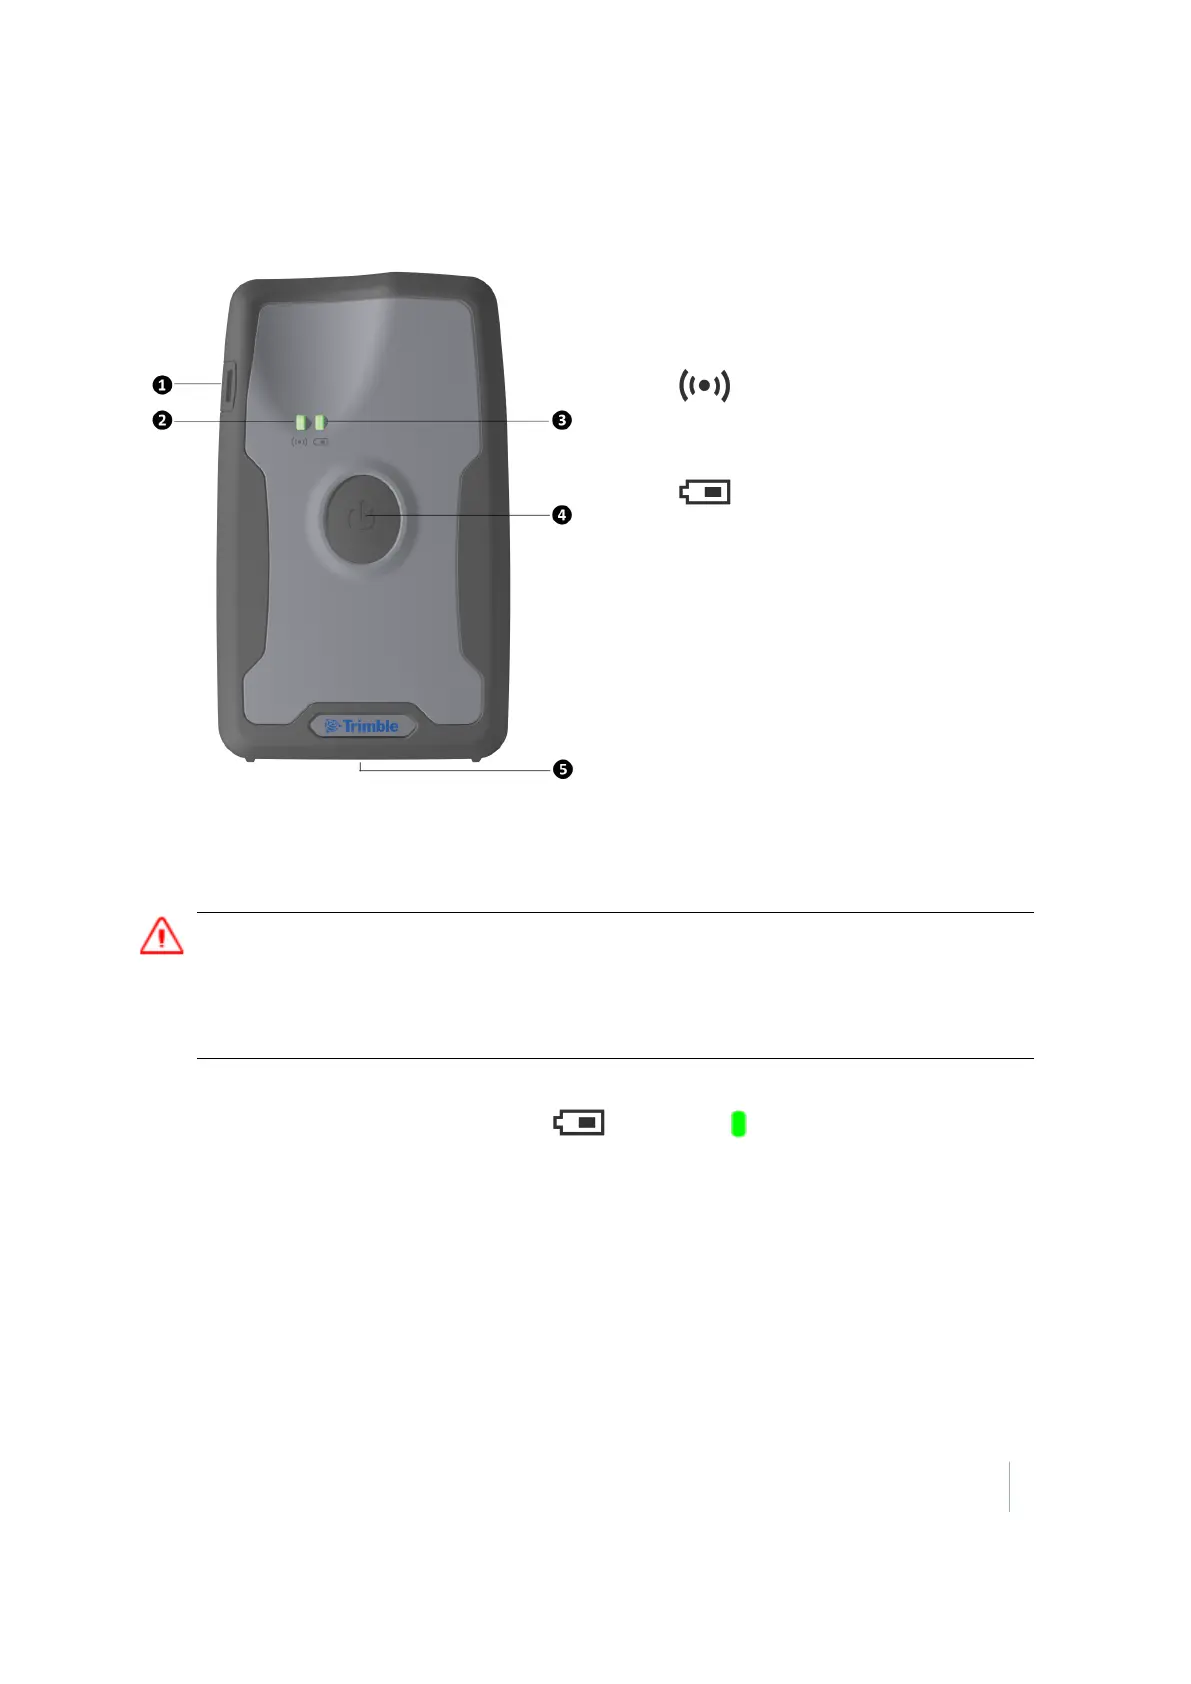
❶ External antenna connector
❷ LED:Bluetooth and GNSS
❸ Power LED
❹ Power button / Bluetooth pairing
button
❺ Mini USB/ charger connection (rear of
device)
Charging the battery
WARNING – Charge and use the rechargeable Lithium-ion battery only in strict accordance with the instructions.
To prevent injury or damage:
– Discontinue charging a battery that gives off extreme heat or a burning odor.
– Never attempt to remove, replace, or repair the battery yourself.
– If the battery requires attention, send the receiver to an authorized Trimble Service Center.
Before using a new R1 GNSSreceiver, or one which has been unused for months, charge the device
with the supplied charger until the Power LED is solid green .
To charge the internal battery, do one of the following:
l Connect the R1 GNSSreceiver to your laptop or office computer using the USBcable supplied
with the product.
l Connect the R1 GNSSreceiver to mains power using the USBcable and internation adaptor kit
supplied with the product.
Charging the receiver's battery using the Trimble-supplied charger connected to mains power can
take up to 5 hours. Charging from a laptop or desktop computer or using an unapproved charger
can take longer.
Trimble R1 GNSS Receiver User Guide 12