Thermostatic shower pole
10
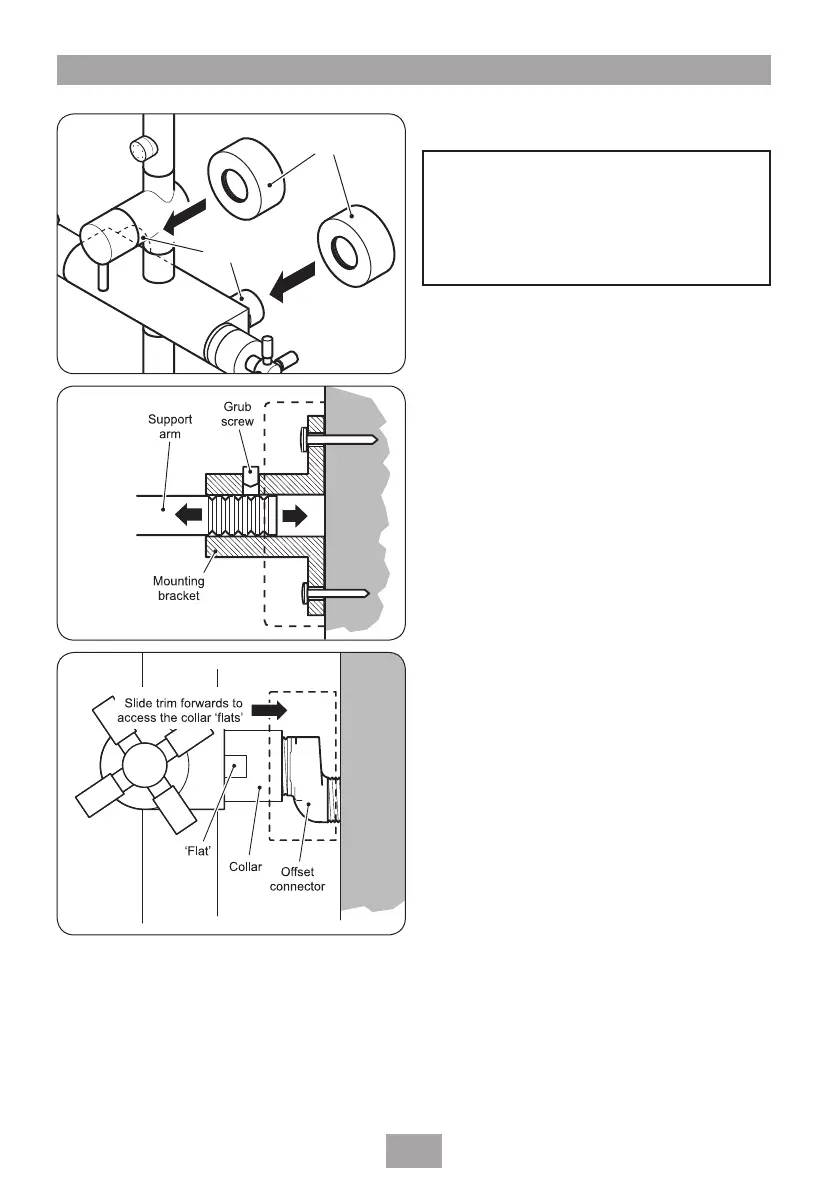
Fitting the shower pole
Slide the cover trims onto the shower pole
collars (fig.16).
Make sure the sealing washers are in place in
the shower pole inlets and that the mounting
supports are aligned correctly.
Carefully locate the shower pole onto the
dogleg connectors and insert the support arms
into the wall brackets. Tighten the mounting
bracket grub screws to secure temporarily the
shower pole.
Note: The support arms allow for a small
amount of depth adjustment (fig.17).
Slide the cover trims forwards up to the wall
surface to allow access to the 'flats' on the inlet
collars (fig.18). Tighten the collars to secure
the shower pole to the dogleg connectors.
Loosen the mounting bracket grub screws, make
any final adjustments and tighten once more to
secure the shower pole to the wall.
Fitting the flexible hose
Fit the flexible hose to the outlet on the
underside of the mixer unit, making sure that
the sealing washers supplied are inserted into
each end of the hose cone (fig.19).
LEAK TESTING
Fit the hose to the outlet and direct it to waste.
Open the supplies and test for leaks in the valve
connections. Remedy any leaks if necessary.
Fig.16
Fig.17
Fig.18
WARNING!
Due to the weight of the shower
pole, it is advisable to have a second
person support the unit during the
fitting procedure.
 Loading...