10
ASSEMBLY STEPS
1. PREPARATION
• Before assembling make sure that you will have enough space around the item.
• Use the supplied parts and hardware for the assembly.
• Before assembling, please check whether all the required parts have been supplied as per the exploded
drawing on the opposite page.
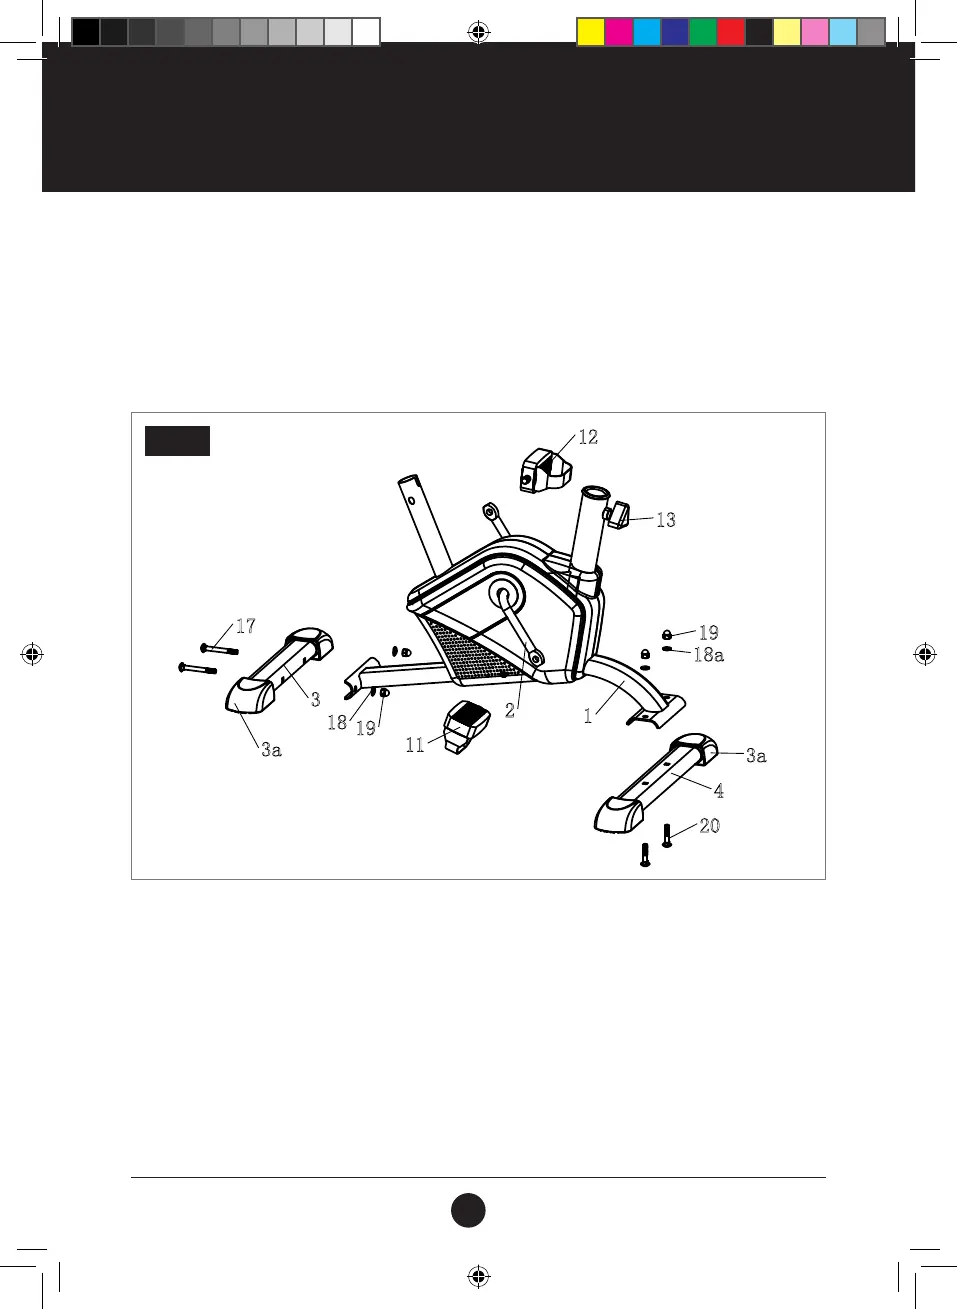
STEP 1: FRONT AND REAR STABILISER ASSEMBLY
Connect Front Base (3) to the Main Frame (1) using 2 Bolts (M8 x 70) (17), 2 Arc Washers (Ø8) (18) and
2 Nuts (M8) (19). Connect Rear Base (4) to the Main Frame (1) using 2 Bolts (M8 x 40) (20), 2 Washers (Ø8) (18)
and 2 Nuts (M8) (19).
Secure the Right Pedal (12) and Left Pedal (11) to the Crank (2).
Note: Left Pedal (11) is marked with an “L” and the Right Pedal (12) is marked with an “R”.
STEP 1
18a
1
2
11
12
13
19
18
3a
3
17
20
4
3a
19
#19M05T013 Apex 100 Bike UM V2.indd 10 15/07/2019 14:05
 Loading...