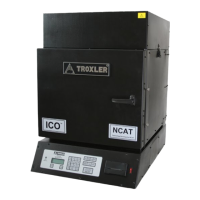
Turning the PaveTracker Plus On
To turn on the PaveTracker Plus, press the power switch
located on the front panel next to the serial port (see Figure
1–1).
NOTE
To turn off the PaveTracker Plus, press and hold the power
switch for two seconds.
The gauge displays the model number, battery voltage,
software version, and unit serial number as shown below:
Press the 〈ENTER/START〉 key to continue. The software
performs two tests to ensure that the gauge is working
properly. The gauge first performs a brief self-test, followed
by a test of the display.
Following the test period, the gauge displays the Ready
screen:
The operator can access any gauge function from the Ready
screen. On the first line, the Ready screen displays whether a
density offset (see page 3–3) or mix calibration (see page 3–6)
is enabled.
When the GPS option is installed, enabled, and receiving
satellite signals, the symbol g appears in the upper-right of
the display, as shown above.
Bat t er y Vol t s: X. X
V#. ## SN: ###
Pr ess <ENTER>
- Ready - Of f set : YES g
mm/ dd/ yyyy hh: mm AM
Pr j : PROJ ECT NAME
Mode: Cont i nuous