CHAPTER 2: ASSEMBLY INSTRUCTIONS
Truefitness.com / 800.426.6570 / 636.272.7100 12
TREADMILL ASSEMBLY STEPS (continued):
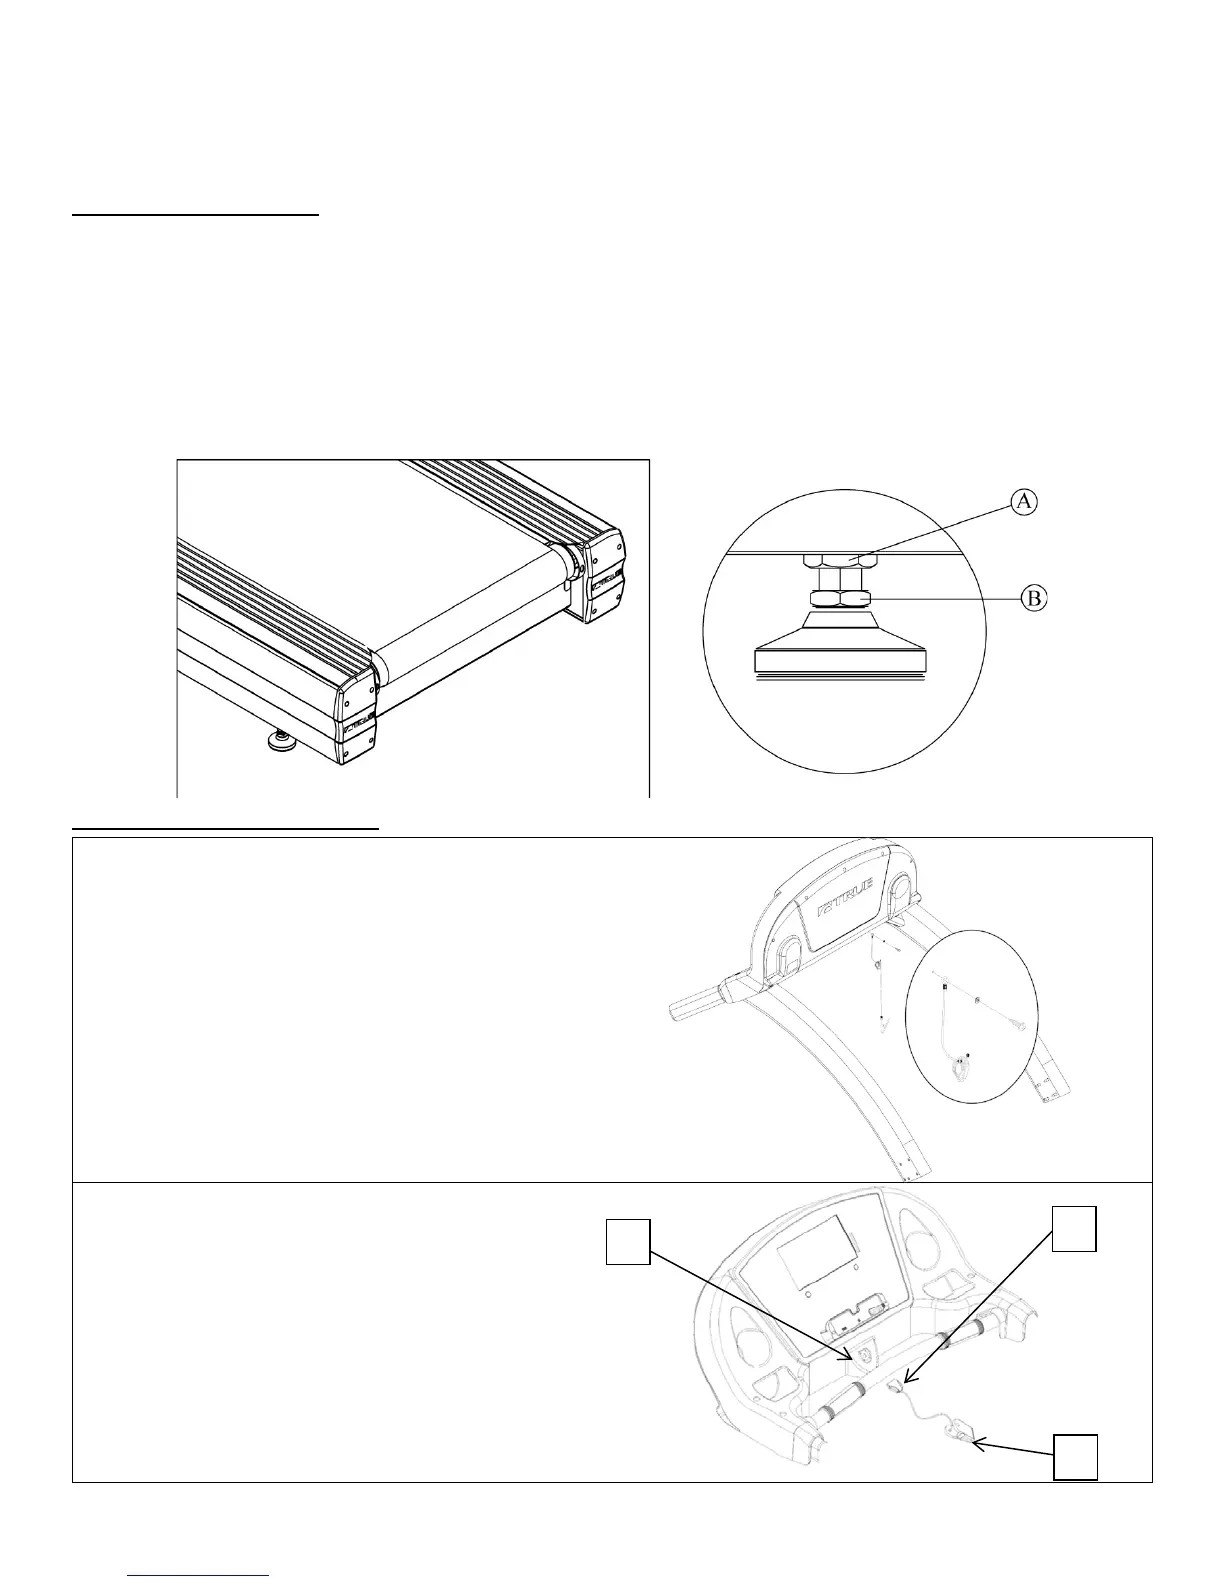
9) Rear Foot Leveling:
a) Ensure treadmill incline rack wheels and rear feet are resting on the floor and not on cardboard,
packaging, etc.
b) Using the pliers to loosen the wing-nut (A) counter-clockwise.
c) Using a level or estimating by sight, turn section (B) of foot counter-clockwise to a proper height.
d) Tighten wing-nut (A) to secure (B) section.
NOTE: Same adjustment applies to both sides.
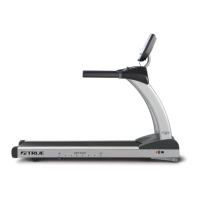
10) Safety Key Attachment:
Read the entire Owner’s Manual before
attempting any workout.
CAUTION: Remove Safety Key from treadmill after
each use to
a) Attach the safety key on the back of console.
NOTE: The bolt and washer are pre-installed. Remove
these parts and re-install as shown.
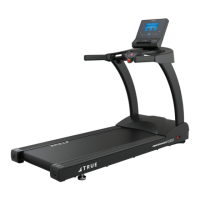
b)
Attach Safety Key magnet (
) to front of
console (B) as shown below.
c) Attach clip (C) to clothing at the beginning of
any workout.