CHAPTER 2: ASSEMBLY GUIDE
Truetness.com / 800.426.6570 / 636.272.7100 17 of 62
TREADMILL ASSEMBLY STEPS:
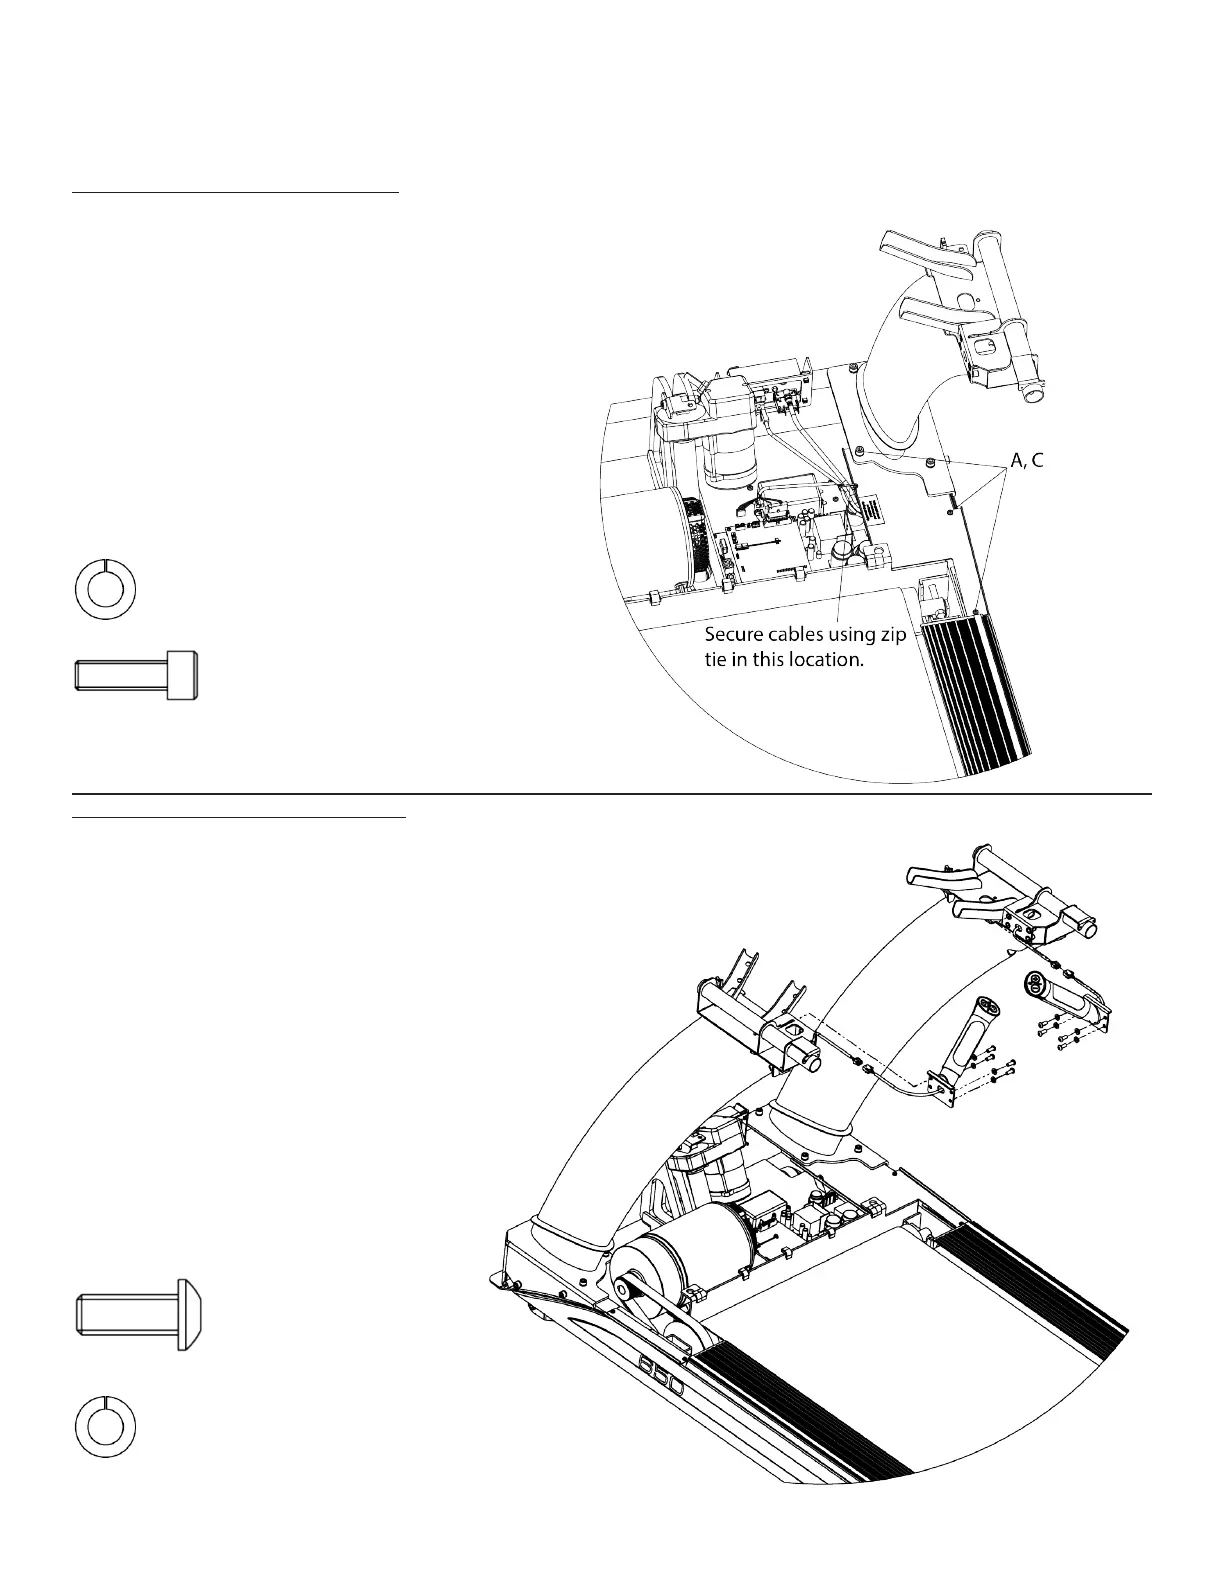
Step 4 Drip Guard Assembly:
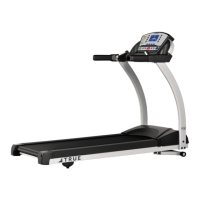
Step 5 Hand Grip Assemblies:
a) Screw the M5 screws that were
removed earlier and a M8 x 25 bolt (A)
with a M8 split lock washer (C).
b) Secure all four right pedestal cables
to the drip guard assembly using the zip
tie in the location shown.
Note: Do not operate treadmill with
drip guard assembly removed.
Required Hardware:
Qty. 1 Lock Washer M8
Qty 1 Bolt M8 x 25
a) Connect the wire coming from
the bottom of the Contact Heart
Rate (CHR) grip assembly to the
corresponding wire located in the
pedestal arm as shown.
b) Secure each CHR grip assembly to
the pedestal arm with four screws and
four lock washers.
Note: Conrm each grip assembly is
assembled on the correct pedestal using
the le and right orientation stickers on
them.
Required hardware:
8 Bolt ¼”-20 x ⅝”
8 Lock Washer ¼”