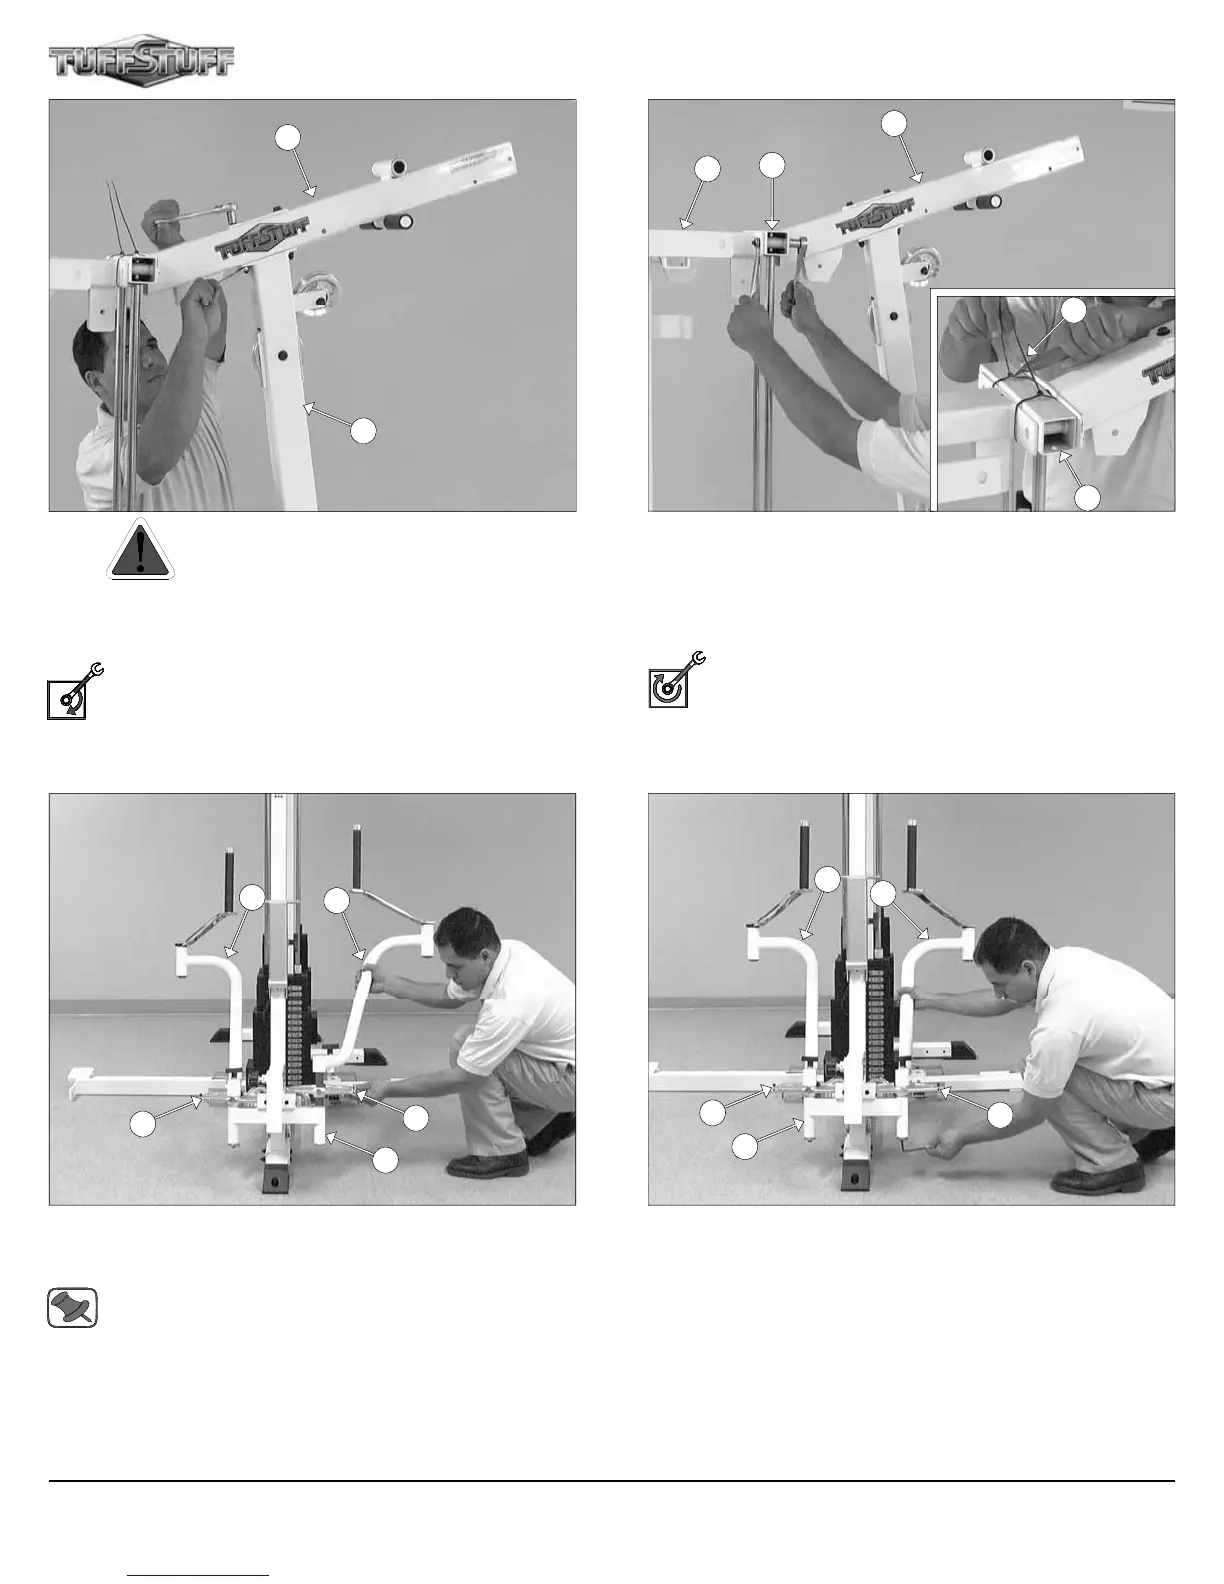
FIG. 17 Caution: It is strongly recommended to use another
person in assisting with this assembly.
Attach the Top Pulley Assembly (#49) to the Front Upright (#16)
using two Hex Head Cap Screws 3/8-16 X 4 1/4 (#104), four Flat
Washers SAE 3/8” (#93), and two Nylon Insert Lock Nuts 3/8-16
(#119).
Loosely Fasten: Do not completely fasten this hardware
assembly at this time.
FIG. 19 Insert the Left Pec Dec Arm (#35) along with the Alumi-
num Cam Plate (#60) into the receptacle of the Front Upright (#16).
Repeat the same procedure for the Right Pec Dec Arm (#36).
Note: It is recommended to grease both axles of the Left and
Right Pec Dec Arms (#35, #36) with multi-purpose grease prior
to assembling.
FIG. 18 Using a utility knife, remove the two Plastic Ties (#127) from
the Press Bar Station Guide Rod Retainer (#18).
Next, affix the Top Pulley Assembly (#49) to the Press Bar Station
Guide Rod Retainer (#18) and the Weight Stack Frame (#53) using
two Hex Head Cap Screws 3/8-16 X 3 1/4 (#101), four Flat Washers
SAE 3/8” (#93) and two Nylon Insert Lock Nuts 3/8-16 (#119).
Fully Fasten: Proceed to align and fully fasten this hardware
assembly and the previous assemblies that were left loosely
fastened. (Assemblies described in FIG. 14 and FIG. 17).
FIG. 20 Secure the Left Pec Dec Arm (#35) into place using one
Button Head Socket Cap Screw 3/8-16 X 1 (#71), one Split Lock
Washer 3/8” (#152), and one Chrome Washer 3/8 X 1 1/2 (#74).
Repeat the same procedure for the Right Pec Dec Arm (#36).
49
16
127
49
18
53
36
35
60
60
16
15
16
8
119
119
7
18
Apollo Modular Gym System (Base Unit)