8
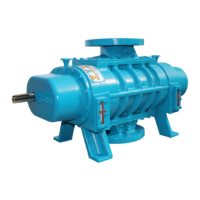
T650/T950H ASSEMBLY INSTRUCTIONS — STAGE ONE
The numbers in parentheses correspond with the drawing on the facing page.
1. PREPARE END PLATES (5).
2. INSTALL PLUMBING FOR END PLATE (FROM STAGE TWO DRAWINGS (21)(22)(23)(24)(25))
2.1. Install elbows and cap screws.
2.2. Install sight glasses and plugs.
3. PREPARE HOUSING
3.1. Install plugs.
4. PREPARE ROTORS
4.1. Hone lobes.
4.2. Sand.
5. POSITION/INSTALL ROTORS
5.1. Place male rotor (4) to right side of fixture (1) plate so that it aligns with the drive shaft.
5.2. Place female rotor (3) in place.
5.3. Make sure shorter shoulder on each rotor is facing upward.
5.4. Place endplate (5) over rotors.
5.5. TAKE A MEASURE… Check with feeler gauge to ensure that rotors are flush with end cover.
5.6. TAKE A MEASURE… Seal shoulder must be greater than endplate bore shoulder by .005+.
5.7. TAKE A MEASURE… Measure step from end of shaft to each side of bearing sleeve and each side of bearing
surface and do calculation to find mean. Shim size is to be determined for both male rotor and female rotor.
Average = (left + right)/2
Shim Size = 0.003-average
6. INSTALL SEALS, BEARINGS AND SHIMS – END PLATE
6.1. Oil rotor shafts and inner race (all components).
6.2. Load O-rings into seal carrier
6.3. Press seals (6) into place (RED) right seal male rotor: (BLUE) left seal female rotor.
6.4. TAKE A MEASURE… Seal shoulder must be less than or no greater than .001 above step in end plate.
6.5. Oil and install the roller bearings (7) flange down; it is best to install one side at a time. Start with either male or
female. NOTE: It is very important that the bearings are started straight!
6.6. Install shims (8) – if required, adjust height as calculated previous.
6.7. Install dummy bearing – dummy bearing should be approximately 0.005 above endplate.
6.8. Install bearing retainer and torque bolts.
6.9. TAKE A MEASURE… measure clearances between rotor and end plate. Clearances should be between 0.0015
and 0.0020.
6.10. If clearances are out of specification, then remove retainer and dummy bearings and add or remove shims. Recheck
clearances between rotor and end plate as required. Repeat until within specification.
6.11. Install ball bearings (9). First install ball bearing race to rotor, then add ball bearing components with numbers and
asterisk facing up. NOTE: The ball bearings should be slightly above the endplate.
6.12. Install retainers (10) with cap screws (11) to hold in place.
7. INSTALL DRIVEN GEAR
7.1 Install gear spacers (12) (13).
7.2. Prep keyway by beveling the edges to allow key to fit better in shaft
7.3. Install keys (14). Dress key with stone. DO NOT USE A STEEL HAMMER TO DRIVE KEY ONTO SHAFT!!
PRESS THE KEY INTO THE SHAFT.
7.4. Install gear (15) onto shaft in press, (pre-lube shaft) insure gear is pressed flush with shoulder of shaft!!!
7.5. TAKE A MEASURE… measure rotor clearances and record. It is critical that endplate to rotor clearance is between
0.0015 and 0.0020.
Assembly Instructions are continued on page 10.