TFP610
Page 5 of 28
Installation
The TYCO
Specific Application Attic
Sprinklers for Protecting Attics must
be installed in accordance with this
section.
NOTICE
Do not install any bulb-type sprin-
kler if the bulb is cracked or there is
a loss of liquid from the bulb. With the
sprinkler held horizontally, a small air
bubble should be present. The diam-
eter of the air bubble is approximately
1/16 inch (1,6 mm) for the 155°F (68°C)
and 3/32 inch (2,4 mm) for the 200°F
(93°C) temperature ratings.
A leak-tight 1/2 inch NPT sprinkler
joint should be obtained by applying a
minimum-to-maximum torque of 7 to
14 ft.lbs. (9,5 to 19,0 Nm). Higher lev-
els of torque can distort the sprinkler
inlet with consequent leakage or im-
pairment of the sprinkler.
Step 1. Sprinklers must be oriented
correctly as follows:
• Model BB Sprinklers are to be in-
stalled in the upright vertical po-
sition with the flow arrows on the
deflector pointing down the two op-
posing slopes.
• Model SD Sprinklers are to be in-
stalled in the upright vertical posi-
tion with the flow direction arrow
on the deflector pointing down the
slope.
• The Model HIP Sprinklers are to be
installed with the deflector at the
top and with the sprinkler centerline
perpendicular to the ridge of the hip
roof and with the flow direction ar-
rows on the deflector pointing down
the two opposing slopes. (Unlike the
Model BB and Model SD, the Model
HIP is installed angled so that its
deflector is parallel with the slope of
the hip ridgeline.)
• The Model AP Sprinklers are to be
installed in the upright position with
the deflector parallel to the roof
slope. There are no flow arrows on
the deflector to consider; however,
a good piping practice is to position
all the Model AP Sprinklers so that
their frame arms are in the same
direction.
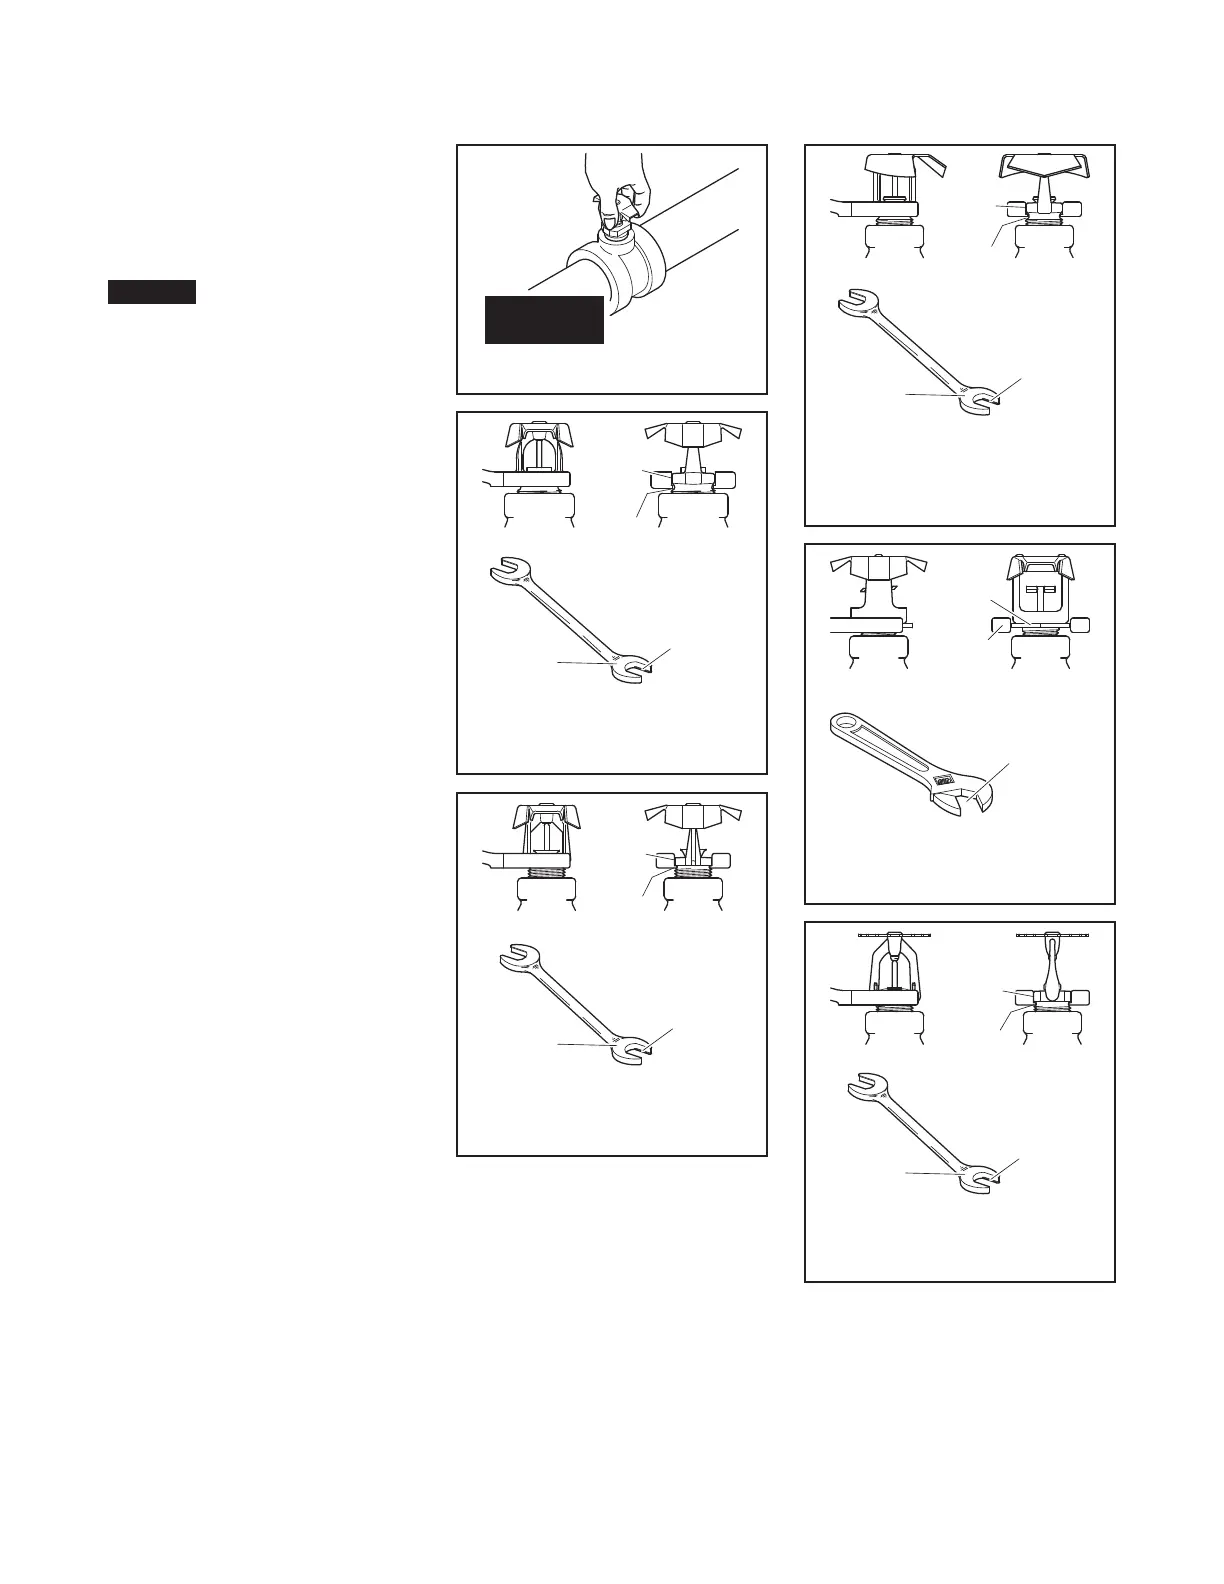
Step 2. With pipe thread sealant ap-
plied to the pipe threads, hand-tighten
the sprinkler into the sprinkler fitting.
Note: With reference to Figure G,
do not grasp the sprinkler by the
deflector.
Step 3. Wrench-tighten the sprinkler
using only the wrenches shown in
Figures H thru M. Wrenches are only
to be applied to the sprinkler wrench
flats or wrench hex, as applicable.
WRENCH
FLATS
USE END
MARKED
WRENCH
ENGAGE
SPRINKLER
THREAD RELIEF
WITH WRENCH
JAW FLANGES
WRENCH
FLATS
USE END
MARKED
WRENCH
ENGAGE
SPRINKLER
THREAD RELIEF
WITH WRENCH
JAW FLANGES
WRENCH
HEX
ADJUST
WRENCH JAW
TO FIT WRENCH
HEX
APPLY
WRENCH
TO WRENCH
HEX ONLY
DO NOT
WRENCH
FLATS
USE END
MARKED
WRENCH
ENGAGE
SPRINKLER
THREAD RELIEF
WITH WRENCH
JAW FLANGES
WRENCH
FLATS
USE END
MARKED
WRENCH
ENGAGE
SPRINKLER
THREAD RELIEF
WITH WRENCH
JAW FLANGES
FIGURE K
W-TYPE 20
SPRINKLER WRENCH
For Use with
HIP (K=5.6) Sprinklers
FIGURE L
ADJUSTABLE WRENCH
For Use with BB (K=5.6) &
SD (K=5.6) Sprinklers
FIGURE M
W-TYPE 6 SPRINKLER WRENCH
For Use with
AP (K=4.2 & 5.6) Sprinklers
FIGURE J
W-TYPE 6 SPRINKLER WRENCH
For Use with
BB (K=4.2) Sprinklers
FIGURE H
W-TYPE 3 SPRINKLER WRENCH
For Use with
BB (K=8.0) Sprinklers
FIGURE G
DO NOT GRASP DEFLECTOR