TFP645
Page 5 of 8
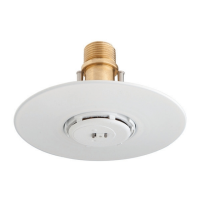
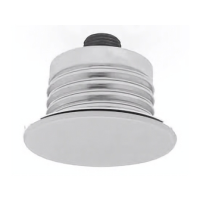
Step 10. Assemble Escutcheon onto
sprinkler body. Ensure Escutcheon is
flush against sprinkler body mating
surface. Apply sealant to external
threads of thread extension.
NOTICE
Ensure sealant avoids contact with
sprinkler guide pins and internal water-
way of thread extension. Failure to do
so may result in equipment failure.
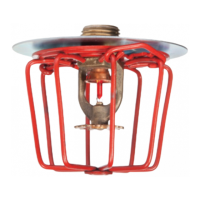
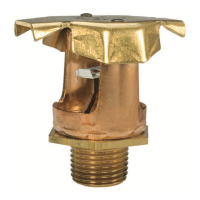
Step 7. Insert W-Type 28 Wrench (Ref.
Figure 3) into installation cup cavity,
fully seating and engaging internal
cup ribs. Applying 27 mm hex wrench
or 1/2 inch drive, unscrew Installa-
tion Cup from sprinkler fitting. Ensure
O-ring is removed with Installation Cup
from sprinkler fitting outlet and sprin-
kler cavity.
Note: Apply ceiling finish or coating before
proceeding to sprinkler installation in
remaining steps.
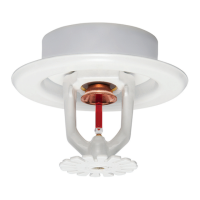
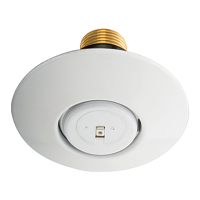
Step 11. Engage Sprinkler by W-Type
25 Wrench (Ref. Figure 2). Hand-tighten
(19 Nm [14 ft.- lbs.] Maximum) assem-
bly into Adapter. Ensure Escutcheon is
flush against ceiling mounting surface
and Sprinkler is oriented as intended
(refer to Figures 1 and 2 for orientation
details).
Note: W-Type 25 Wrench engages
Sprinkler in only one way. When Sprinkler
is engaged by Wrench, flat on Wrench is
parallel to sprinkler deflector guide pins,
indicating during installation relative
sprinkler deflector orientation.
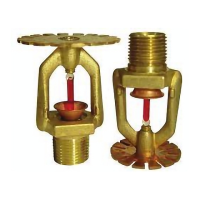
Step 8. Apply sealant (not included
with sprinkler kit) to external threads
of adapter. Hand-tighten Adapter into
sprinkler fitting. Ensure adapter shoul-
der is flush against face of fitting.
NOTICE
Ensure sealant avoids contact with
internal threads of adapter. Failure to
do so may prevent proper assembly of
remaining components.
Step 12. Remove W-Type 25 Wrench.
Step 9. Apply sealant to external
threads of sprinkler inlet. With hex end
of thread extension oriented toward
sprinkler inlet, hand-tighten onto sprin-
kler threads until recess is seated on
sprinkler thread shoulder.
NOTICE
Ensure sealant avoids contact with
sprinkler guide pins and internal water-
way of sprinkler inlet. Failure to do so
may result in equipment failure.
Step 11
Step 10
Step 12
Step 9Step 7 Step 8