EasyManuals Logo

U-Line ICE-MAKER User Manual

U-Line ICE-MAKER
56 pages
To Next Page IconTo Next Page
To Previous Page IconTo Previous Page
Page #17 background imageLoading...
Page #17 background image
15
NOTE
After completing the installation, turn on the water and
recheck water connection for leaks. Apply additional tight-
ening if needed. Do not use thread sealing compound or
tape.
4. Plug in the power cord.
5. Gently push the unit into position.
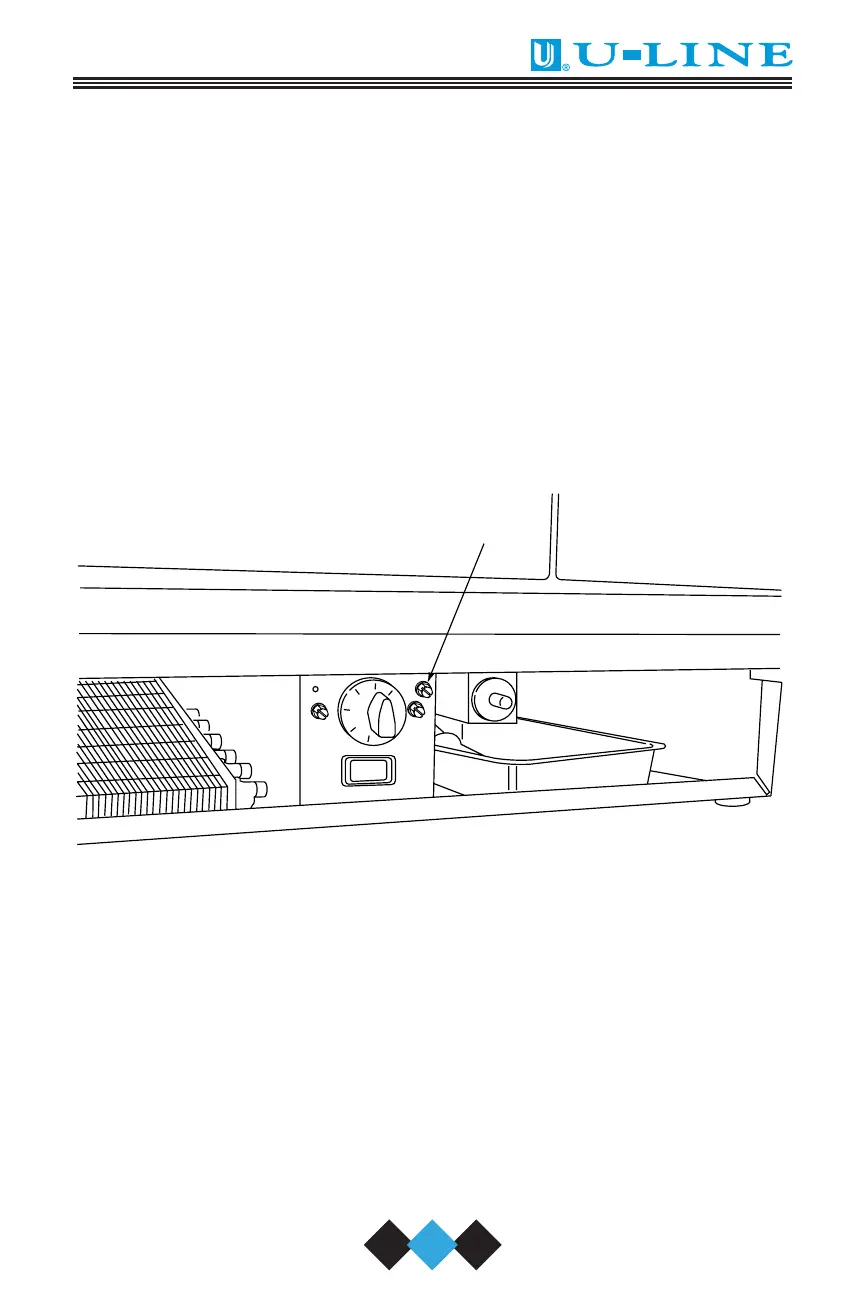
GRILLE INSTALLATION
1. With a standard blade screwdriver (or 1/4” nutdriver), remove
the grille screw to attach the grille (Figure 11).
Figure 11
2. Remove the control knob by pulling it toward you.
3. Identify the small screw hole located toward the top of the
middle recessed section of the grille.
UL106
GRILLE SCREW
30035 User Manual Body.qxd 1/5/05 8:08 AM Page 15

Questions and Answers:

Question and Answer IconNeed help?

Do you have a question about the U-Line ICE-MAKER and is the answer not in the manual?

U-Line ICE-MAKER Specifications

General IconGeneral
Ice ShapeCrescent
Power SourceElectric
Voltage115 V
Installation TypeFreestanding or Built-In
FinishStainless steel
Control TypeDigital
Water SupplyDirect Water Line Connection
MaterialStainless Steel
Warranty1 year parts and labor

Related product manuals