38
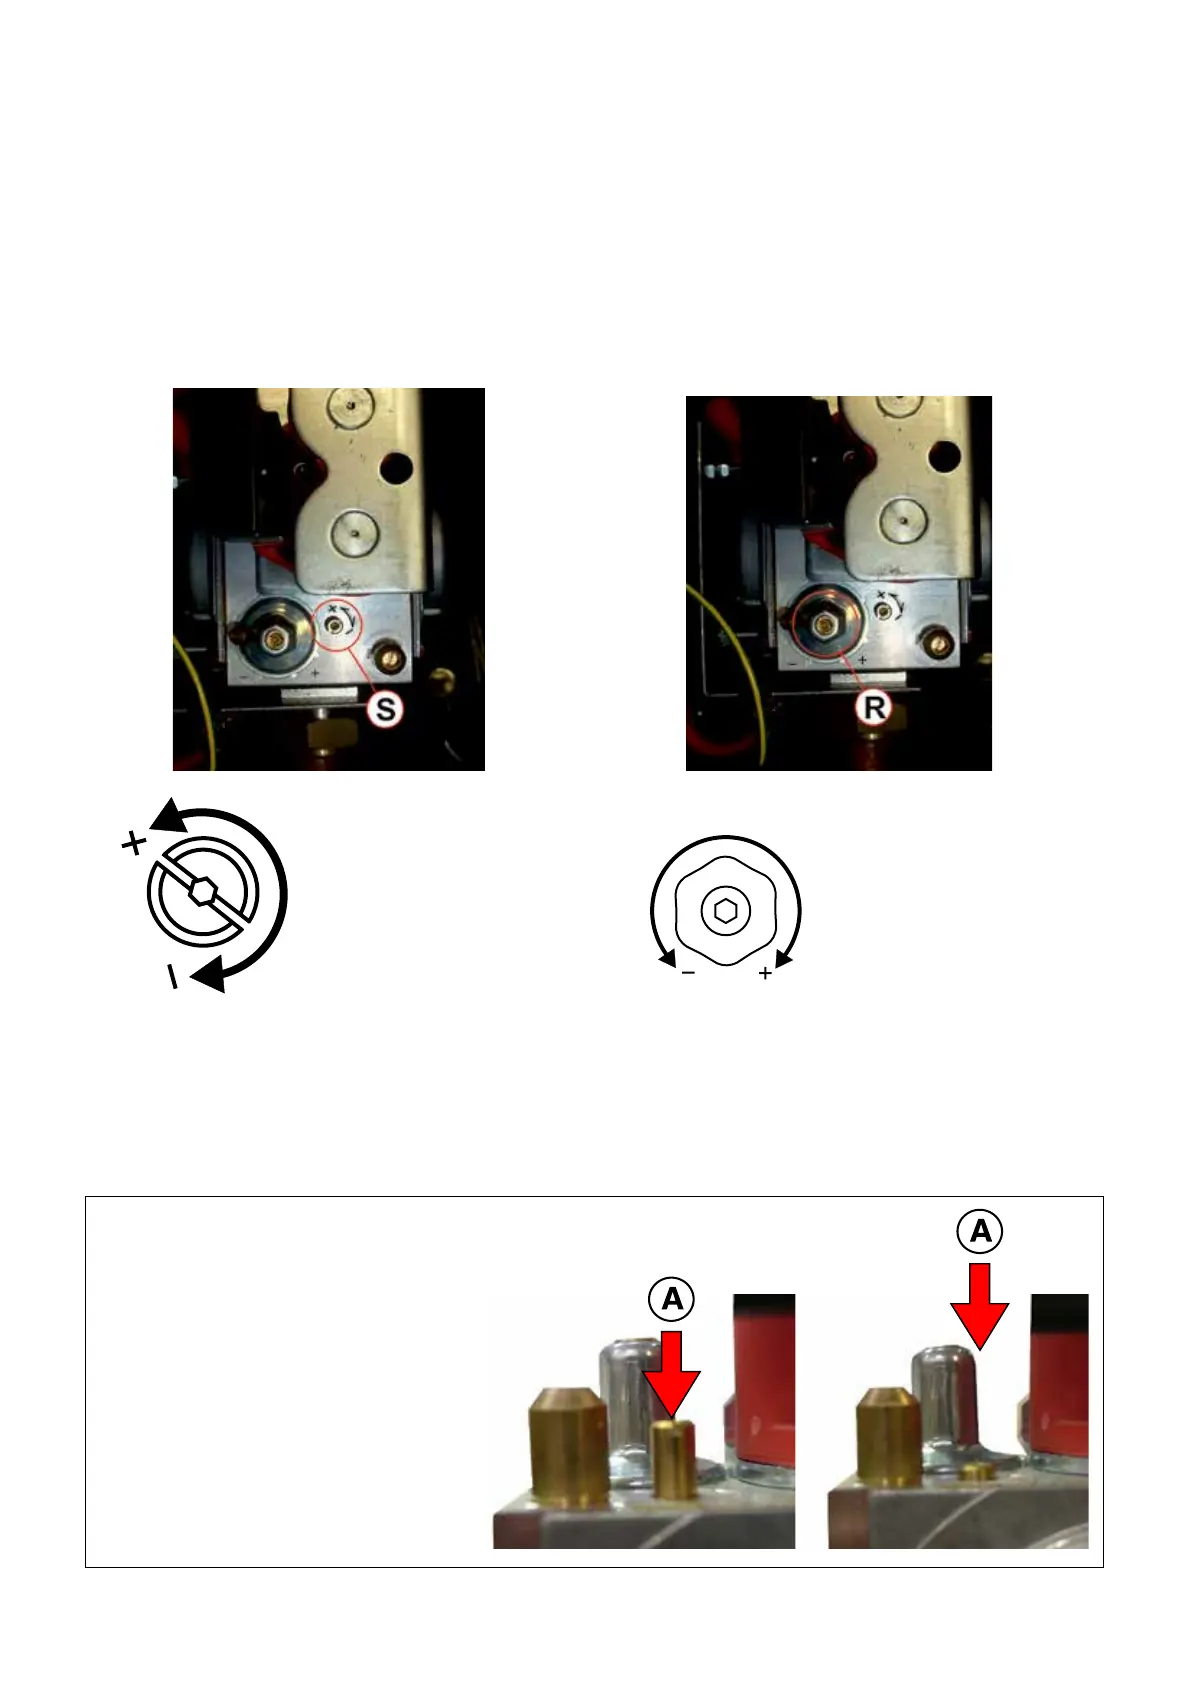
(S)
ADJUSTMENT SCREW
MAXIMUM OUTPUT
(R)
ADJUSTMENT SCREW
MINIMUM OUTPUT
- Remove the cap and insert the CO2 analysis sensor in the
ue gas sample point of the intake/exhaust terminal, see
chap. 3.12.2.
2) Minimum output adjustment
- Operate the boiler in “calibration” mode at MINIMUM OUTPUT
(see 3.12.1)
- Once the burner is on, check that the “MINIMUM” CO2 output
value corresponds to what is indicated in the “NOZZLES -
PRESSURE” table.
- If necessary, adjust the value by turning (with a 2.5 mm hex
key) screw “R” CLOCKWISE to increase it, ANTICLOCK-
WISE to decrease it
(see NOZZLES-CAPACITY-PRESSURE table).
1) Maximum output adjustment
- Operate the boiler in “calibration” mode at MAXIMUM OUT-
PUT (see 3.12.1)
- Once the burner is on, check
that the “MAXIMUM” CO2 output value corresponds to that
indicated in the “NOZZLES - PRESSURE” table.
- If necessary, adjust the value by turning the ‘’S’’ adjustment
screw CLOCKWISE to decrease it and ANTICLOCKWISE
to increase it
(see NOZZLES-CAPACITY-PRESSURE table).
In case of replacement of the Gas valve or
ignition diculties:
Tighten the maximum adjustment screw ”A”
clockwise up to the stop, then loosen by 7 turns.
Check the boiler ignition, in case of a block,
loosen the screw “A” again by one turn, then try
igniting it again. If the boiler still stops running,
perform the above operations again until the
boiler ignites.
Now adjust the burner as previously illustrated.