MSC-400 Reference Manual
Rev 4
53
3. In the VALUE BLOCK, set the TYPE of command to be issued in the macro using the PULL-DOWN.
(ex. ON).
4. In the TARGET BLOCK, select MASTER/SLAVE as appropriate, using the pull-down. (ex. Master)
5. In the TARGET BLOCK, select RELAY PORT 1 or 2 using the pull-down. (ex. Relay 1)
6. To TEST the command, with the PC connected to the USB1 PORT on the MSC-400, click the TEST
BUTTON. There should be an audile ‘click’ as the relay opens or closes in test mode.
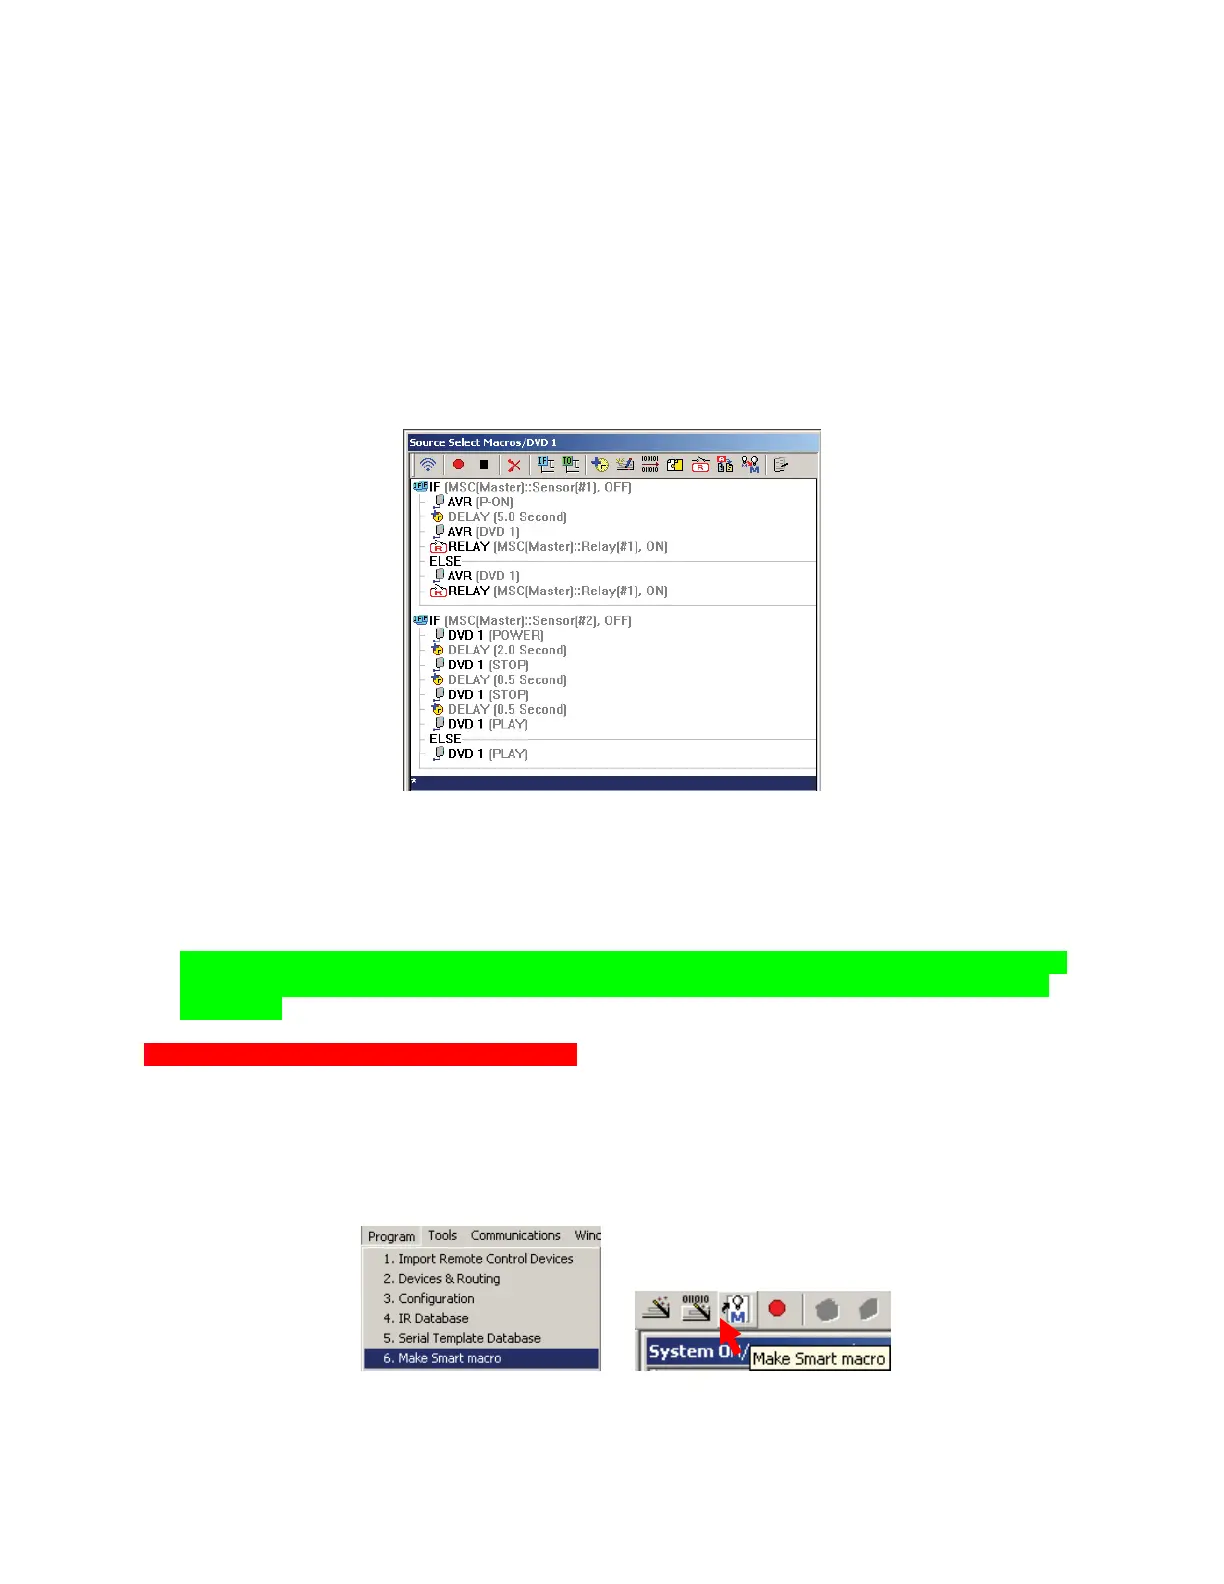
7. Click OK. The command will appear at the bottom of the SMART MACRO FUNCTION LIST.
8. Drag the RELAY COMMAND to the appropriate POSITION in the SMART MACRO in the IF
STATEMENT. DVD1 Source Select Smart Macro with Embedded Relay Commands
9. Click the RELAY COMMAND to highlight it. COPY and PASTE the command, then drag it to the
appropriate position in the ELSE STATEMENT. This way the sub will activate regardless of system
status.
DVD 1 Source Select Smart Macro With Embedded Relay Commands
10. To TEST the edited macro, SAVE the PROJECT and then DOWNLOAD to the MSC-400.
11. If already programmed with a RF TRIGGER for DVD 1 SOURCE SELECT, press the DVD 1
BUTTON on the remote. If not see section: PROGRAMMING MACRO TRIGGERS TO THE
REMOTE. Pg #
TIP - Some additional tweaking of the macro, such as adding some delay or a mute command
while the sub comes on, may be desirable. Each system and set of components will behave
differently.
Creating a Macro Group for Relay Commands
In order to control the MSC-400 RELAYS directly from the REMOTE, for functions such as opening and
closing drapes, a MACRO GROUP will need to be setup to create the RF TRIGGERS to activate the
RELAYS from the REMOTE. To create a Macro Group for Relay Commands:
1. To open the MAKE SMART MACRO WINDOW do either of:
a) In the MSC-EDITOR MENU BAR, click PROGRAM, then click MAKE SMART MACRO.
b) In the MSC EDITOR TOOL BAR, click the MAKE SMART MACRO ICON.
1a
1b
c) The MAKE SMART MACRO WINDOW will appear. Relay Macro Group
8
9