UP Plus 2 3D Printer User Manual v 2013.10.24
the gap.
You will most likely need to repeat the process 5-9 a few times going in a clockwise manner. Each
time reducing the amount of turn on the screws.
Loosen a screw and the related corner of platform will rise. Tighten, or loosen, the screws until
you have the same gap between the nozzle and the platform at all four corners of platform.
7. Platform height (Automatic or Manual)
There are two ways of setting the platform height Automatic and Manual on the UP Plus 2. The
easiest method is to use the Automatic method so skip the manual method.
7.1 Automatic Platform Height Setup
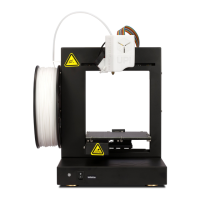
1. Plug in the black calibration cable into the back of the
platform height sensor and the other end into the cali-
bration port on the back of the printer.
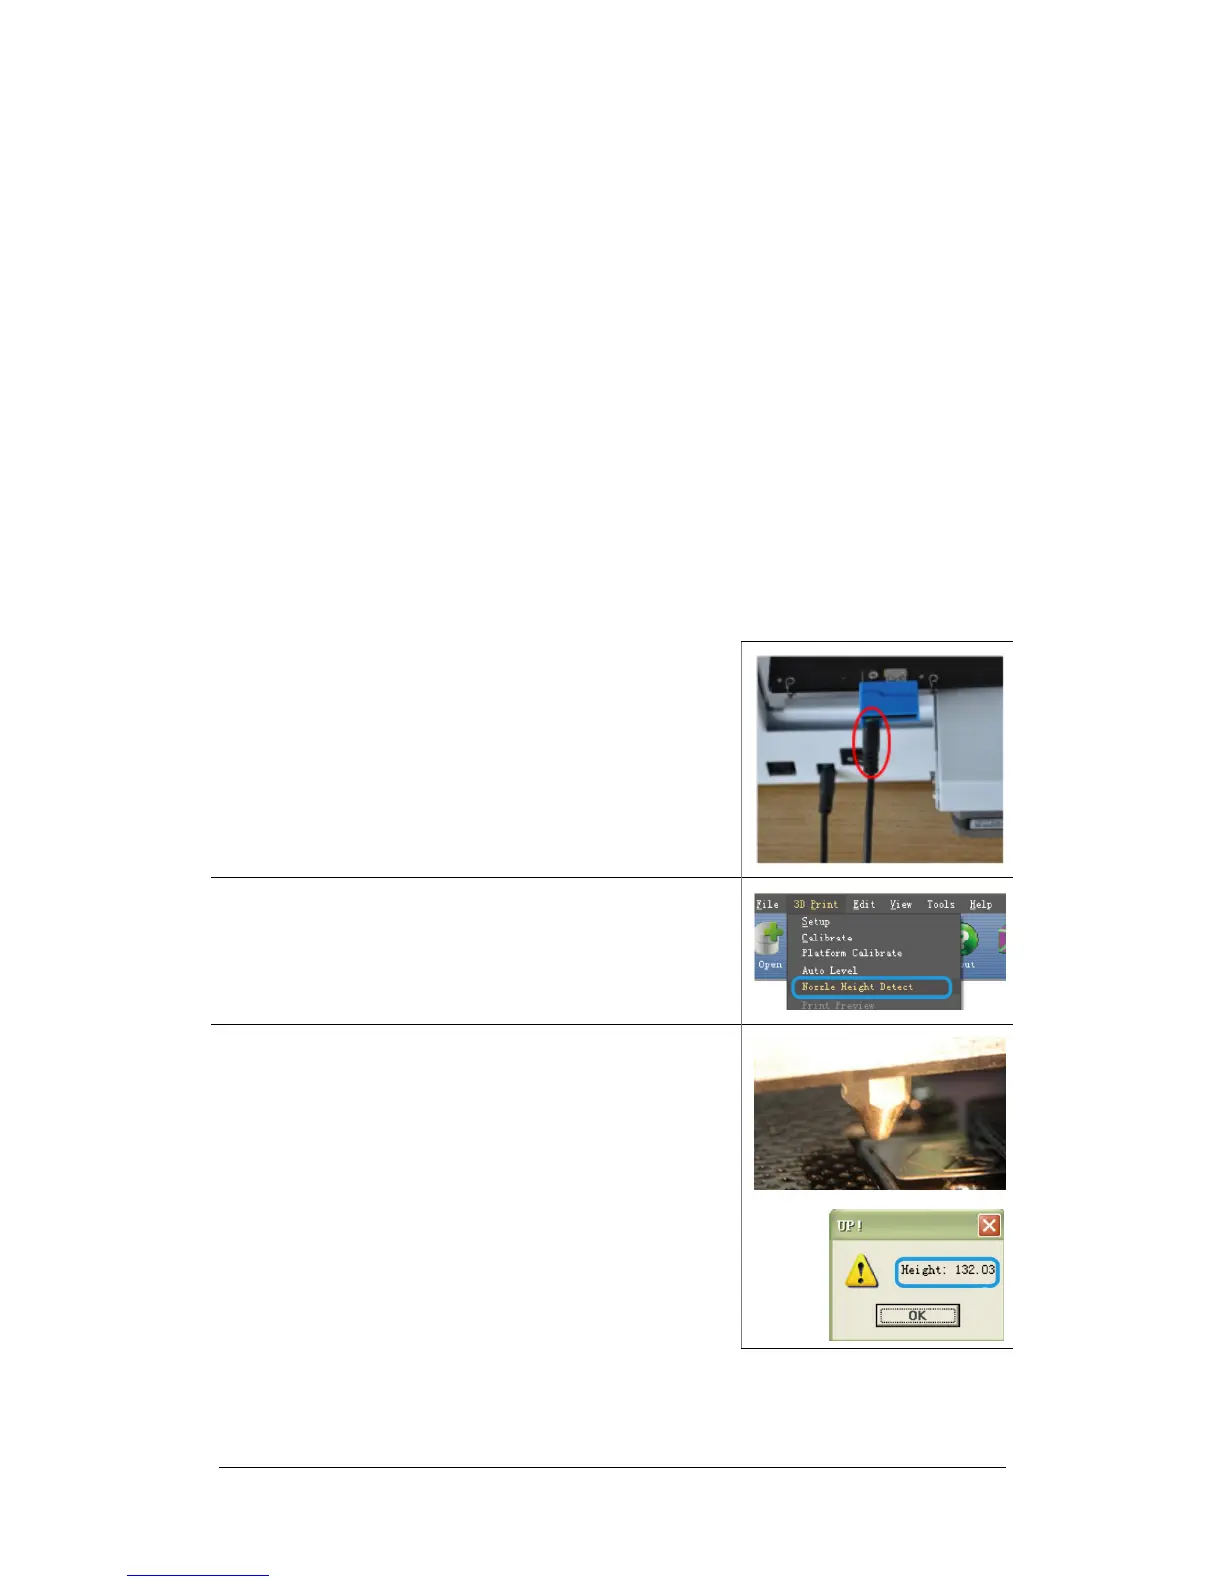
2. In the software, click 3D Print / Nozzle Height Detect.
(if “Nozzle Height Detect” is greyed out check the
connections)
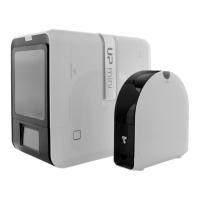
3. The table will rise up and the nozzle will touch the sil-
ver switch in order to automatically set the height.
(the value will be around +/- 135mm)