© UPLIFT Desk • 800-349-3839 • 512-614-3152 • info@upliftdesk.com • upliftdesk.com
10
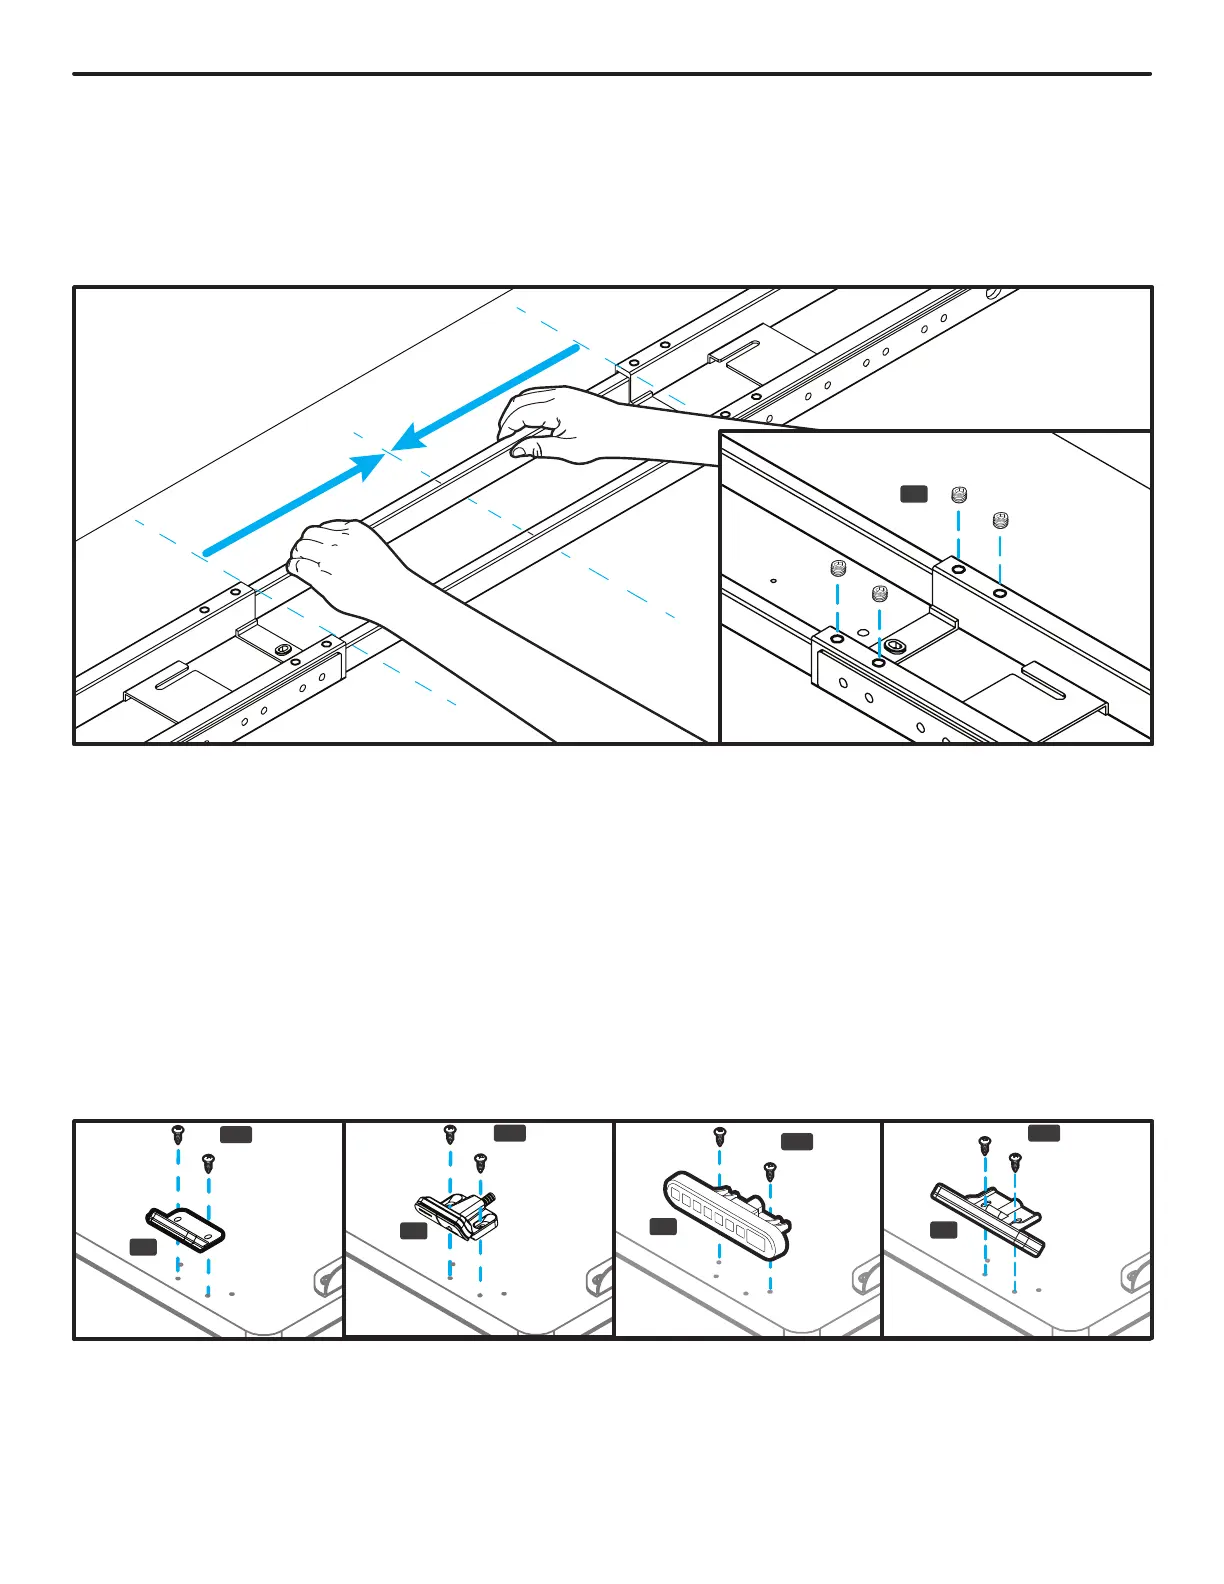
Step 7 - Center Rail Alignment
A. Slide each Crossbar Rail (P6) left or right until the center indicator marks are approximately centered
between the two Crossbar Ends.
B. Insert four M8x8 Set Screws (H3) into each Crossbar End and tighten.
Important: Ensure that all eight set screws make contact with the Crossbar Rail inside the Crossbar Ends.
Step 8 - Keypad Attachment
A. Choose which side of the desktop you’d like your Keypad (P8) to be located. Remember that you are
assembling your desk upside down, so the Keypad will be on the opposite side once the desk is upright.
B. There are two pairs of Keypad mounting holes pre-drilled into each side of most UPLIFT desktops to
accommodate several different Keypad designs. Align the Keypad with the pre-drilled desktop holes
that best align with the Keypad’s mounting holes.
C. If you do not have an UPLIFT desktop with pre-drilled Keypad mounting holes or you would like to
attach the Keypad in a different location than the pre-drilled holes, position the Keypad where you would
like to attach it and make a pencil mark at the center of each Keypad mounting hole and drill pilot holes
with a 1/8” drill bit. IMPORTANT: DRILL NO DEEPER THAN 1/2”.
D. Attach the Keypad with two #10x5/8” Wood Screws (H14). Be careful to not over-tighten to avoid
stripping.
H3
P8
P8
P8
H14
H14
H14
H14
P8