© UPLIFT Desk • 800-349-3839 • info@upliftdesk.com • upliftdesk.com
9
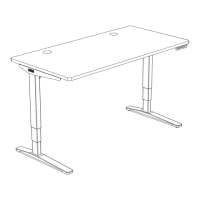
Step 8 - Side Bracket Attachment
(second side)
A. Align the holes in the right Side Bracket (P4) with the holes or
threaded metal inserts in the desktop at the other end.
B. Use a Phillips Head Screwdriver and the screws used in Step 5
to attach the Side Bracket to the desktop.
right
P4
C. Slide the second set of leg assemblies back towards the Side
Bracket and onto the tabs of the Side Bracket.
D. Loosely insert two M6x10 Machine Screws (H1) through the top
of each Crossbar End (P2) and into the Side Bracket as shown.
Once all four screws have been started, tighten them using the
Allen Wrench.
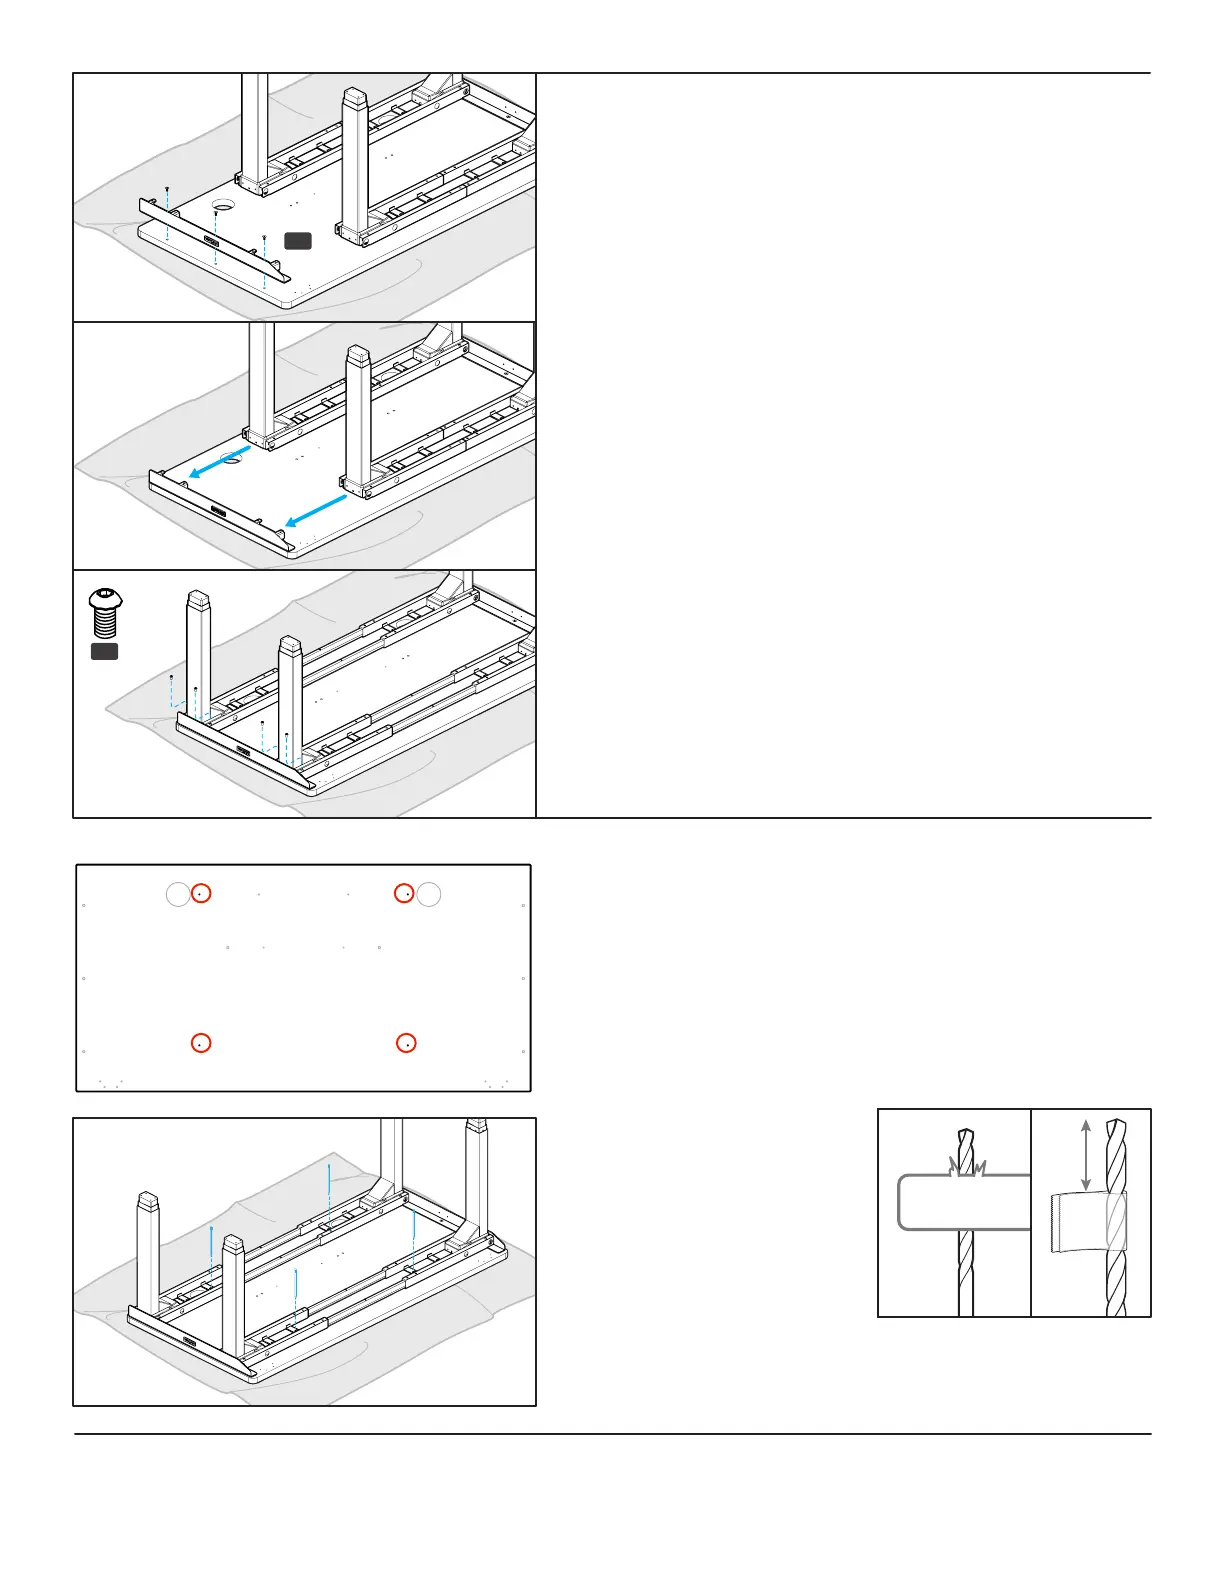
Step 9 (if applicable) - Drill Crossbar End Holes
See image showing a desktop with pre-drilled holes for the
Crossbar Ends (circled). Skip this step and proceed to Step 10 if
your desktop has pre-drilled holes for the Crossbar End.
A. If you are using a desktop that does not include pre-drilled
holes for the Crossbar End (P2) attachment, you will need to
pre-drill holes for the attachment screws now.
B. Make a pencil mark in the center of each of the holes at the end
of each of the 4 Crossbar Ends where shown.
IMPORTANT: Don’t drill
through your desktop top
surface. DRILL NO DEEPER
THAN 1/2”. To ensure this,
we recommend wrapping
a piece of tape around your
drill bit 1/2” from the tip.
Stop drilling just before the
tape touches the desktop.
C. Drill pilot holes at your pencil marks using a 1/8” drill bit.
H1