UVD Robot Model B - User manual v2.1
5. Transportation
If the robot needs to be shipped to another location, always use adequate equipment to
transport and lift the robot. Make sure that the robot remains upright and it is secured for
transportation. We recommend keeping the original packaging in case the robot requires
shipping or storage in the future.
Manual handling caution!
Handling should be done at least by two people, using appropriate safe manual handling
techniques and precautions to reduce the risk of injury. Never handle the robot grabbing the
UV tower.
6. Unpacking, installation and setup
When the robot is delivered, carefully inspect the shipping packaging and the robot for
damage. If damage is evident, save the shipping carton (if applicable) so it can be inspected
and contact your local distributor. Keep the original packaging for use when sending the robot
for technical assistance.
The installation of the docking station and the robot including local adjustments and the
creation of maps for the different zones / rooms must be carried out by trained and qualified
distributors or UVD Robot technicians. Please contact your local distributor when an
installation / setup is required.
7. Step-by-step guide
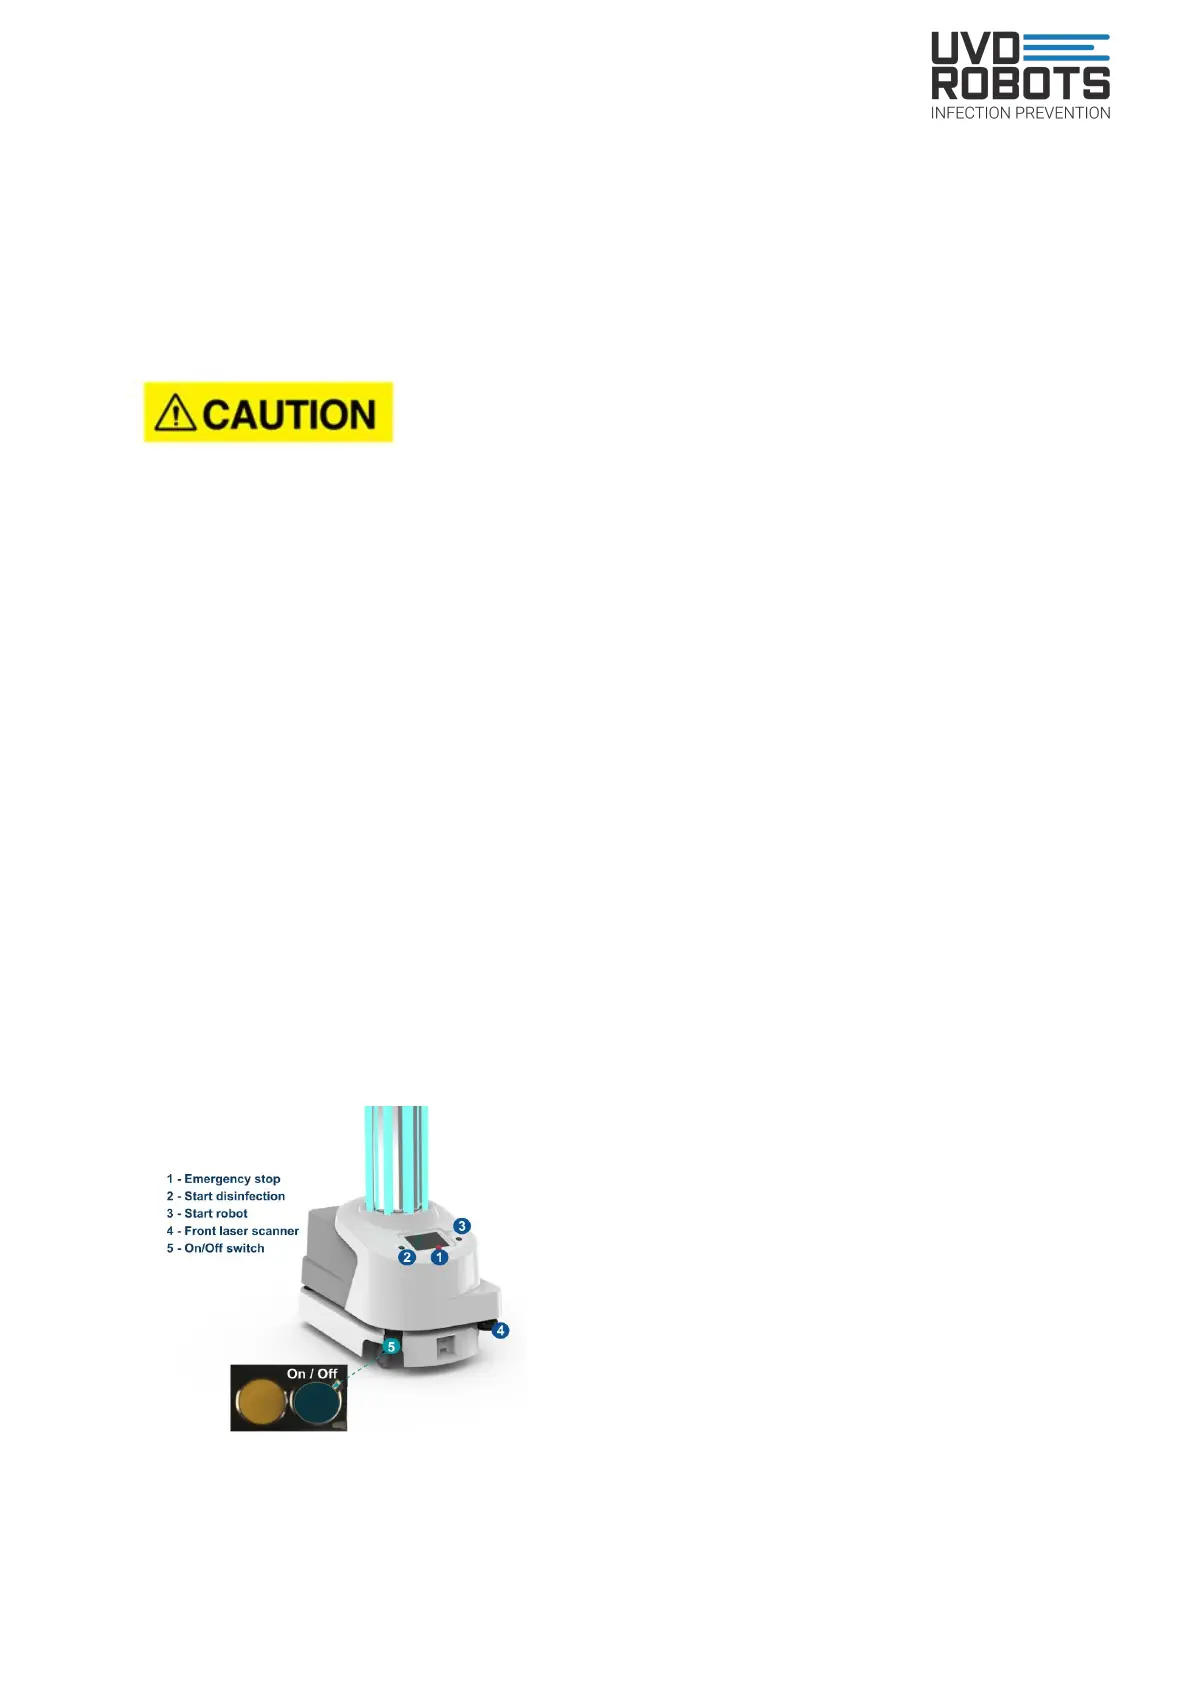
7.1. How to switch on/off the robot
Before turning on the robot make sure that there is
no charging cable attached to the robot.
Turn on the robot: Press the blue button in the front
left hand-corner of the robot (see figure 3, number 5)
and hold it for 1 or 2 seconds until the robot switches
its LED lights on, and then release the button. Then
wait 10 seconds and press the green blinking button
(number 3) and wait until the robot stops blinking
yellow, flashes white and has a constant either
yellow, purple or green glow beneath it which
indicates that the robot is ready for operational use.
Figure 3. Turn On / Off button
13