EasyManuals Logo

Vacon 20 Quick Guide

Vacon 20
62 pages
To Next Page IconTo Next Page
To Previous Page IconTo Previous Page
Page #4 background imageLoading...
Page #4 background image
installation vacon 3
24-hour support +358 (0)201 212 575 • Email: vacon@vacon.com
2
2. INSTALLATION
2.1 Mechanical installation
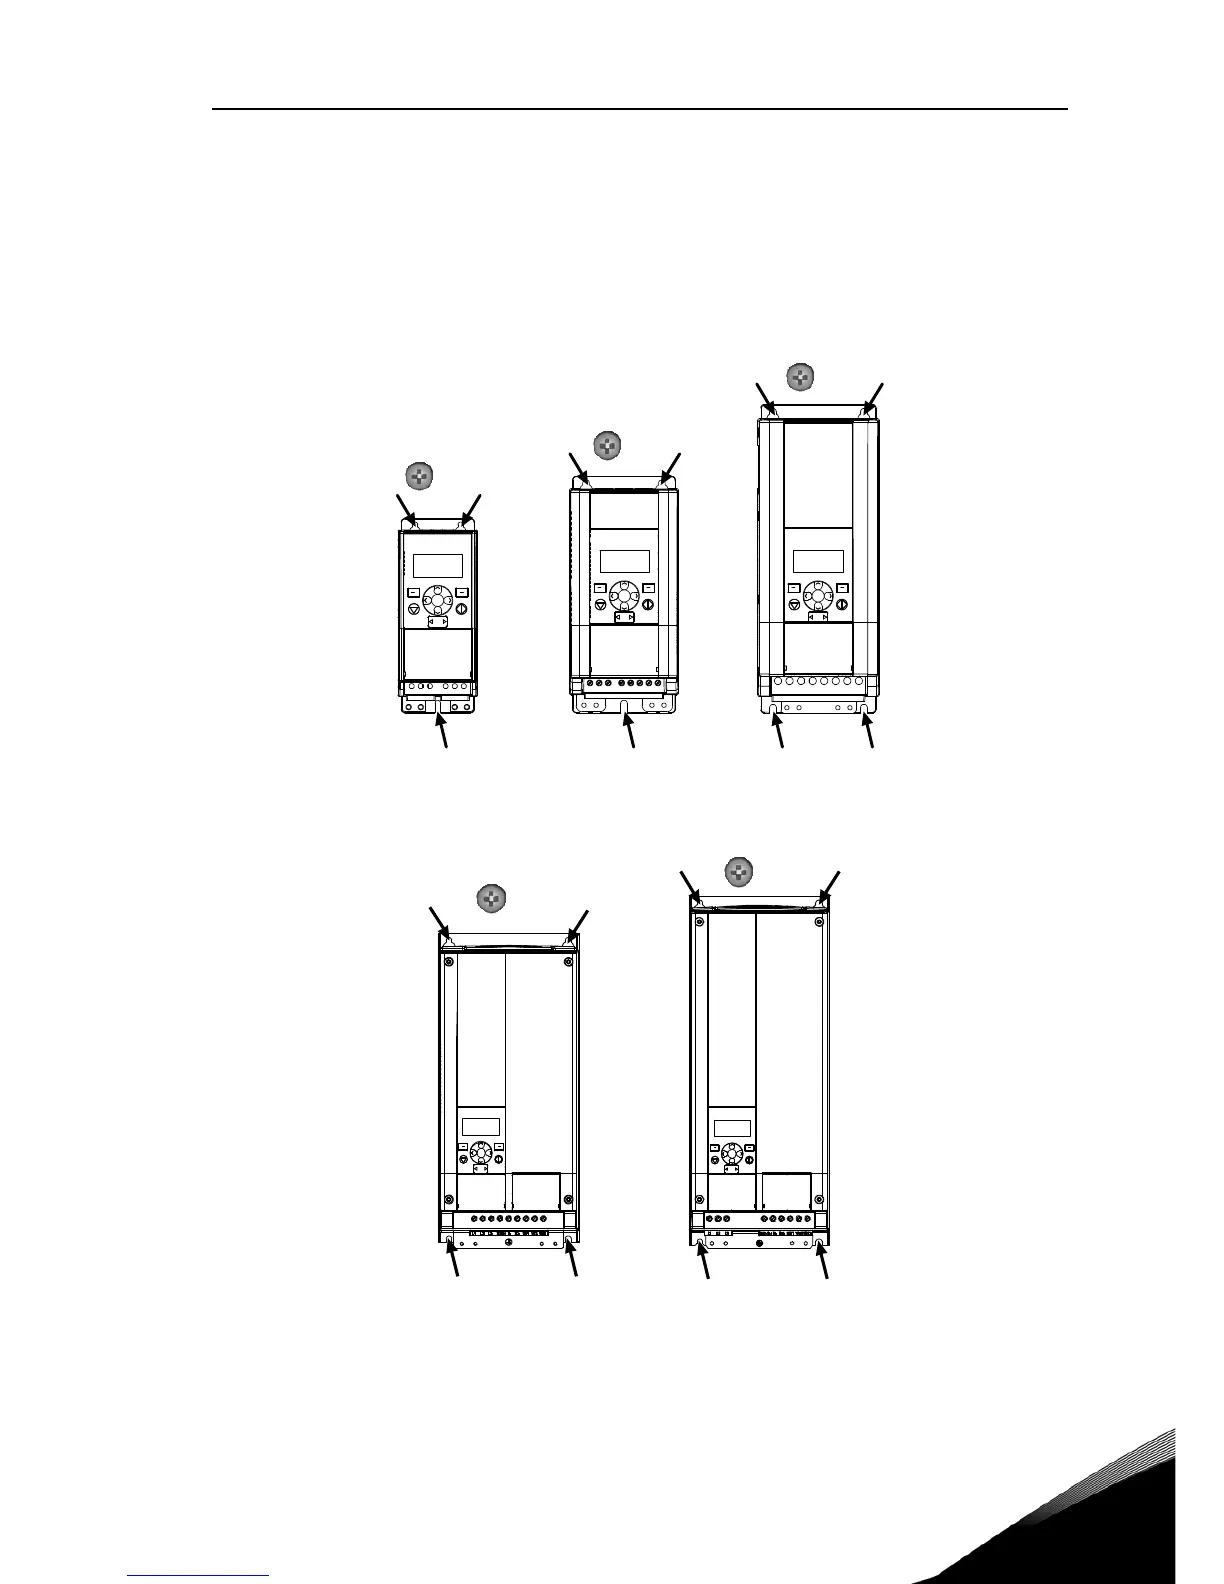
There are two possible ways to mount Vacon 20 in the wall. For MI1 - MI3, either
screw or DIN-rail mounting; For MI4 - MI5, screw or flange mounting.
Figure 1: Screw mounting, MI1 - MI3
Figure 2: Screw mounting, MI4 - MI5
=
M5
MI3
MI1
=M4
MI2
=M5
LOC
REM
BACK
RESET
OK
LOC
REM
BACK
RESET
OK
LOC
REM
BACK
RESET
OK
MI4
=M 6
=M 6
MI5
LOC
REM
BACK
RES ET
OK
LOC
REM
BACK
RES ET
OK

Other manuals for Vacon 20

Questions and Answers:

Question and Answer IconNeed help?

Do you have a question about the Vacon 20 and is the answer not in the manual?

Vacon 20 Specifications

General IconGeneral
Communication OptionsModbus, CANopen, PROFIBUS, Ethernet
Protection ClassIP20
Power Range0.25 to 18.5 kW
Control MethodScalar control, Vector control
Ambient Temperature-10°C to +50°C

Related product manuals